Release Feb 20 2024
Latest updates for AI Content Studio now give more control to the users and enhance the overall user experience. New AI Controls, new post deletion storage, drafts, and category management options.
AI Controls
AI Content Studio has introduced four AI controls to help enhance your content on the fly using Gen AI. The expand, paraphrase, change tone, and custom prompt functions give you full control over your content and will help you generate highly relevant content that resonates with your audience. Let’s take a look at how each of these functions work.
Expand
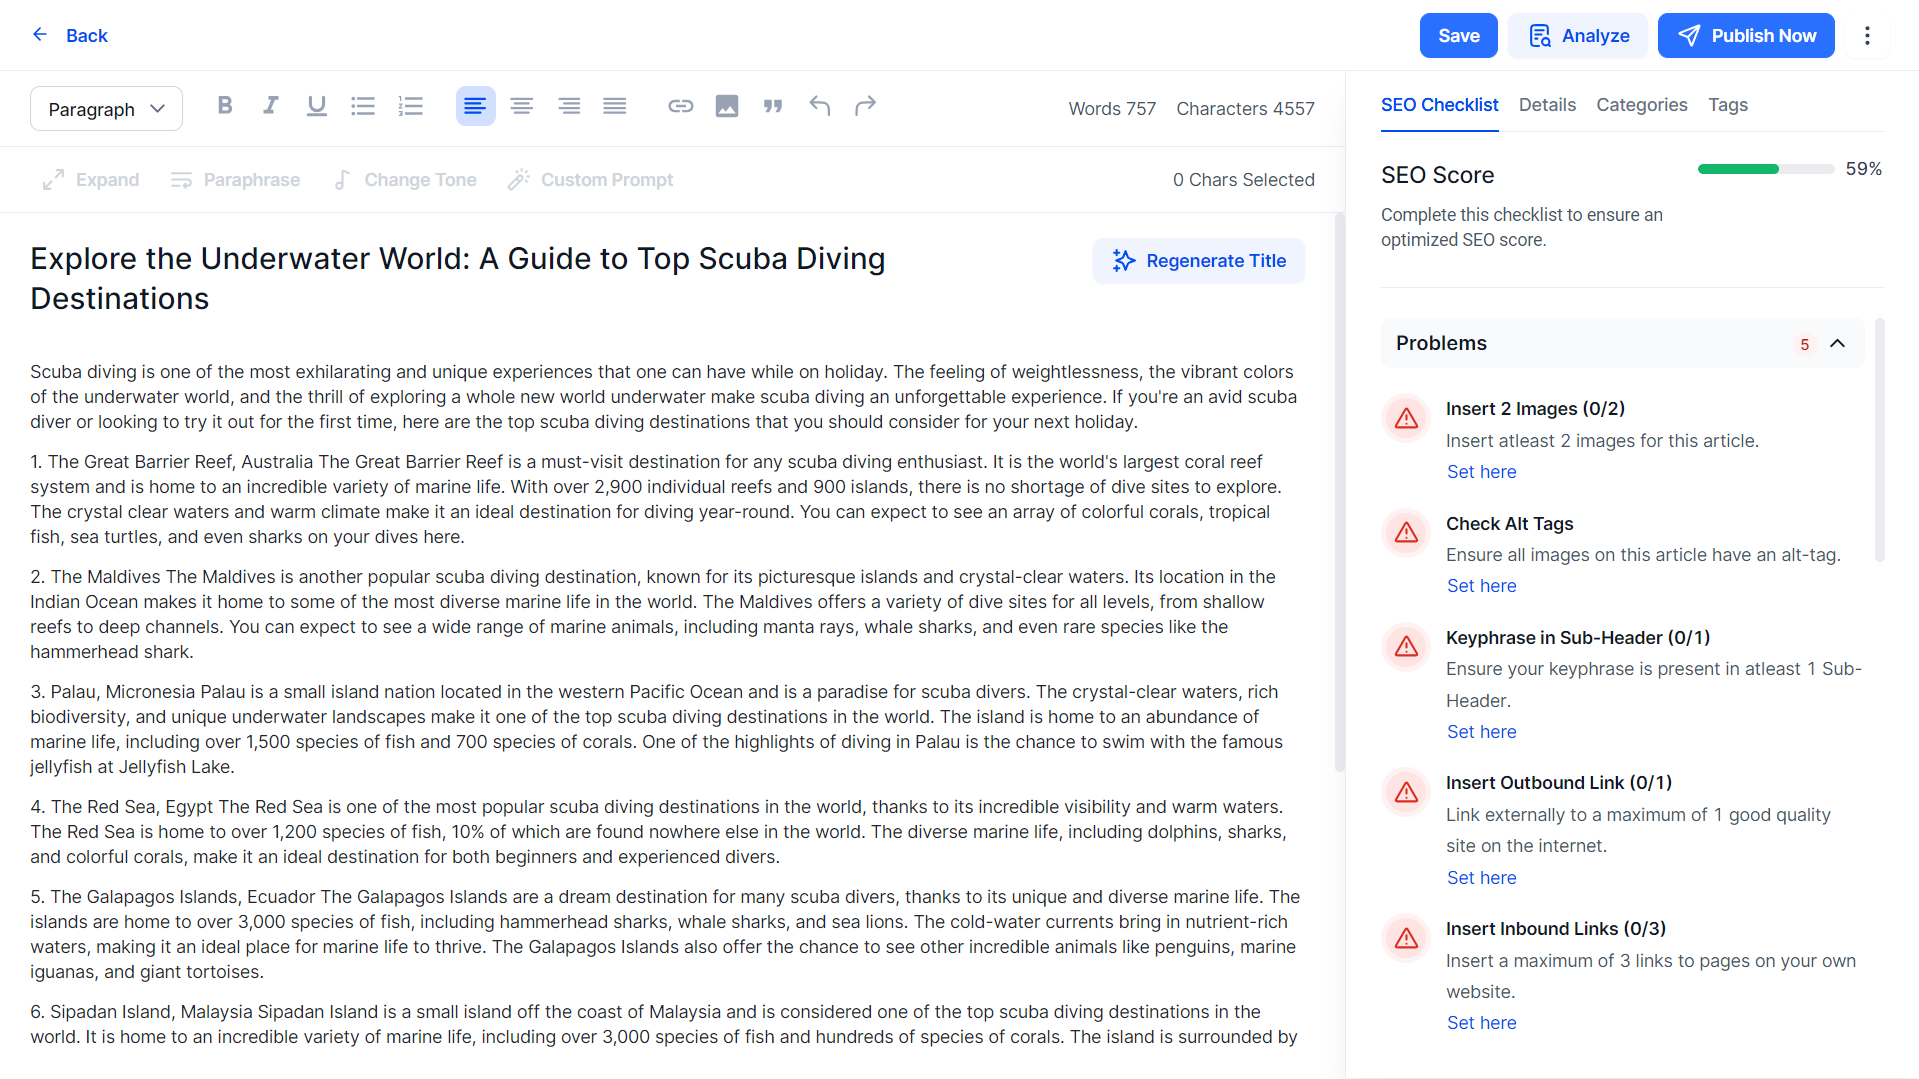
The Expand function helps add detail to your content. By selecting a section of text and clicking on ‘Expand’ AI Content Studio will generate additional text to provide greater detail to your content.
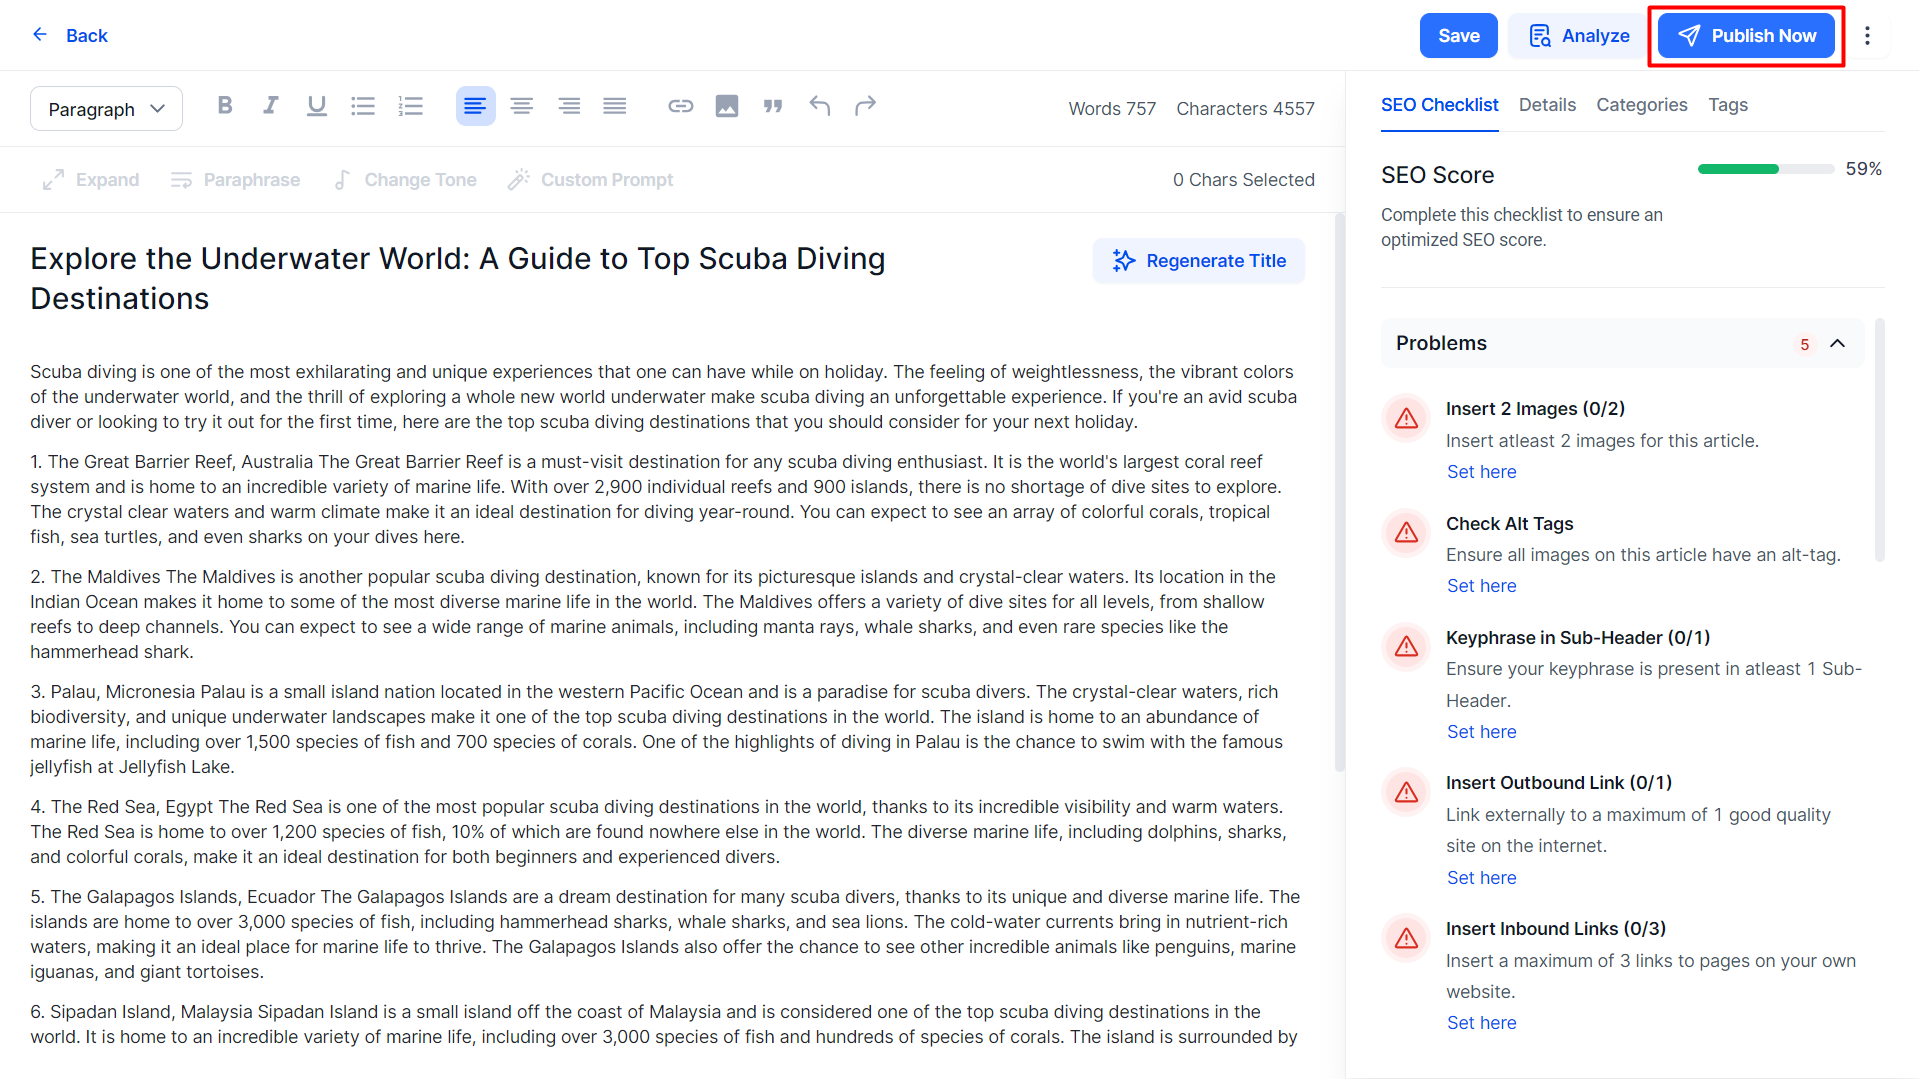
Select the text you wish to expand and click on ‘Expand’ to the top of the editor.

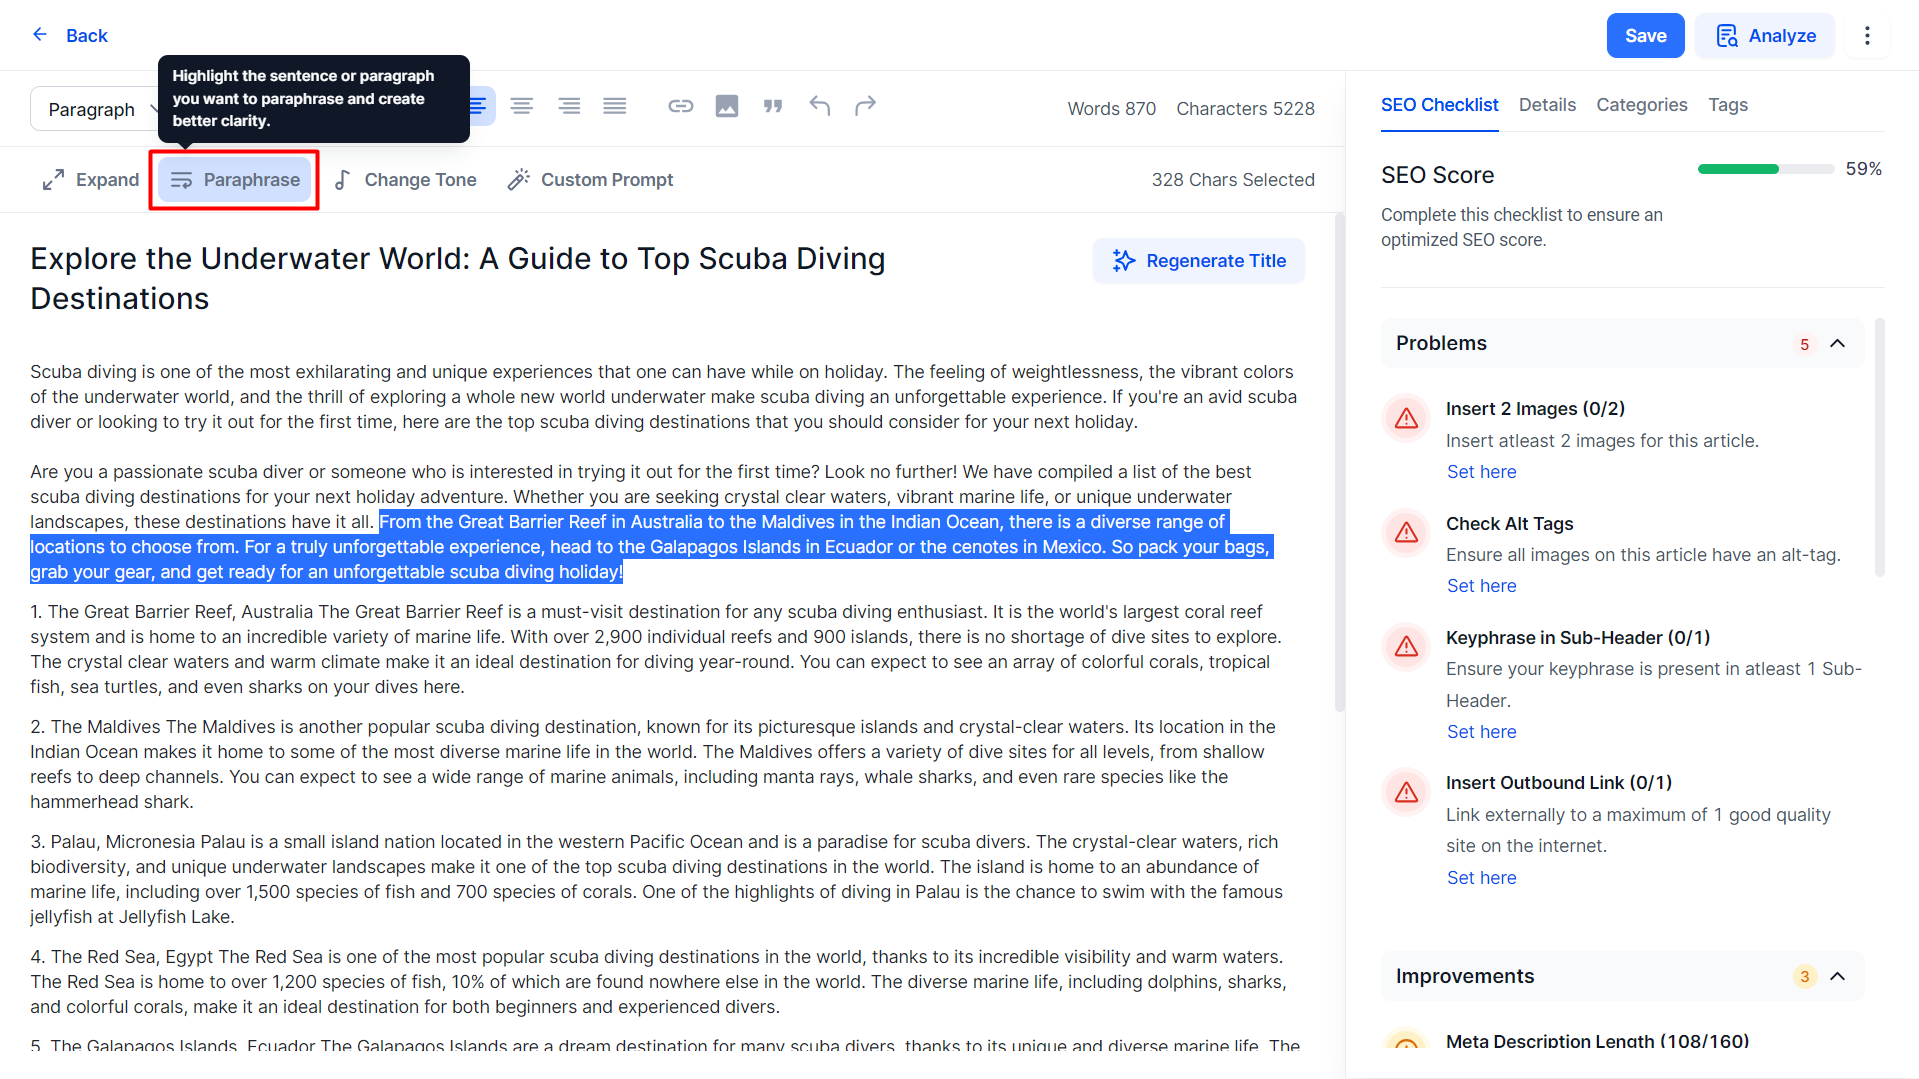
Paraphrase
The Paraphrase function allows you to change how content is worded while maintaining the original tone of the content. This comes in handy when a sentence seems too long or complicated to understand.
Select the text you wish to paraphrase and click on 'Paraphrase’ to the top of the editor.
Change Tone
The Change Tone function allows you to change the tone of text in your content. This gives you the control to make certain sections of your content resonate with the audiences that read your content.
To change the tone of certain sections of your content, select the text you wish to change the tone for and click on ‘Change Tone’ to the top of the editor.
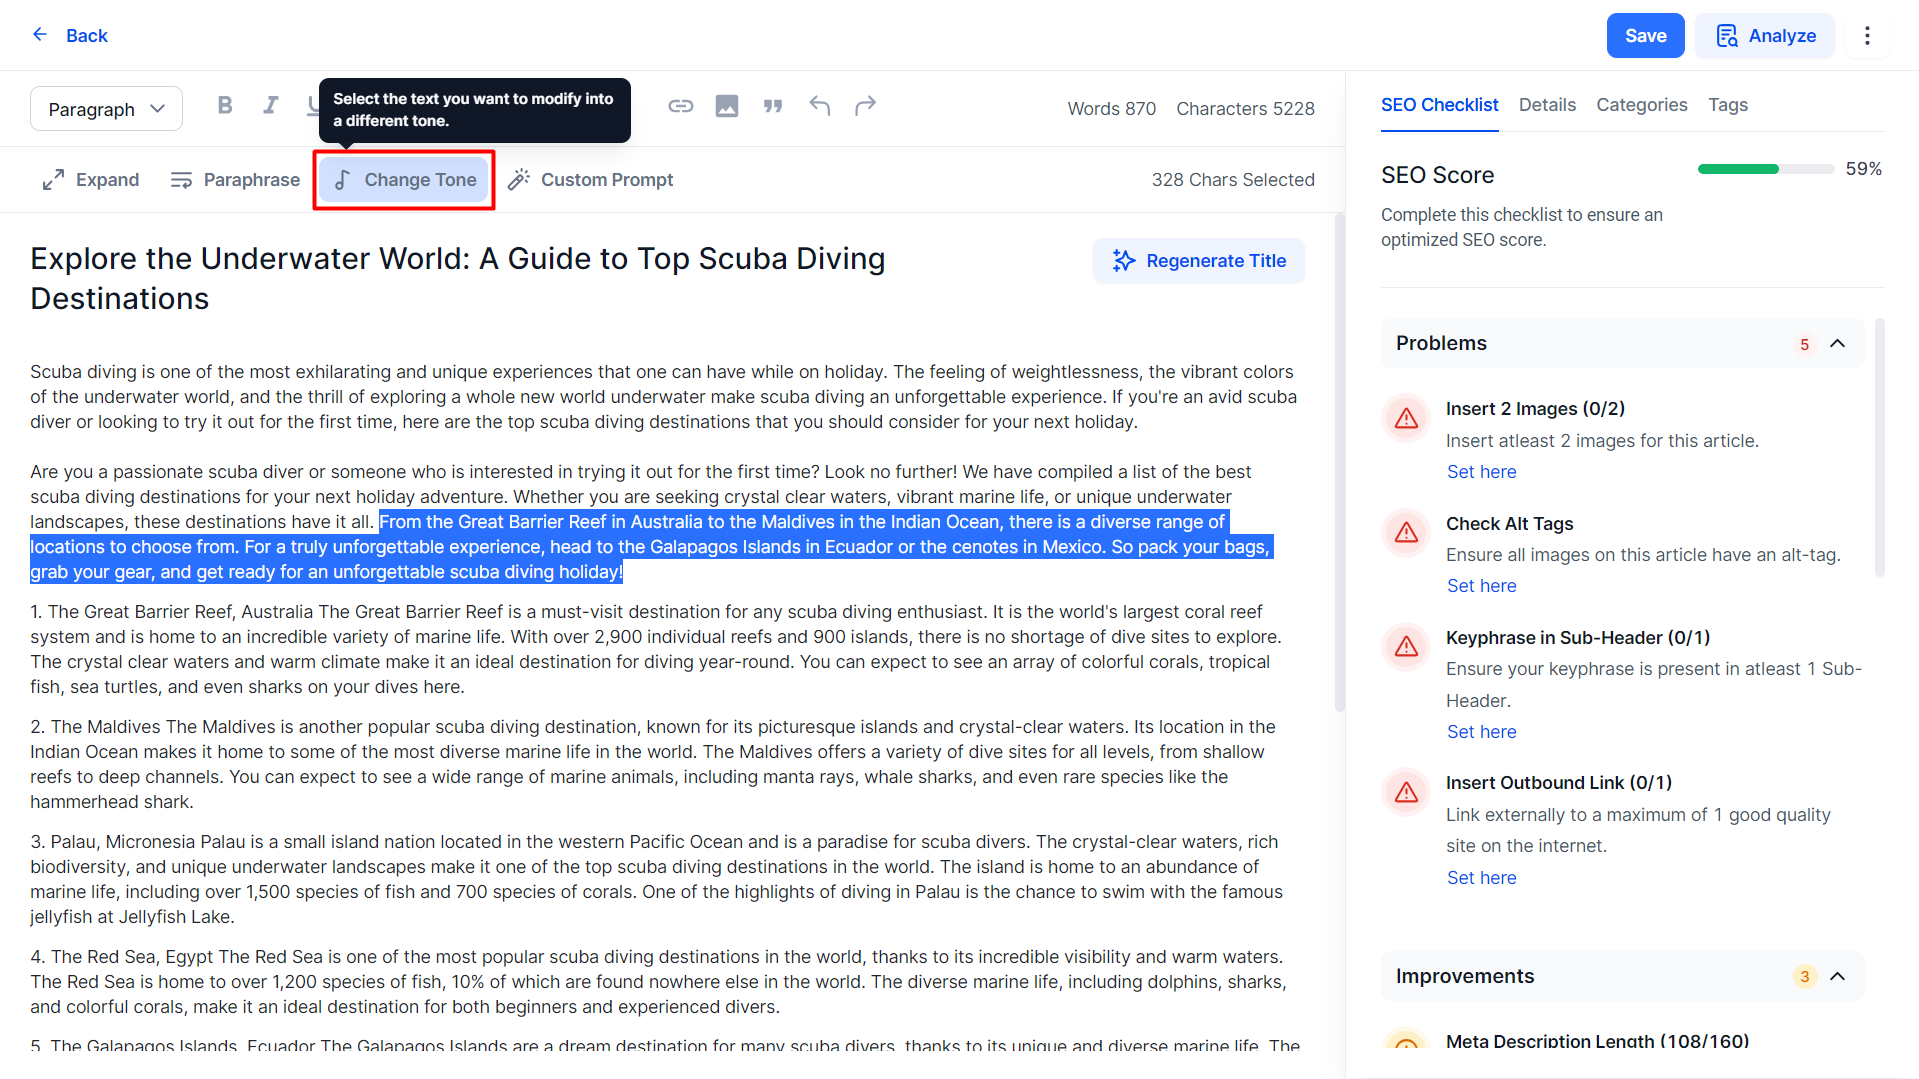
Select the tone you wish to use and click on ‘Apply’.

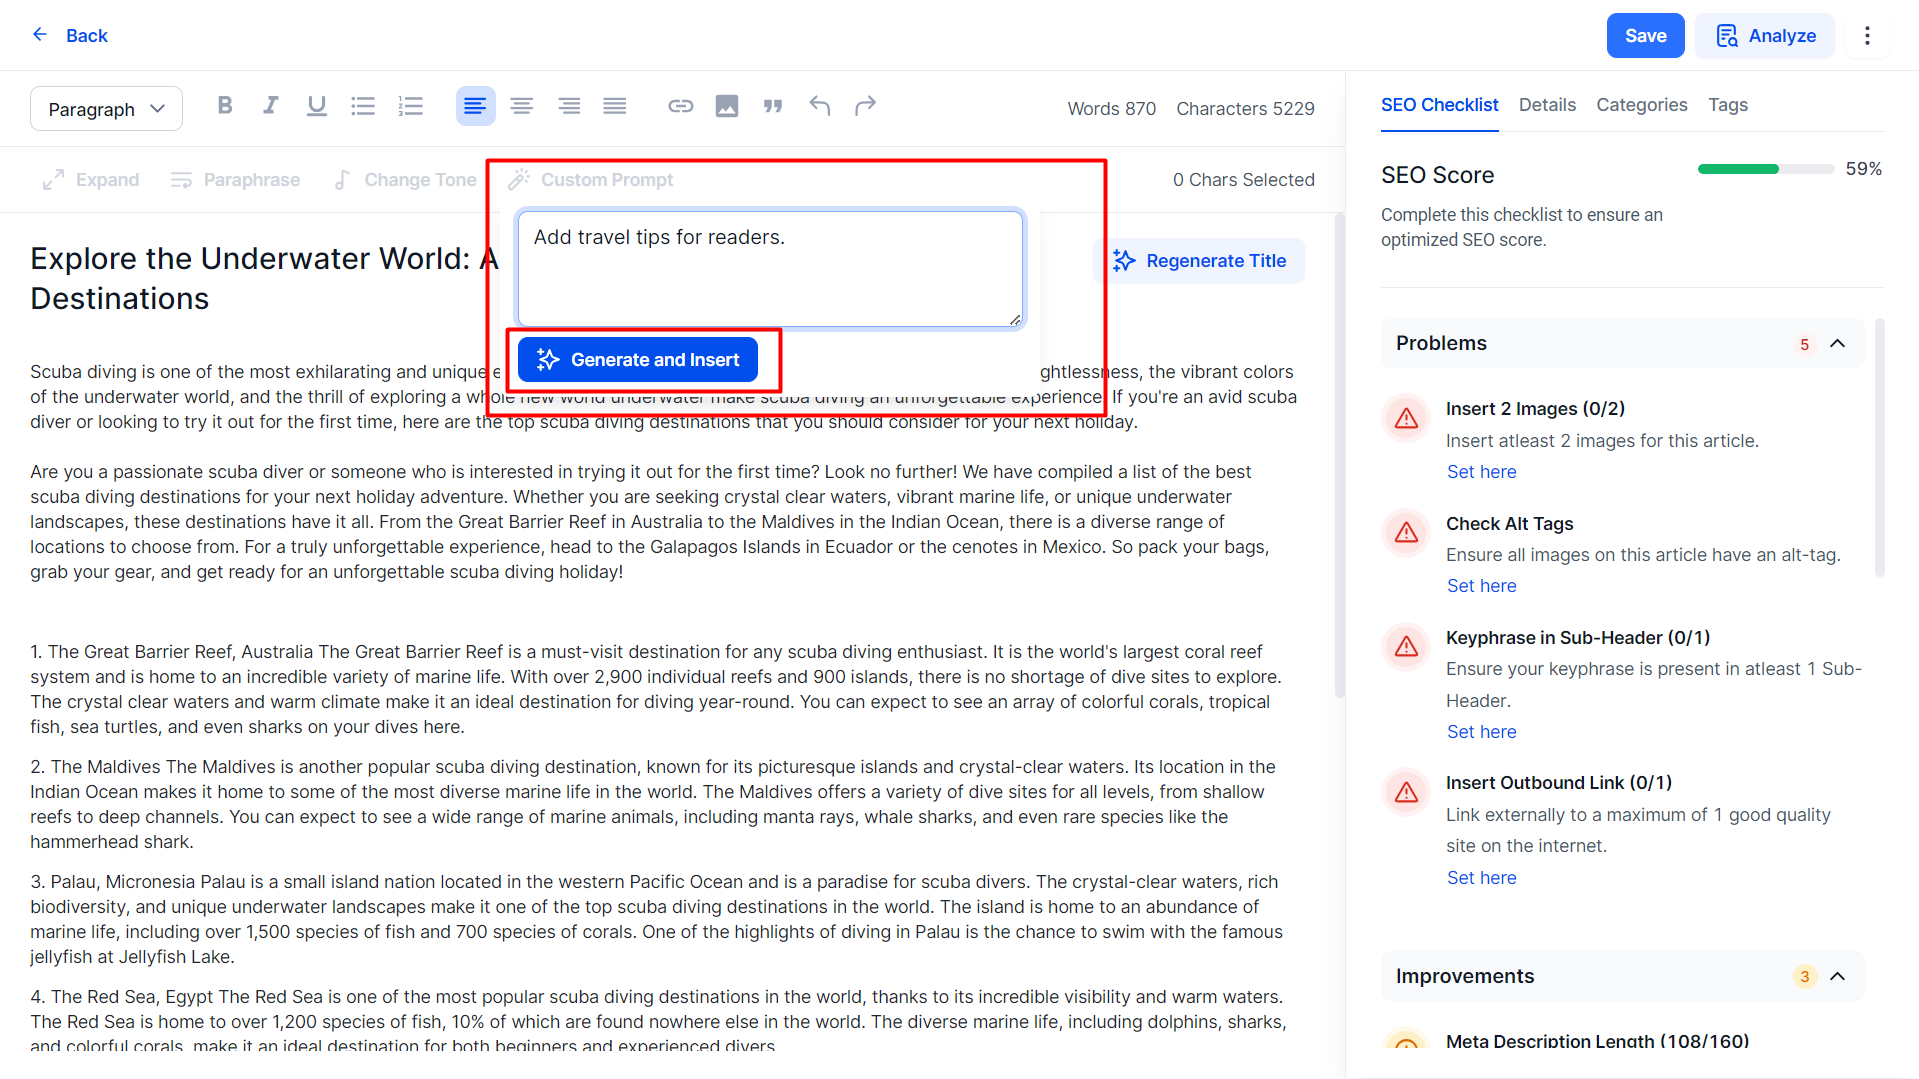
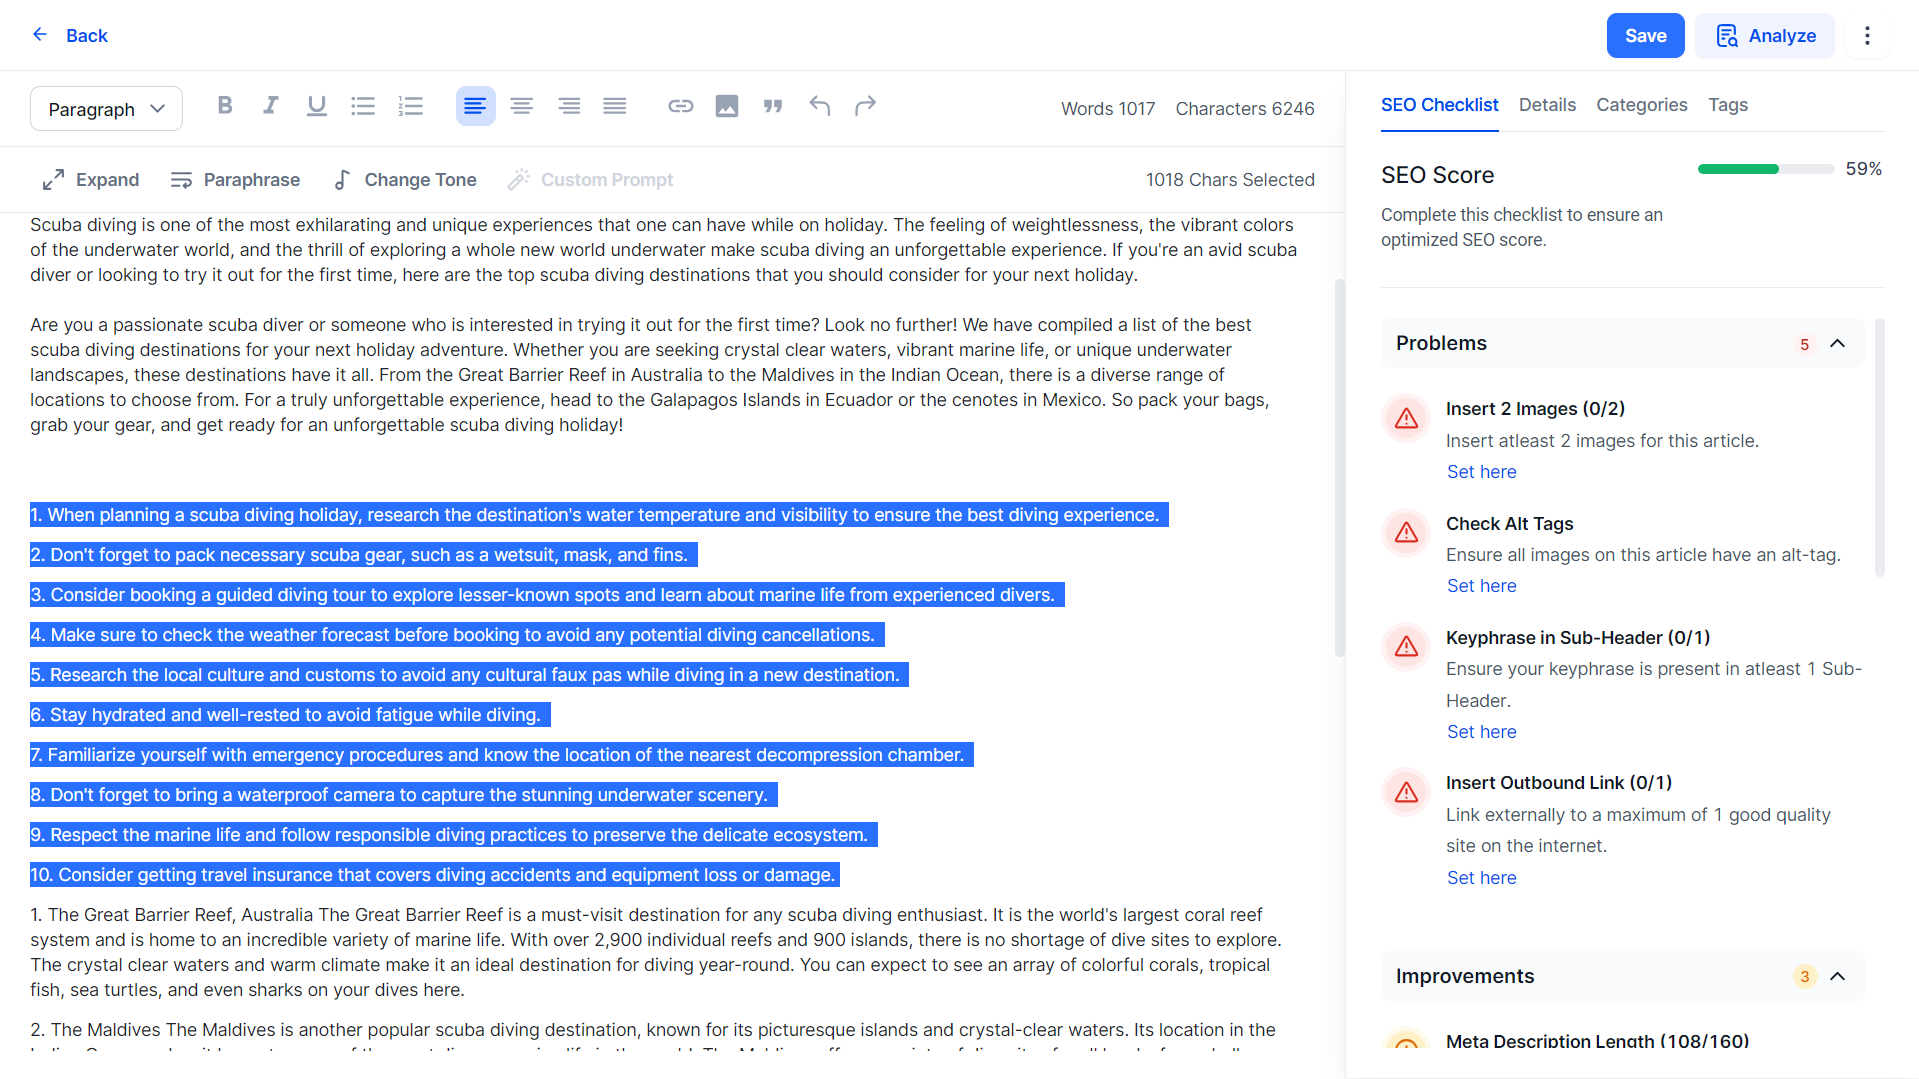
Custom Prompt
The Custom Prompt function helps you customize your content at lightning speed. The Custom Prompt feature lets you add content by using generative AI prompts right within the editor.
Click on where you wish to add content using a custom prompt and click on ‘Custom Prompt’ to the top of the editor.
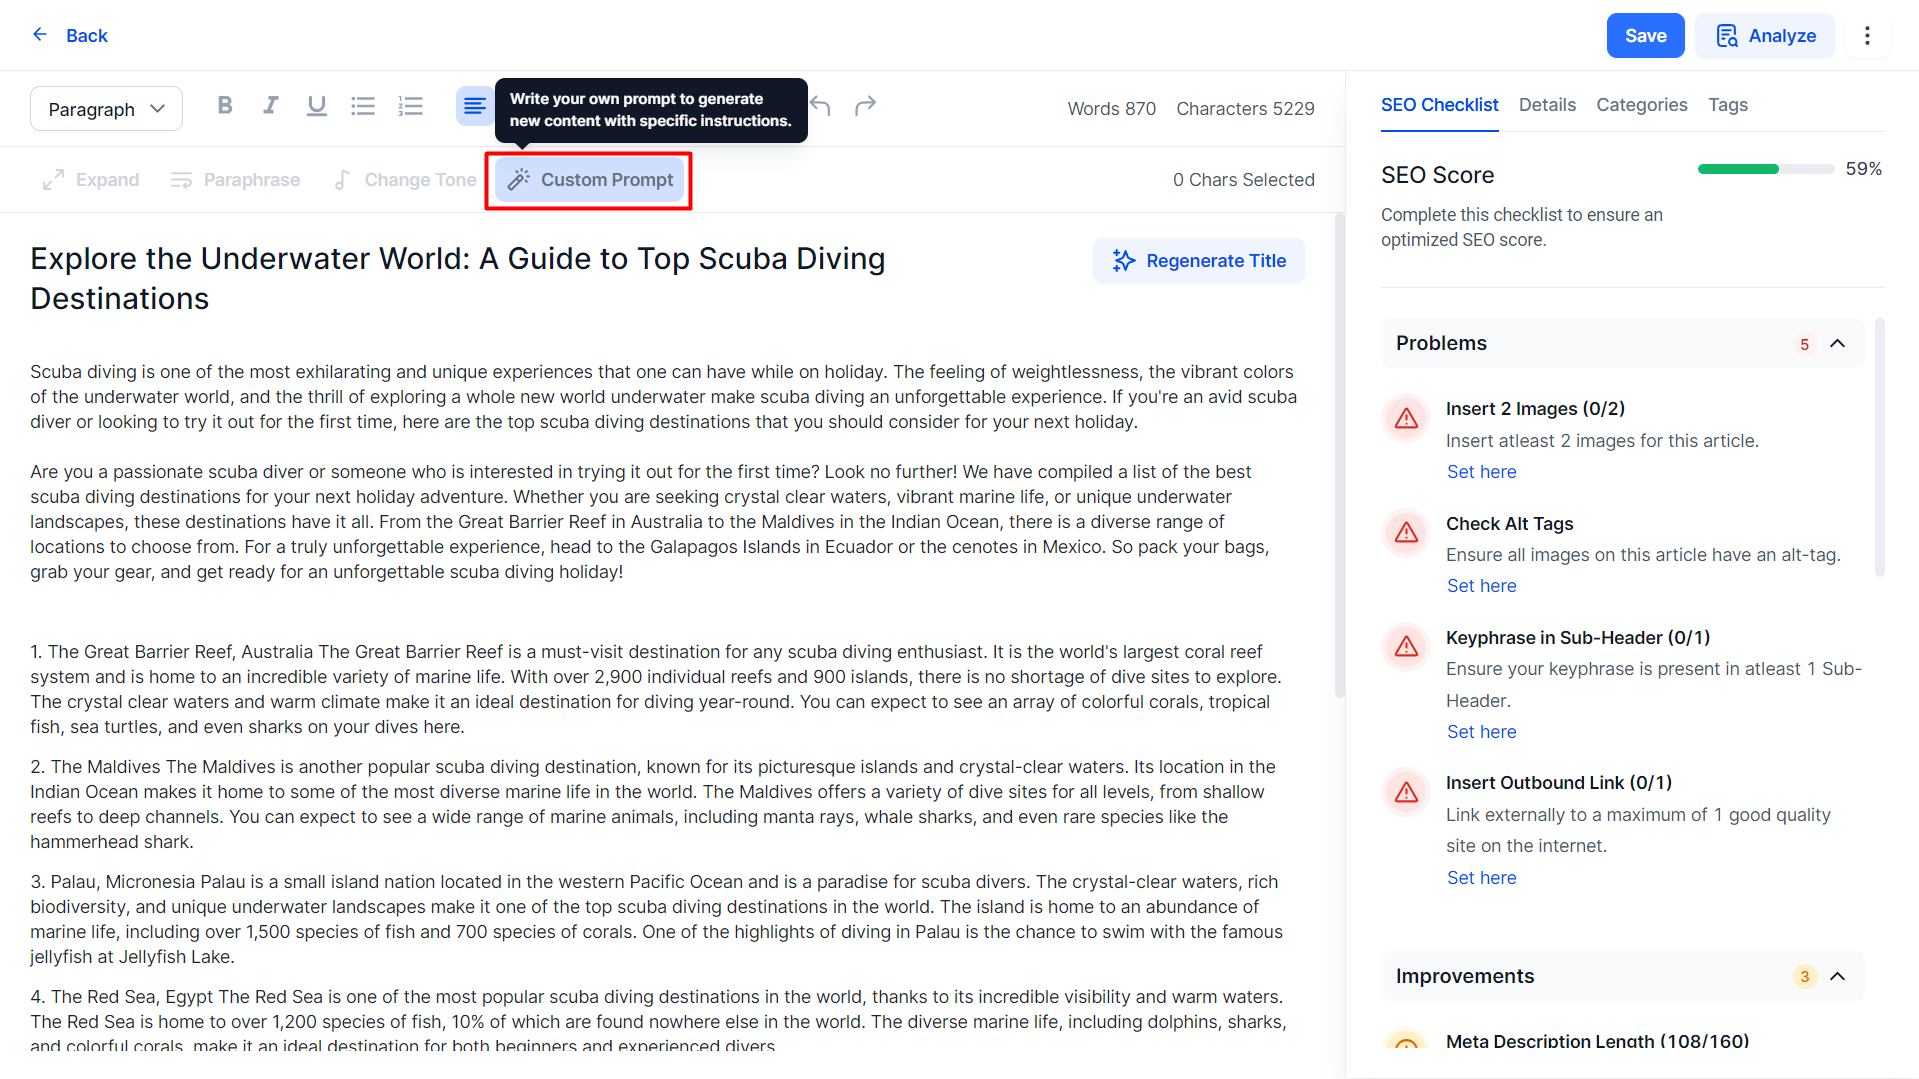
Write the prompt and click on ‘Generate and Insert’
Post Deletion
Milestone AI Content Studio now stores deleted articles for 30 days in the trash before permanently deleting them. A 30-day grace period for storing articles in the trash before permanent deletion helps mitigate risks associated with accidental deletions, facilitates data recovery, supports compliance efforts, and enhances user experience and confidence.
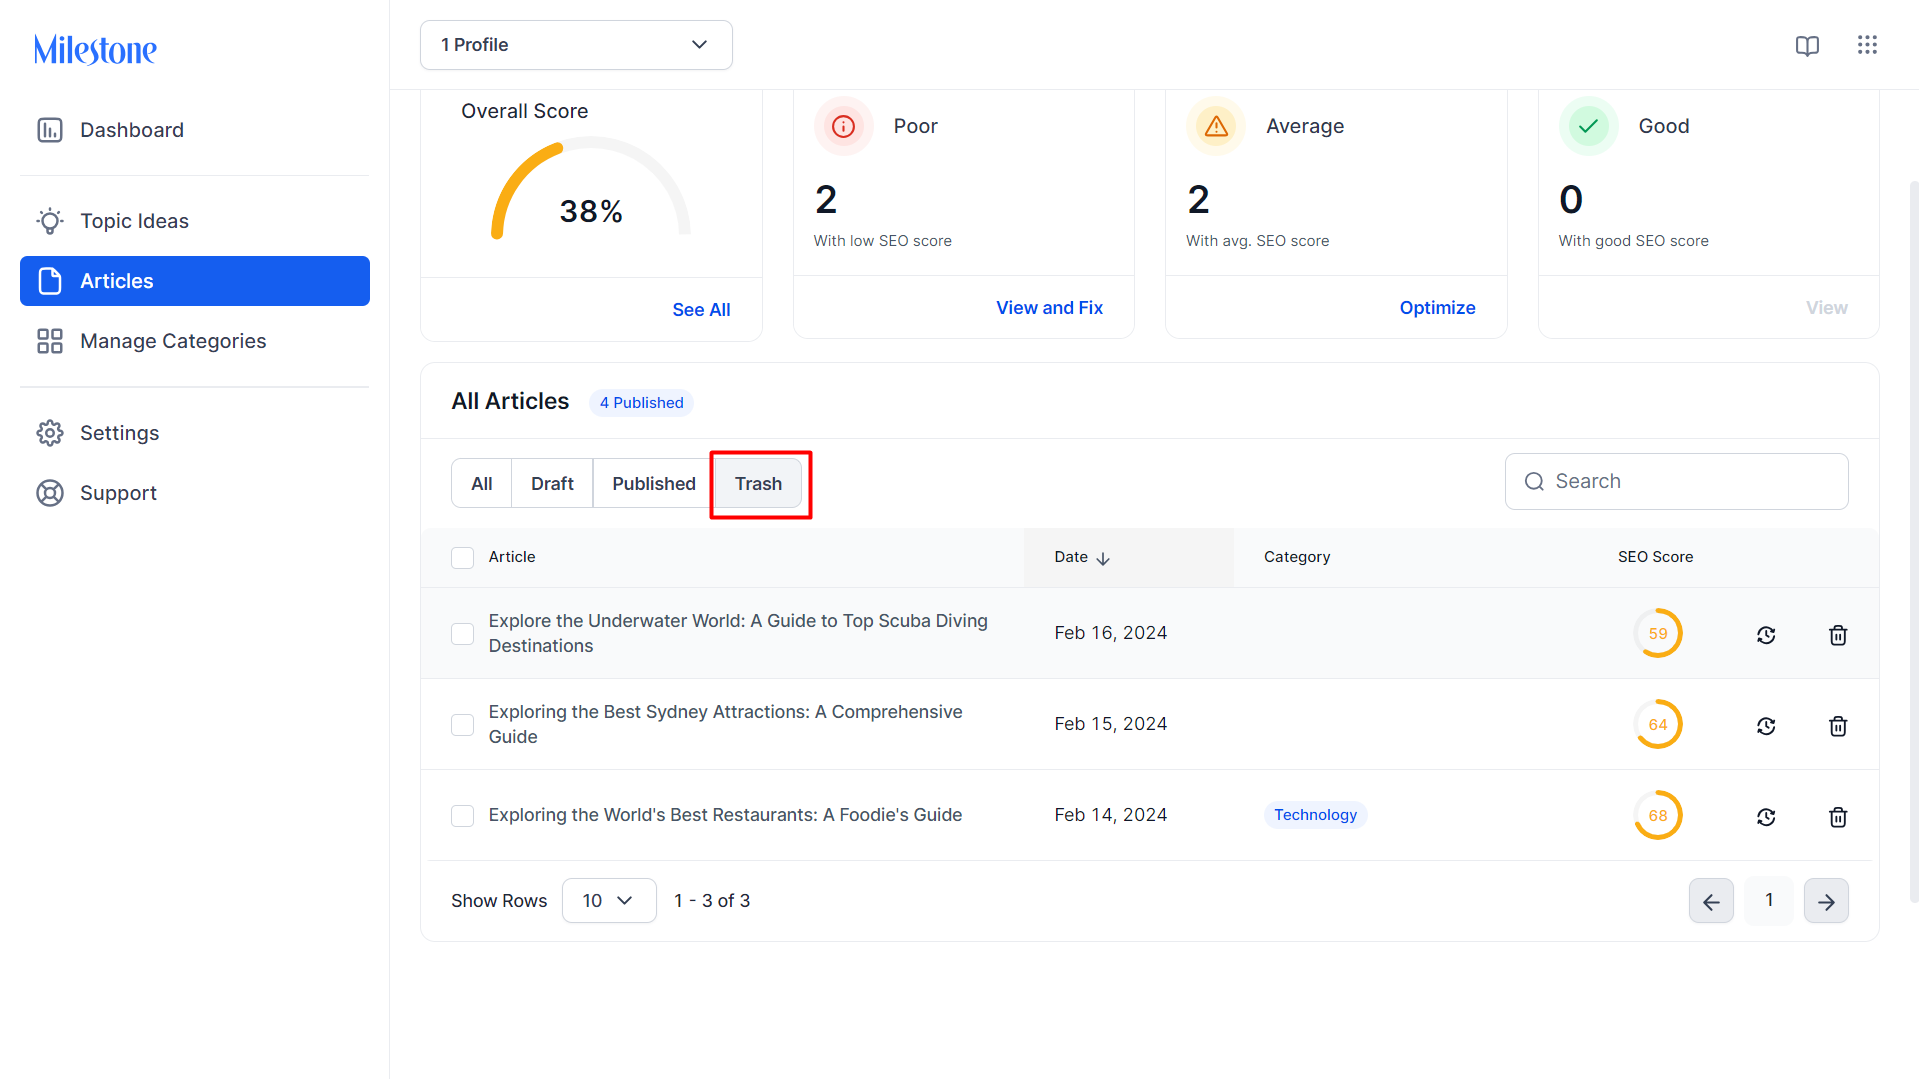
Path: Content Studio > Articles > Trash
Step 1: To view articles on AI Content Studio, click on ‘Articles’ in the left navigation panel.
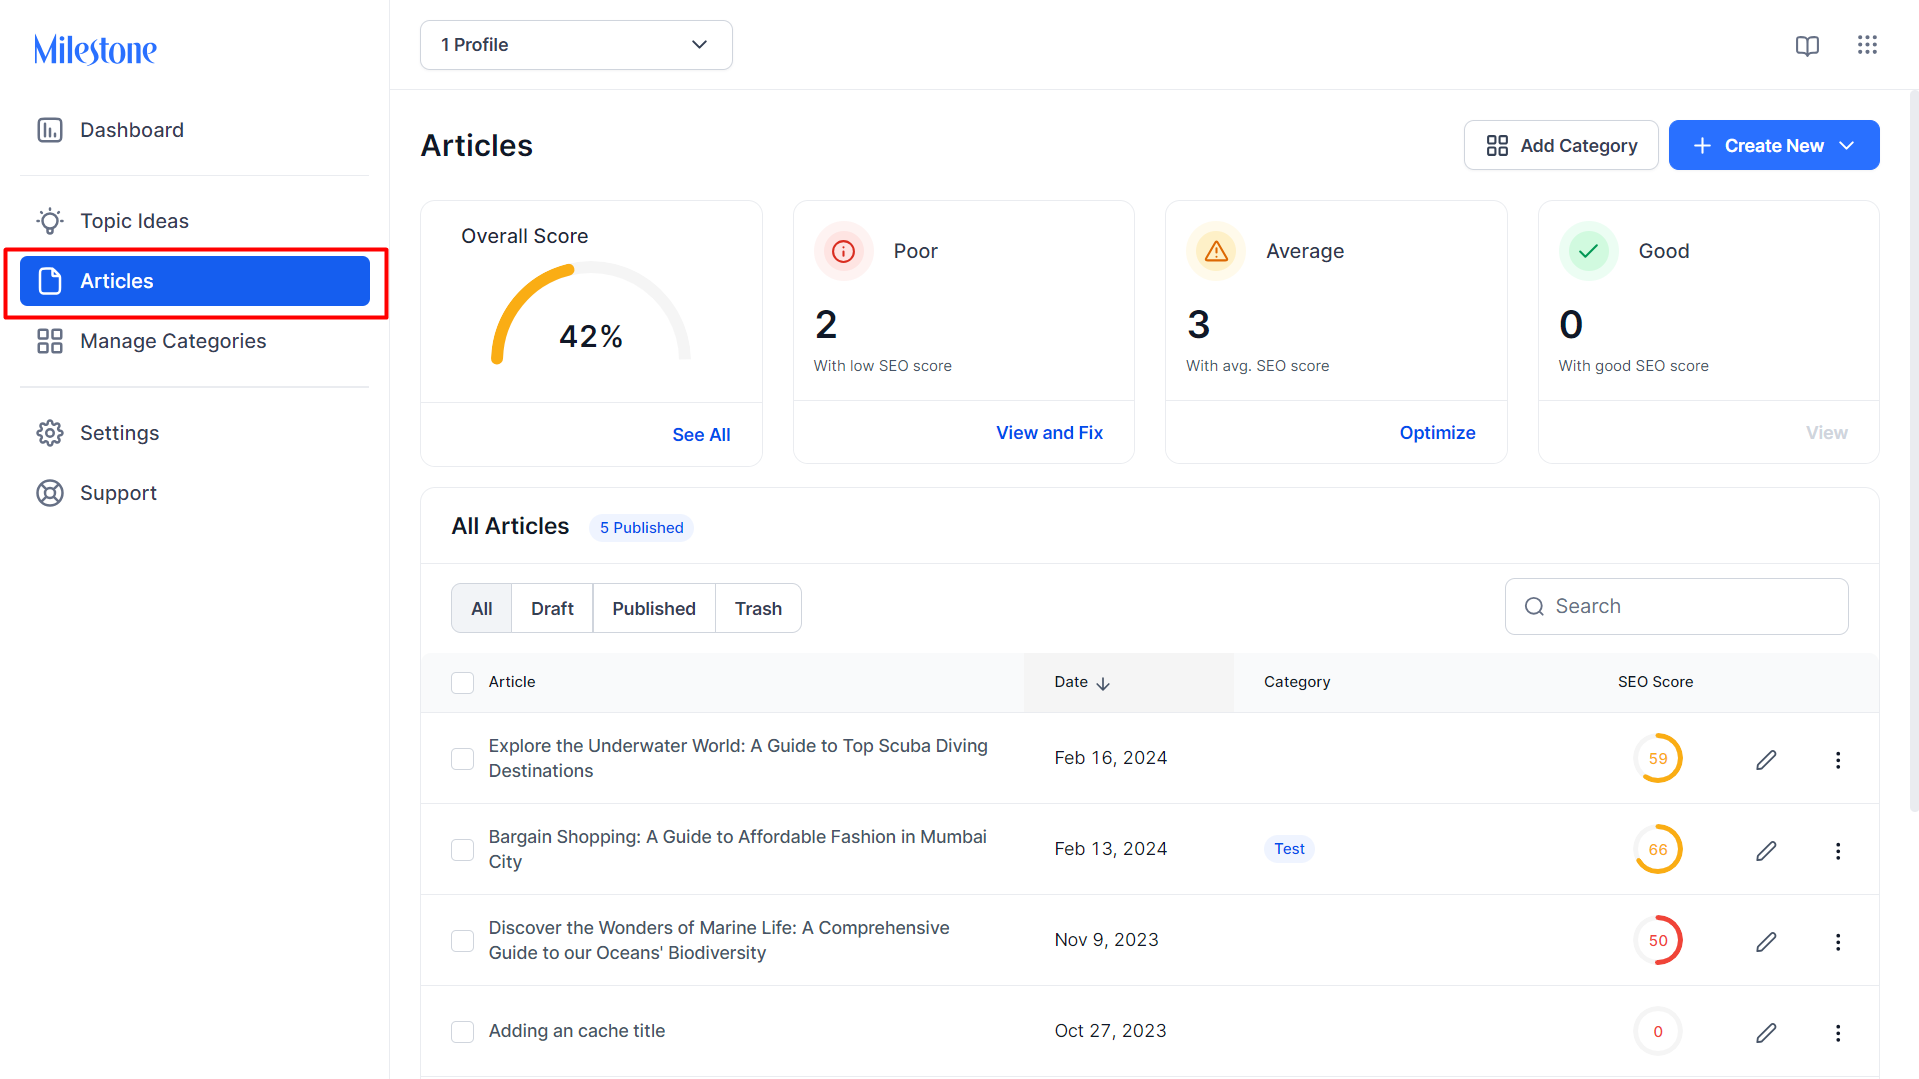
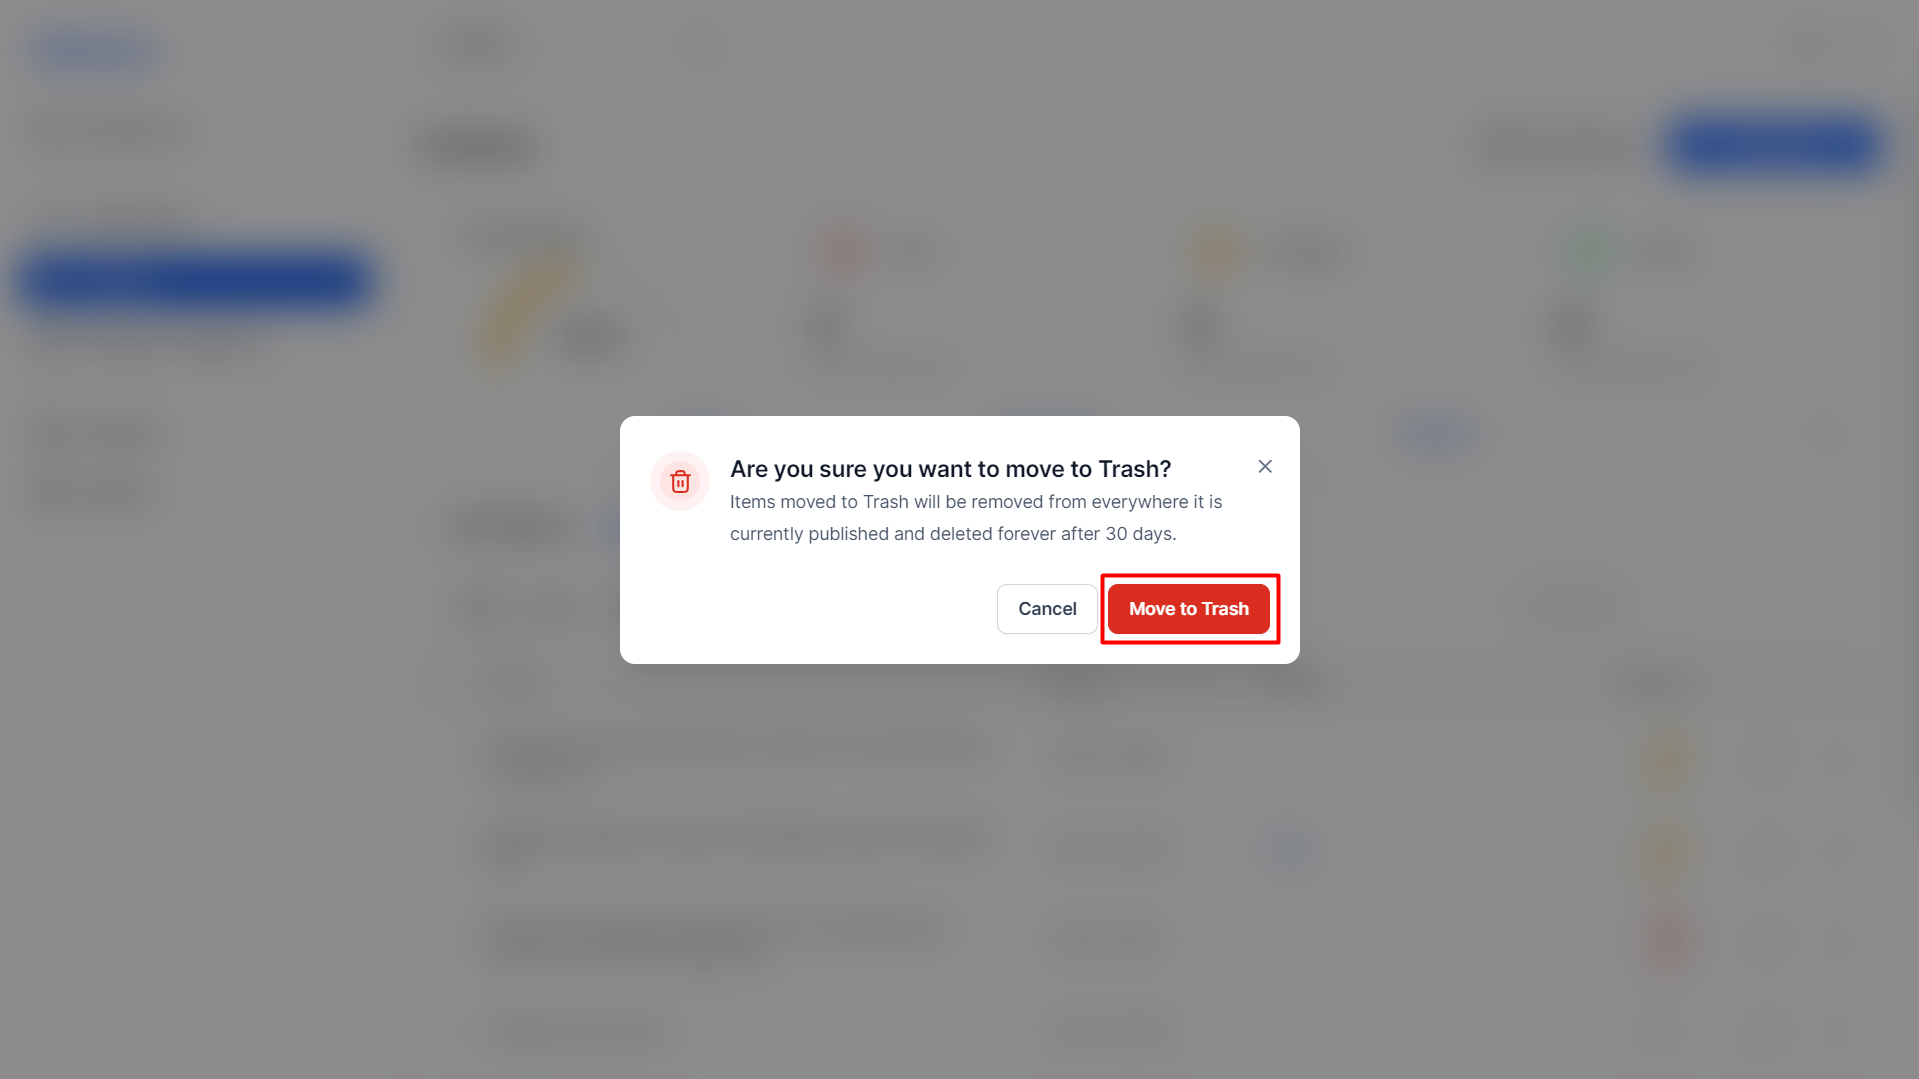
Step 2: Click on the three-dot menu corresponding to the article you wish to move to trash and click on ‘Move to Trash’.
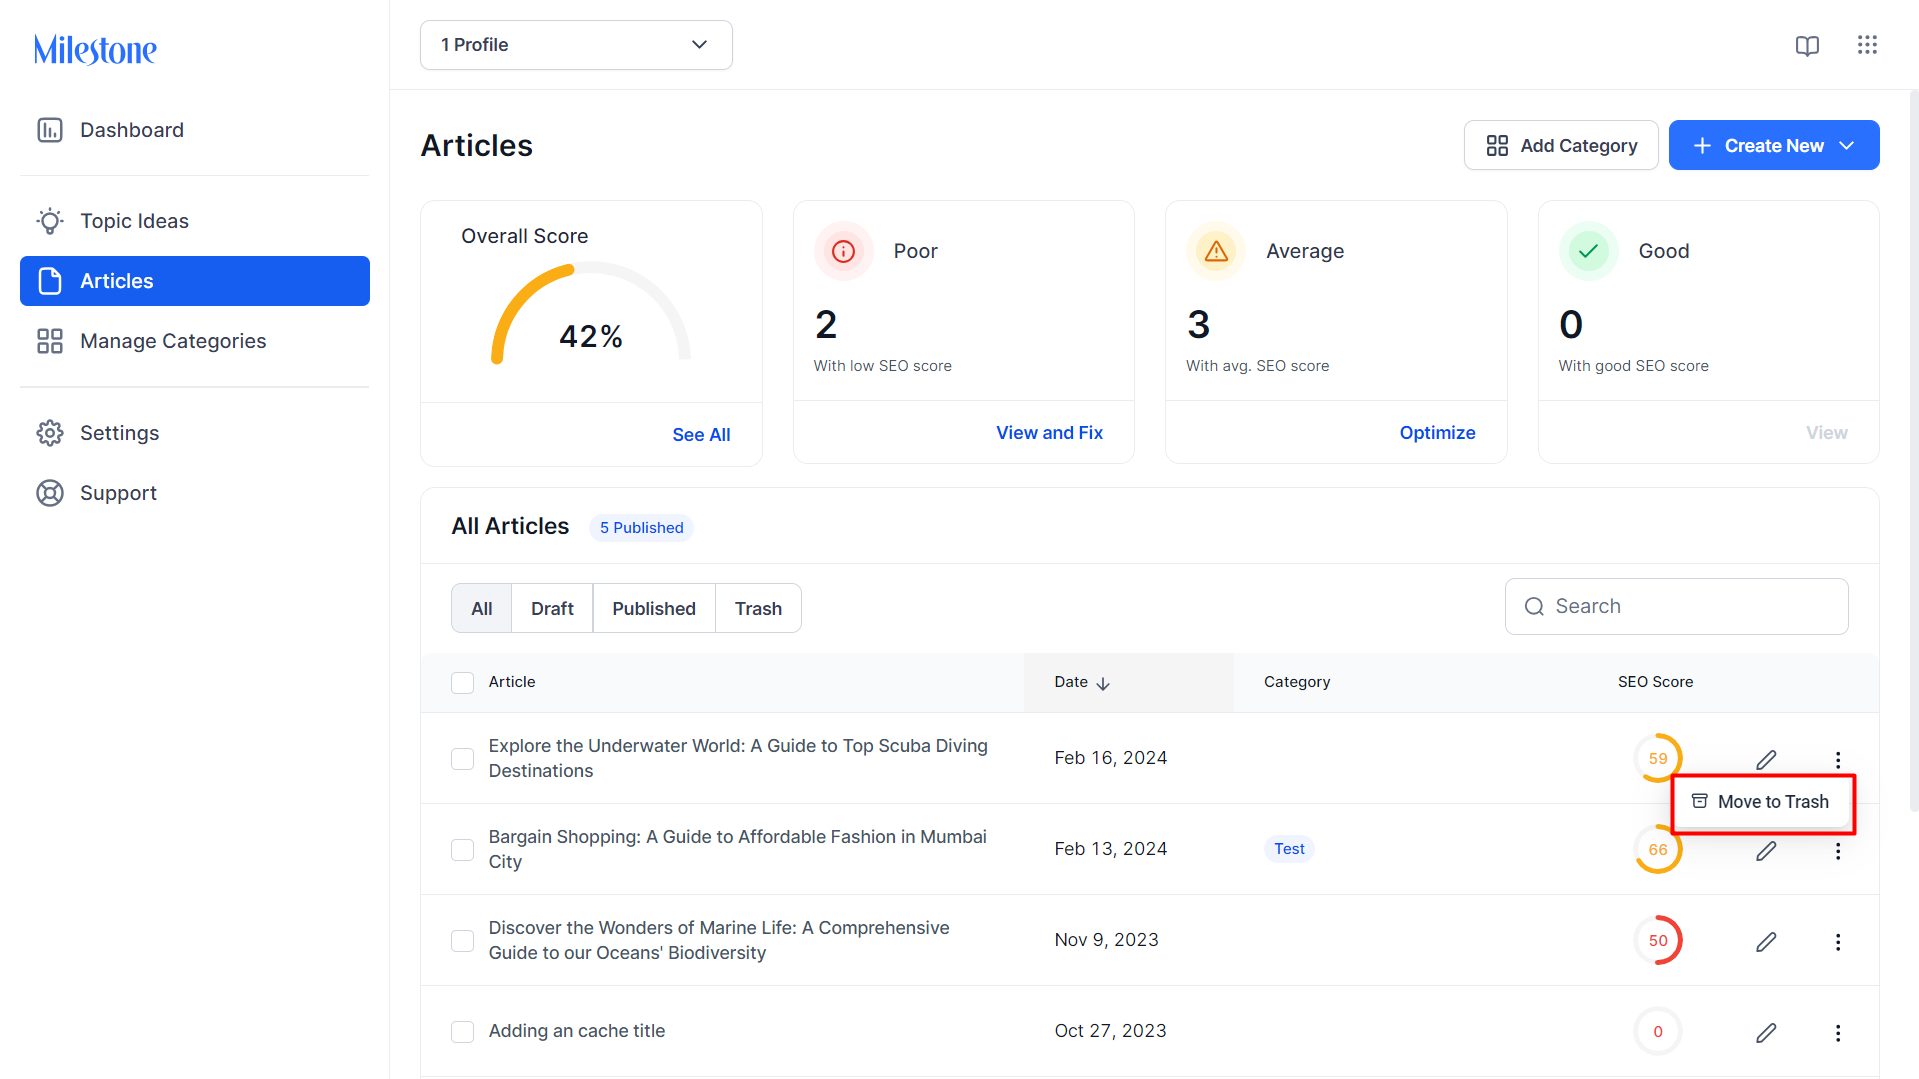
Step 3: You will be notified that the article will be stored in ‘Trash’ for 30 days. Click on ‘Move to Trash’ to continue.
Step 4: To view the articles temporarily stored in Trash click on the ‘Trash’ tab to the top of this section.
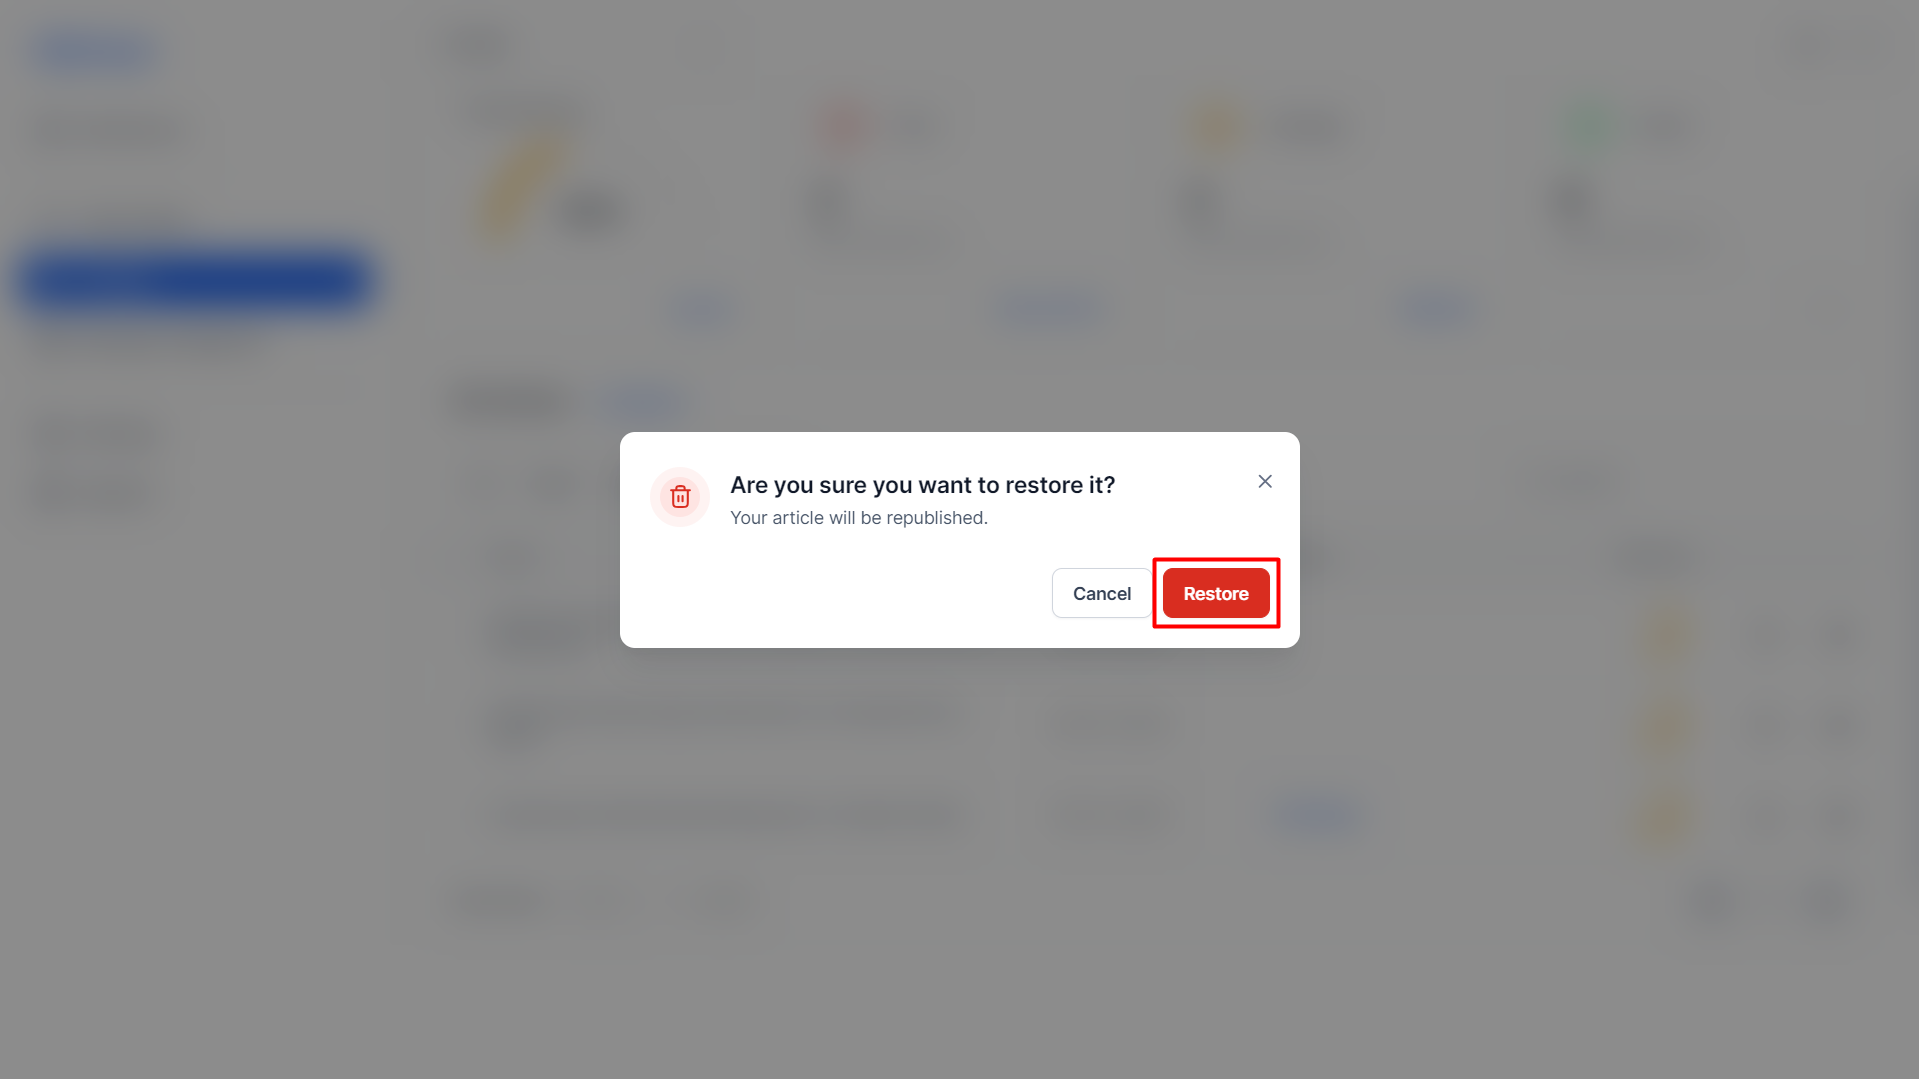
Step 5: To restore an article, click on the ‘Restore’ icon corresponding to it.

Step 6: You will be notified that by restoring this article you will be republishing it.
Draft State
AI Content Studio allows you to save drafts of your articles to provide authors with the necessary time, flexibility, and control to produce high-quality, well-considered articles that resonate with the audience and achieve the desired goals.
Step 1: Create or generate an article on AI Content Studio.
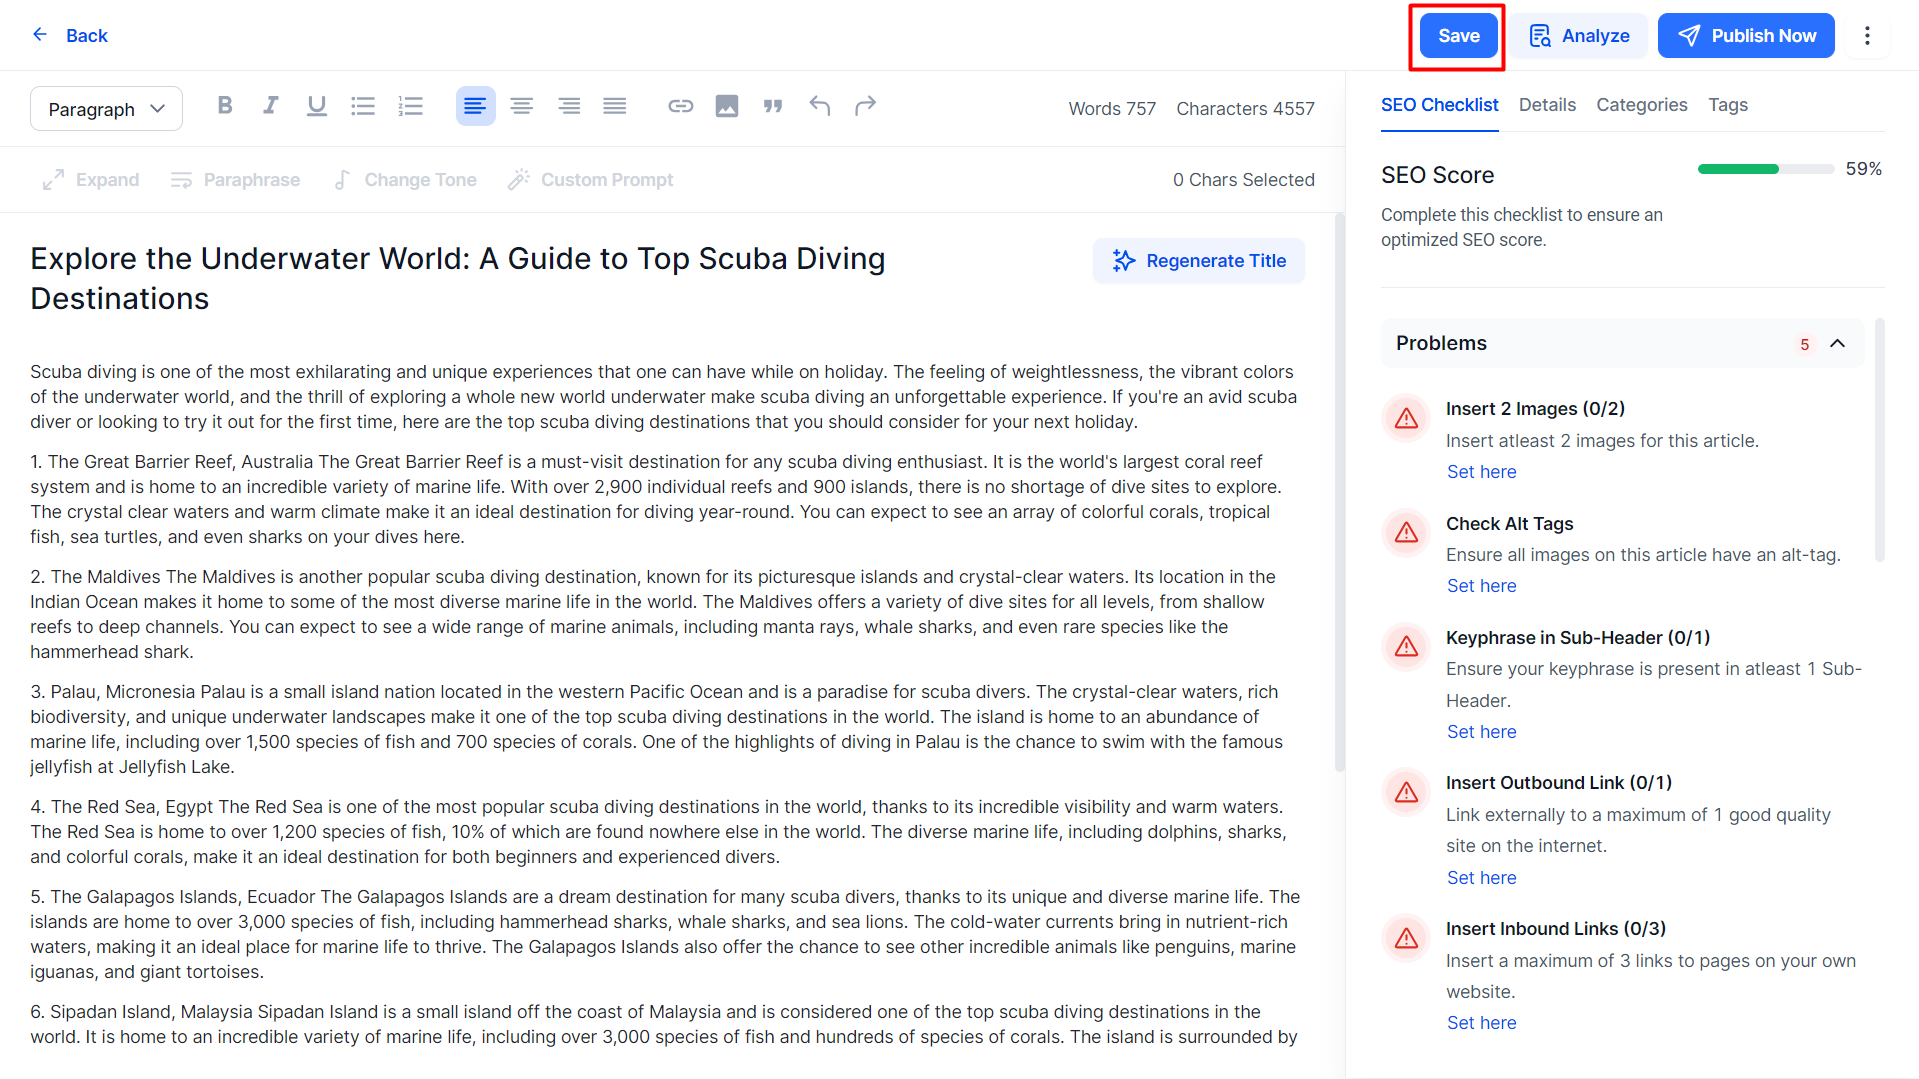
Step 2: Click on ‘Save’ to the top right of this section.
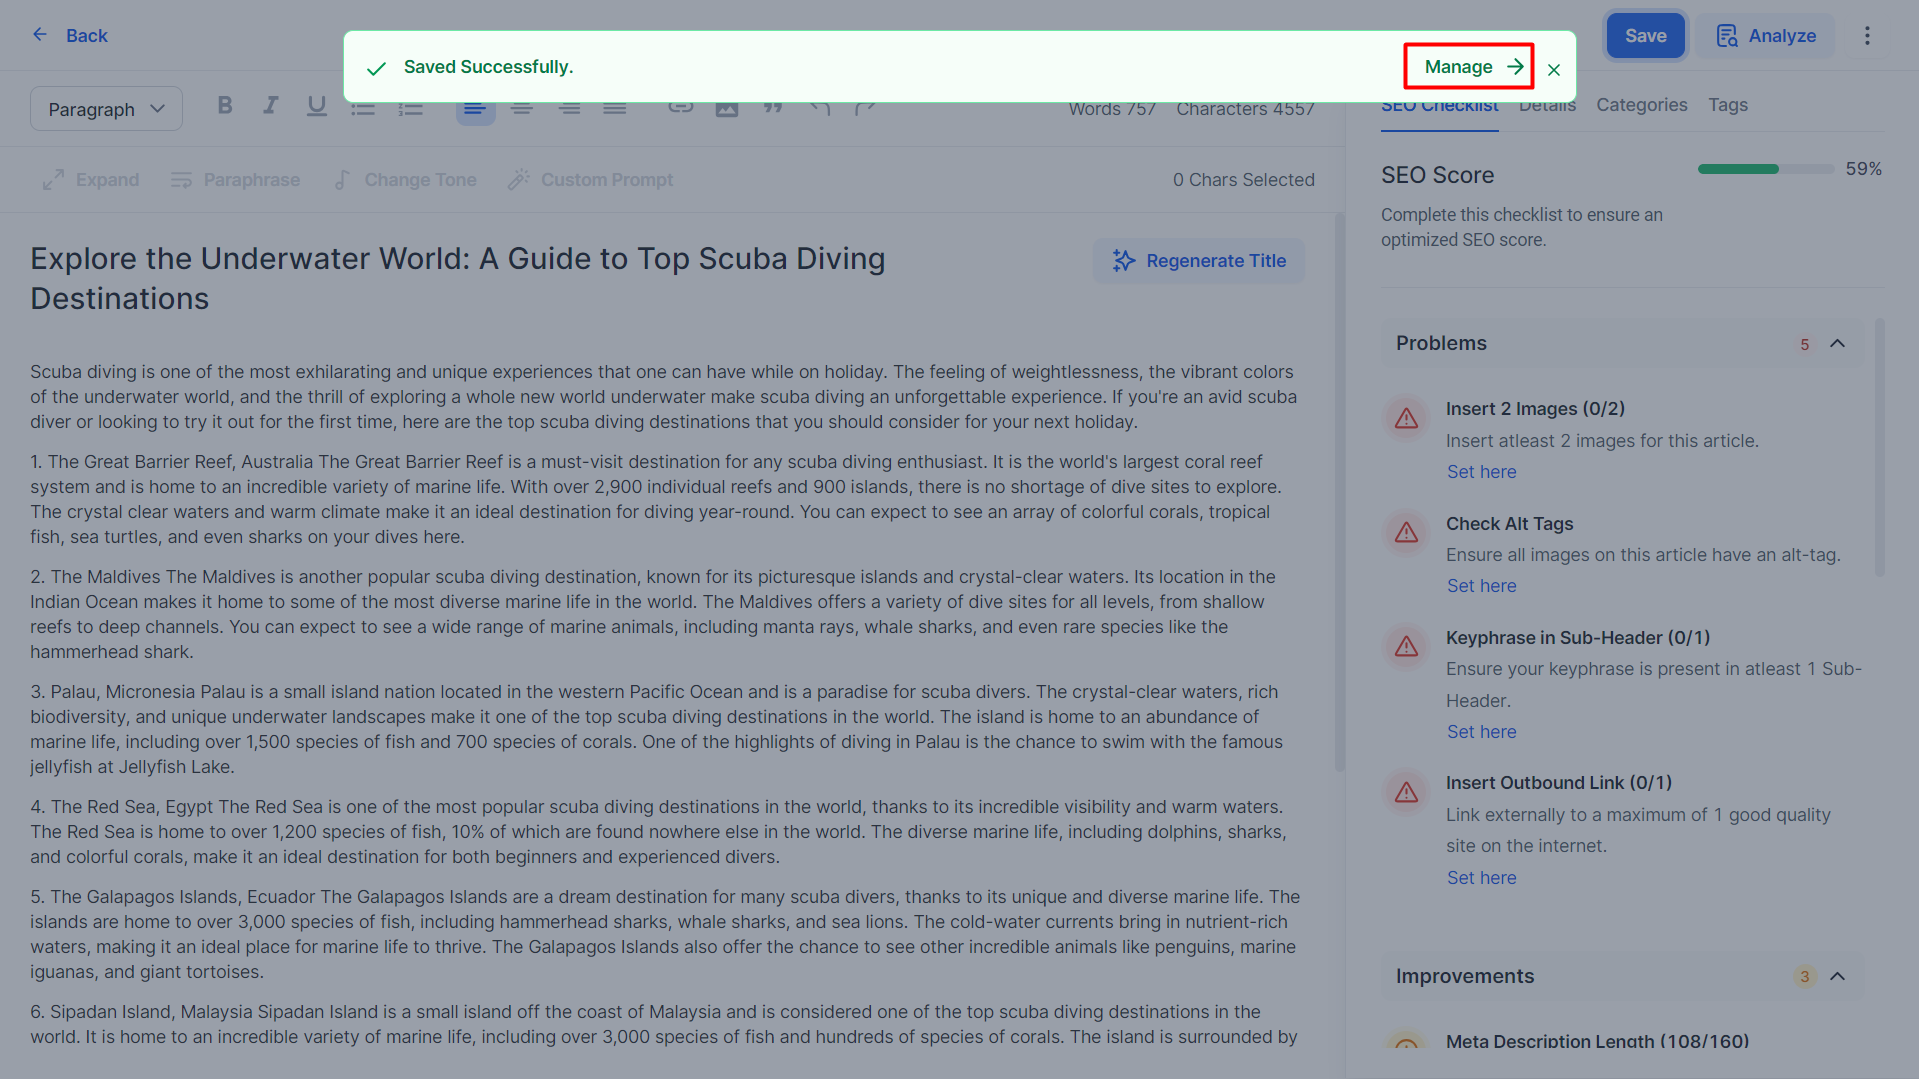
Step 3: Once you save the article you will be notified. You can click on ‘Manage’ to go back to the ‘Articles’ section.
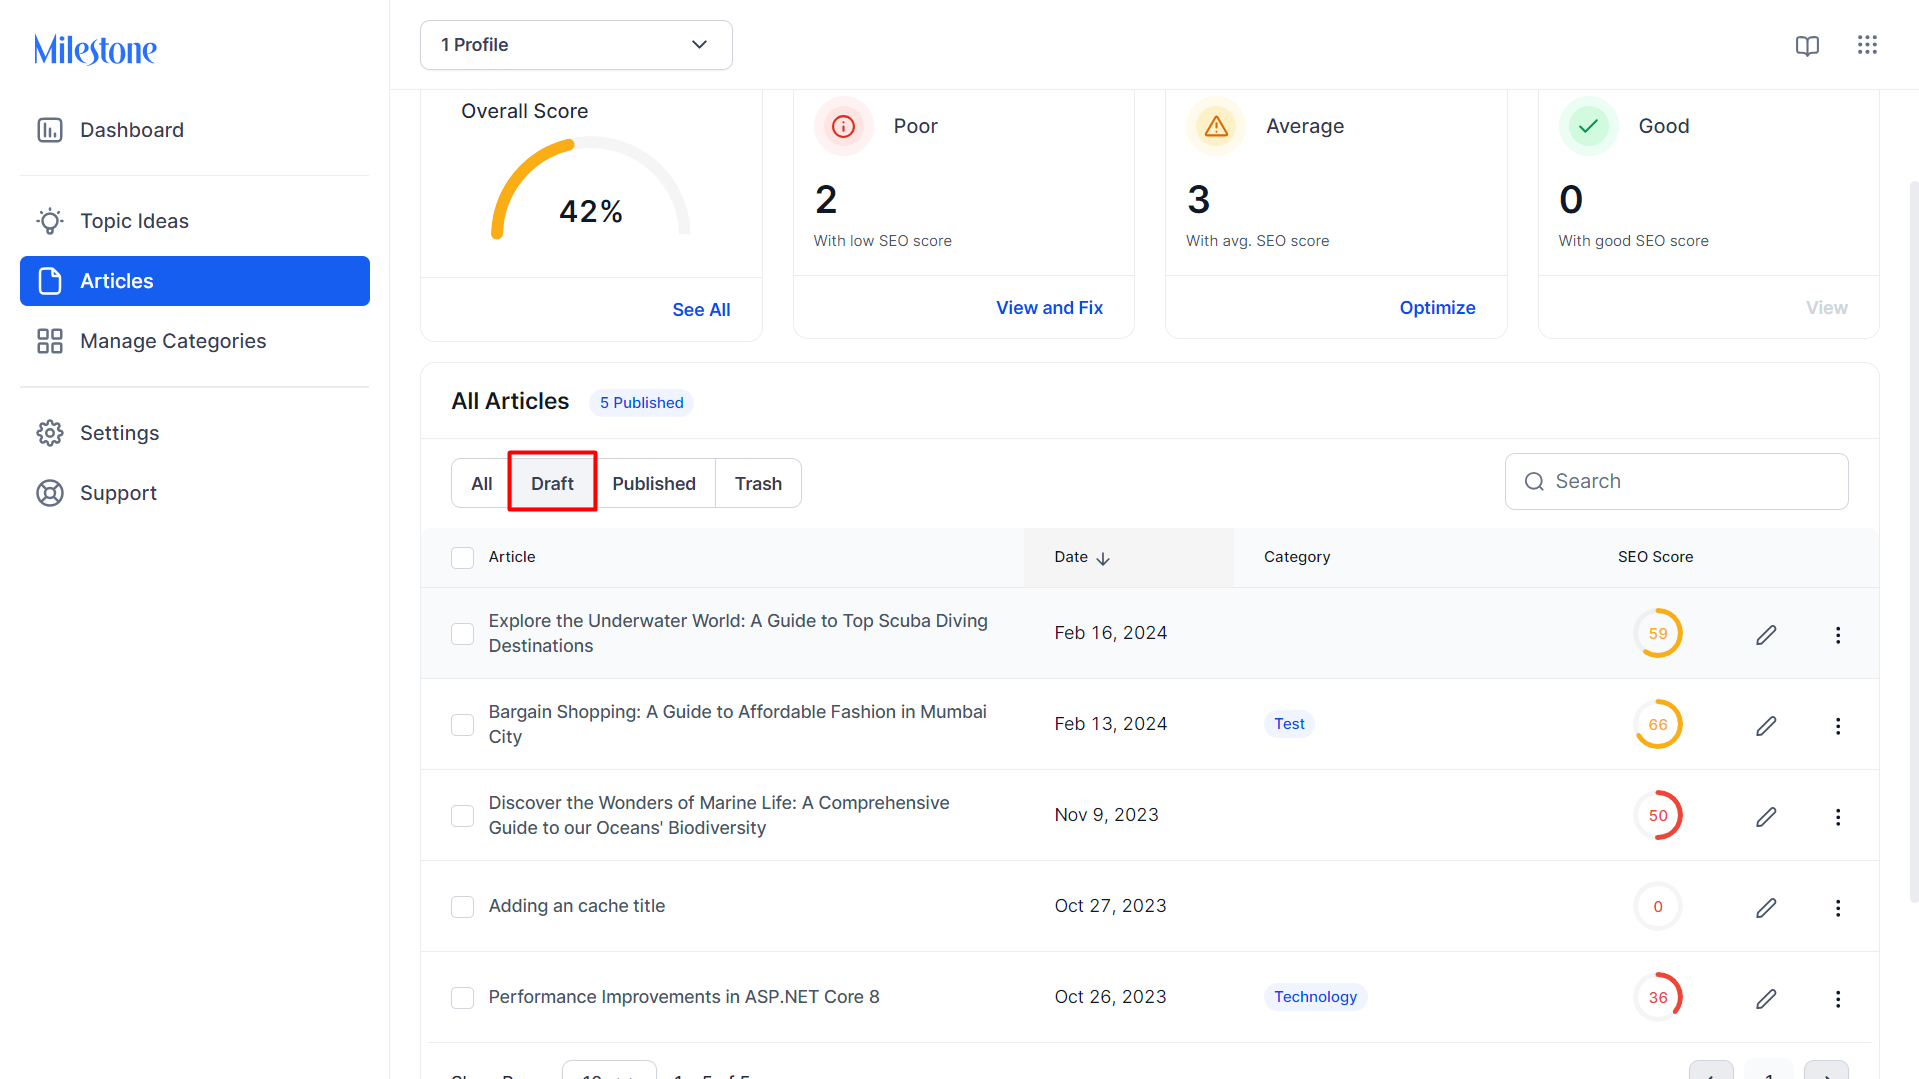
Step 4: In the Articles section click on the ‘Draft’ tab to view saved drafts.
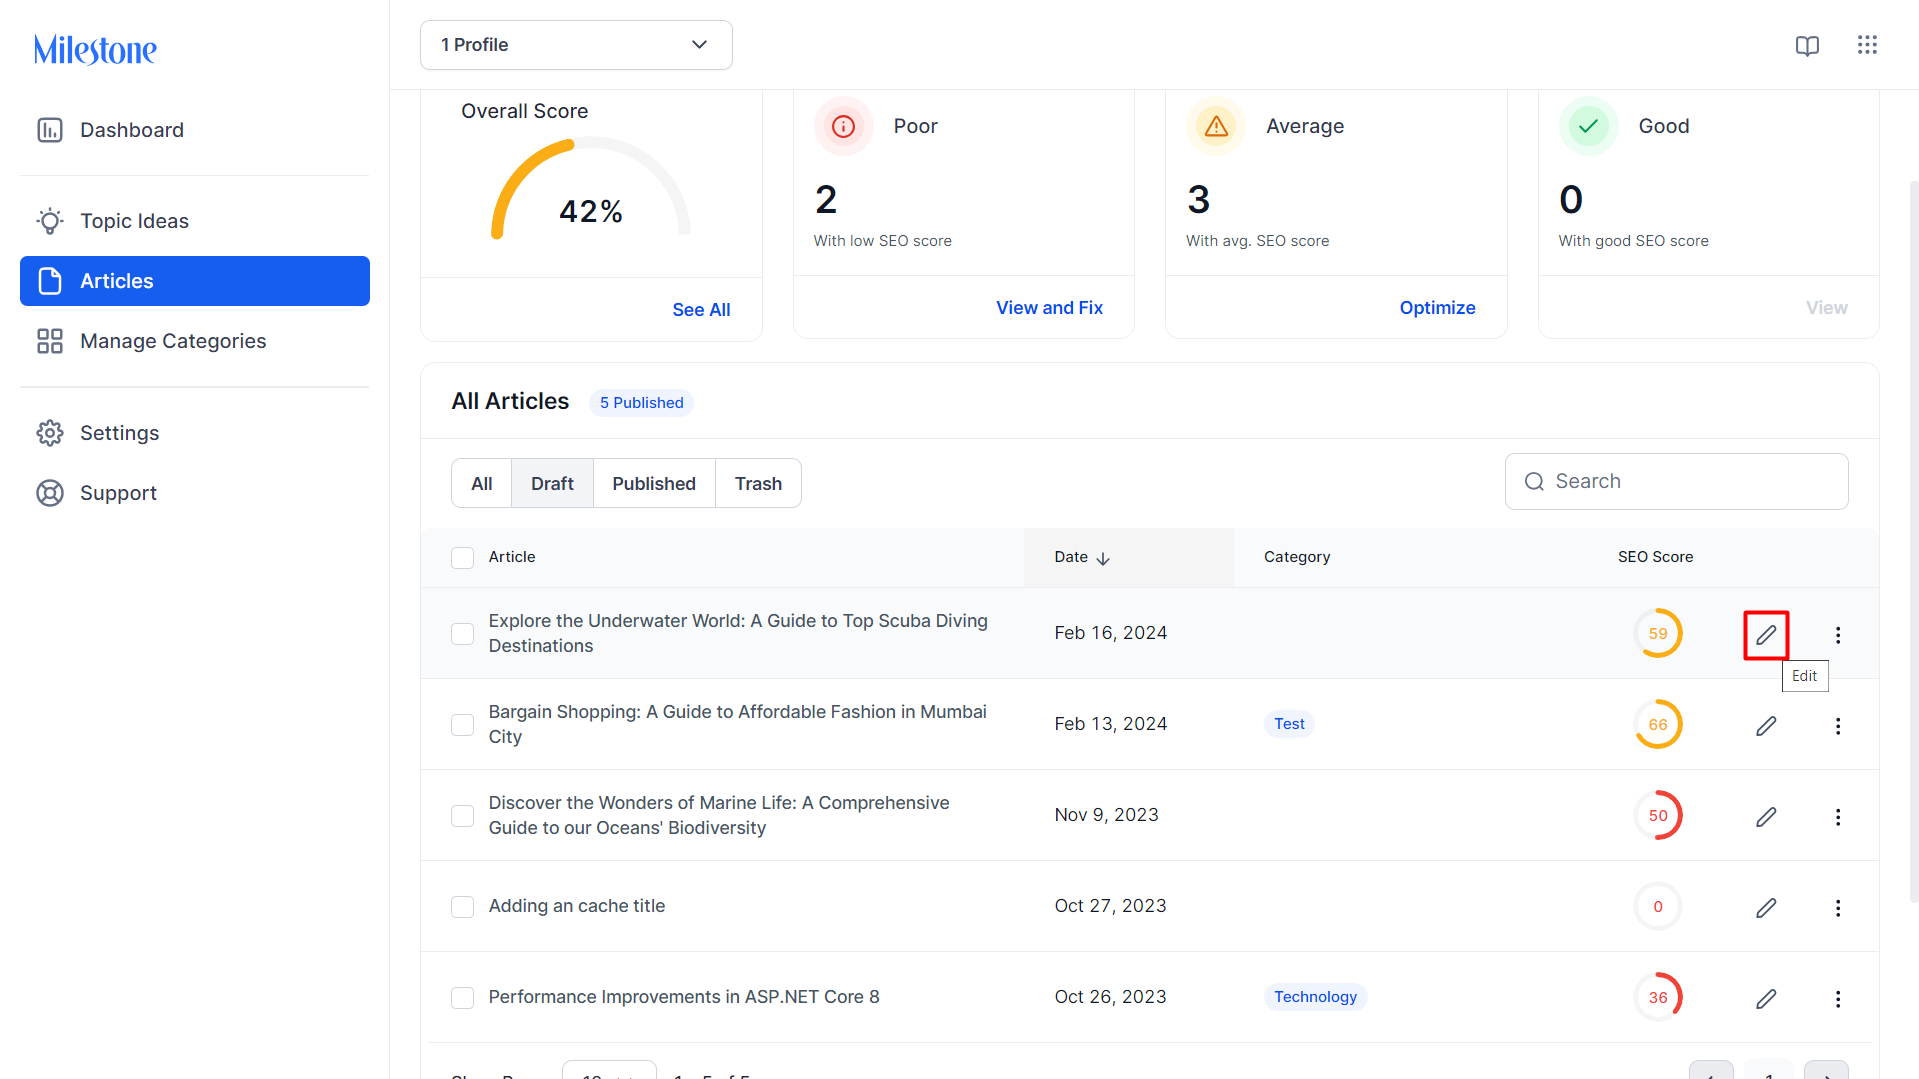
Step 5: Here you can edit articles using the ‘Edit’ icon corresponding to them.
Step 6: Once you have edited the article you can click on ‘Publish Now’ to publish the article.
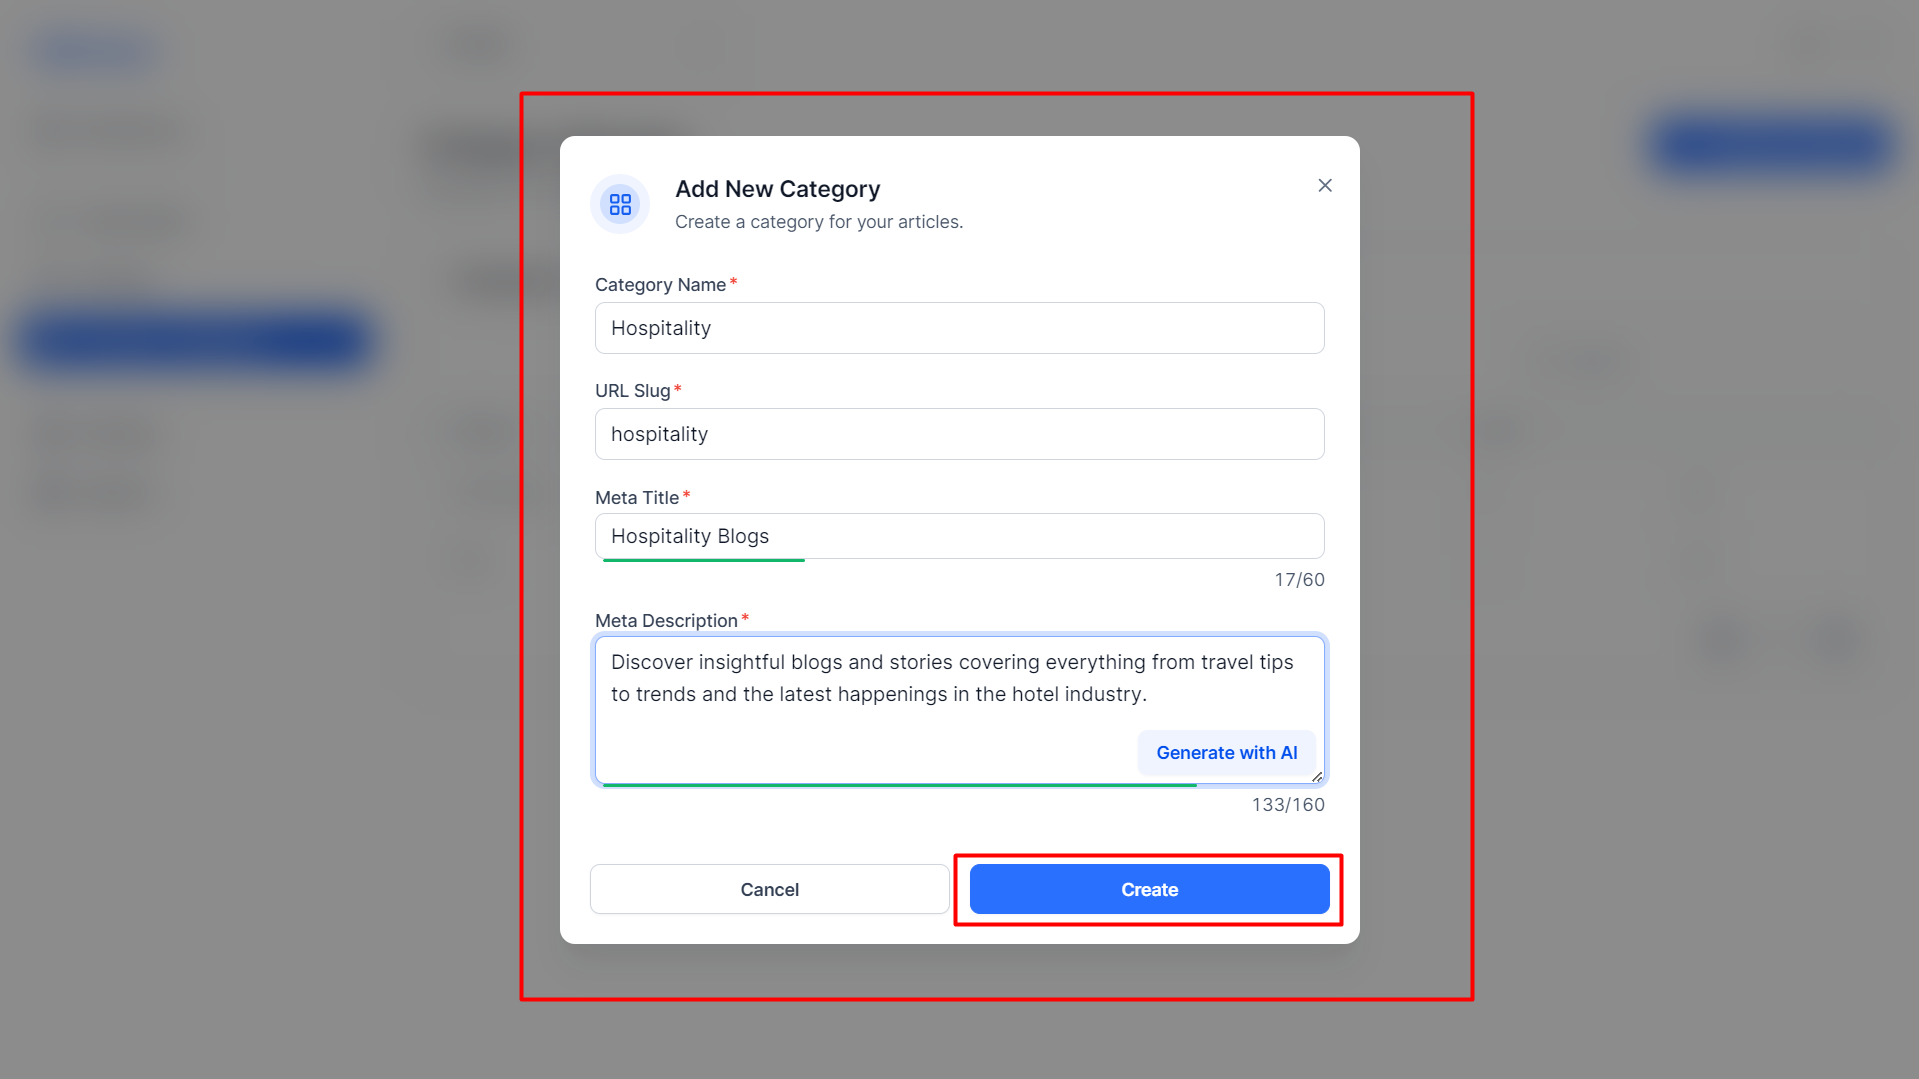
Category Management
AI Content Studio lets you edit, create, and manage categories for your articles. Category management on a blog page plays a crucial role in enhancing the user experience, improving content discoverability, targeting specific audience segments, optimizing for SEO, and supporting a structured content strategy.
Path: AI Content Studio > Manage Categories
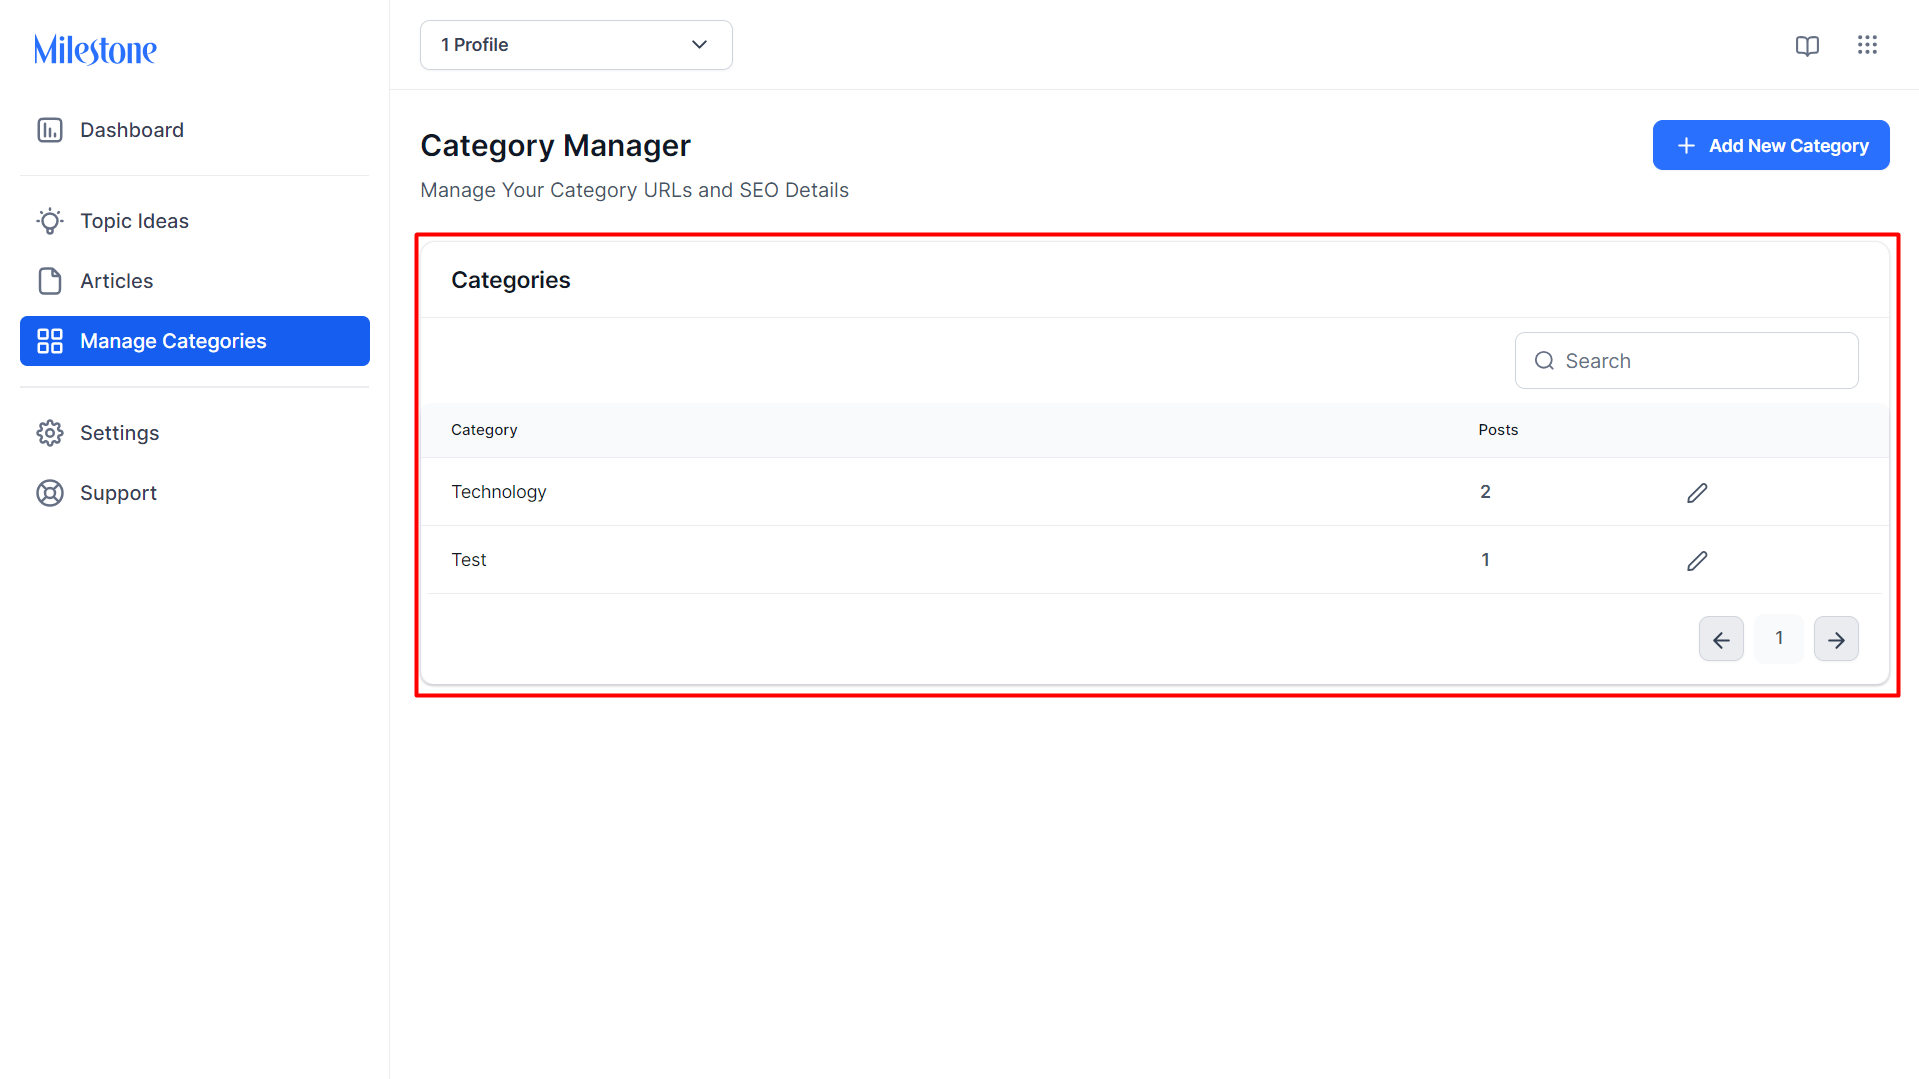
Step 1: Click on ‘Manage Categories’ in the left navigation panel of AI Content Studio.

Step 2: In the Category Manager section, you will be able to see the categories created, the number of posts under each category, and editing options for the categories.
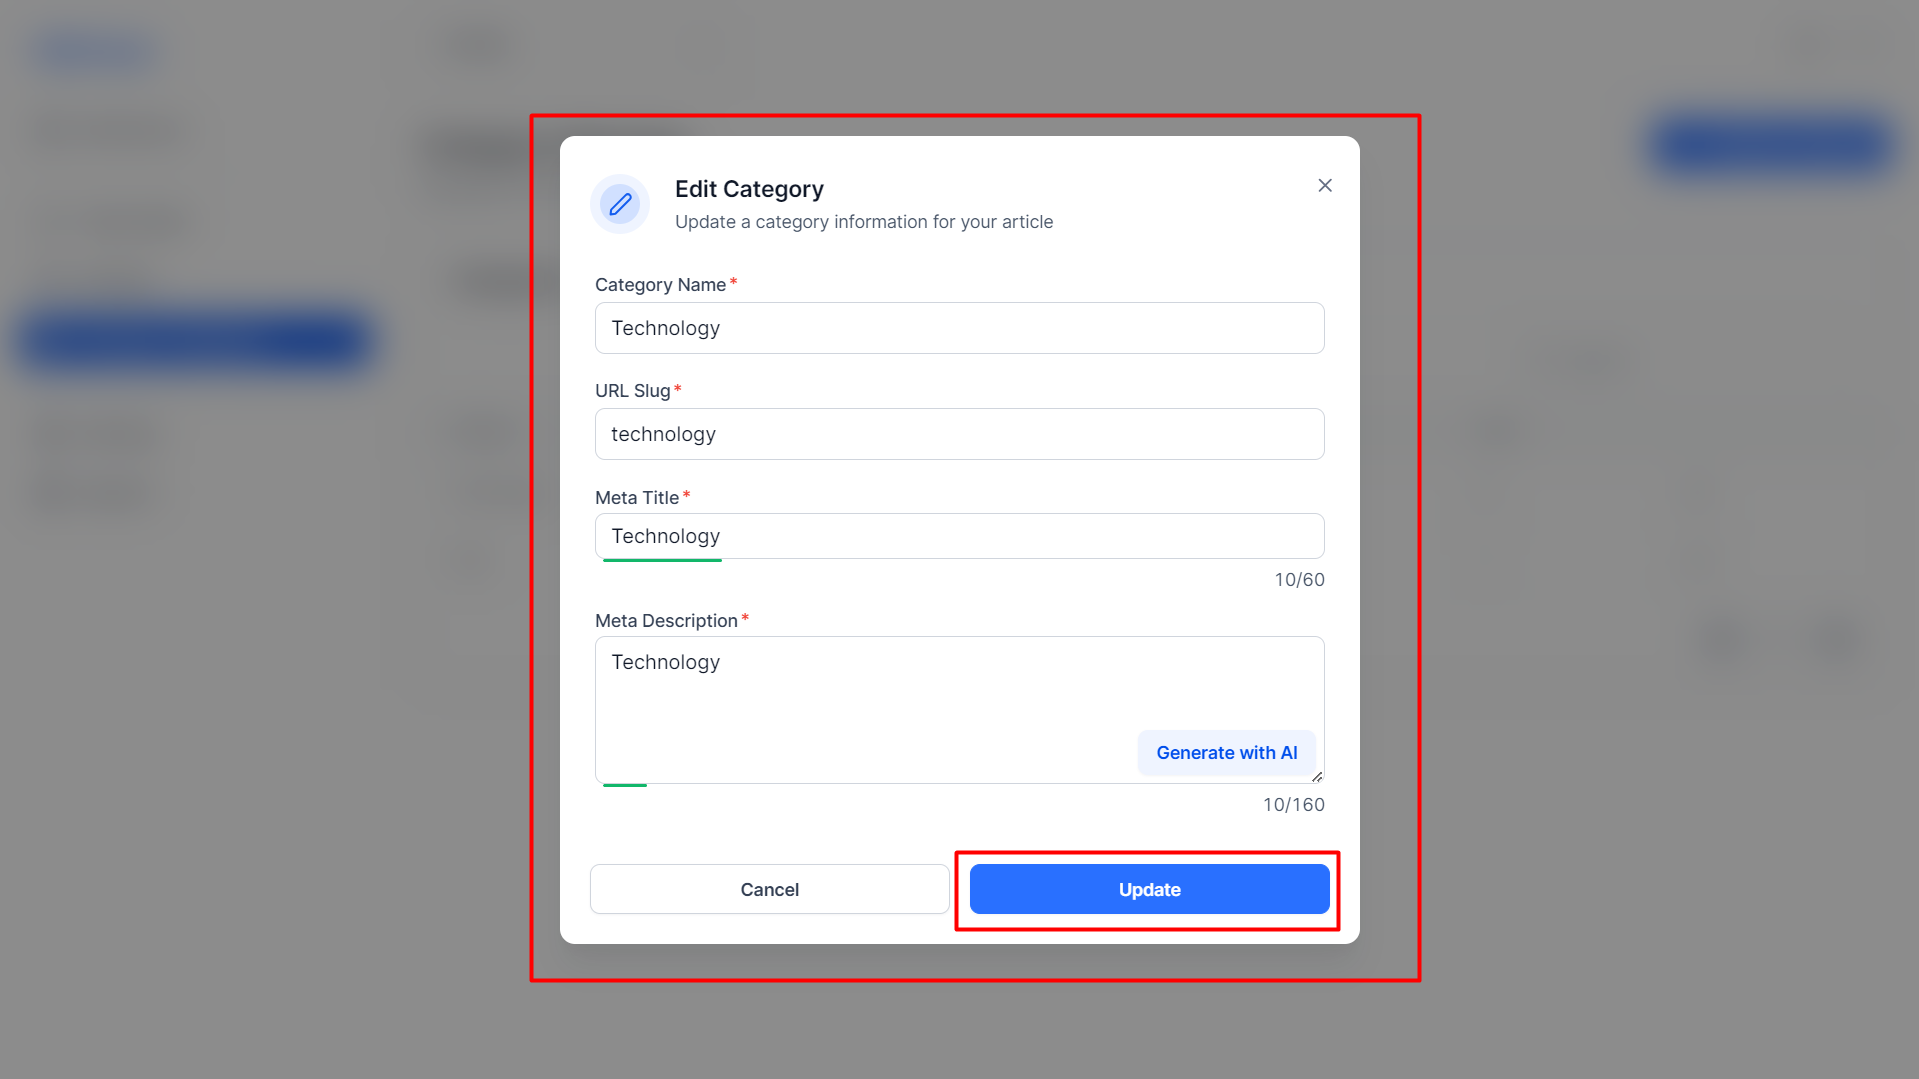
Step 3: To edit a category, click on the ‘Edit’ icon corresponding to it.

Here you can edit the category name, the URL slug for the category page, the meta title for the page, and the meta description for the page.
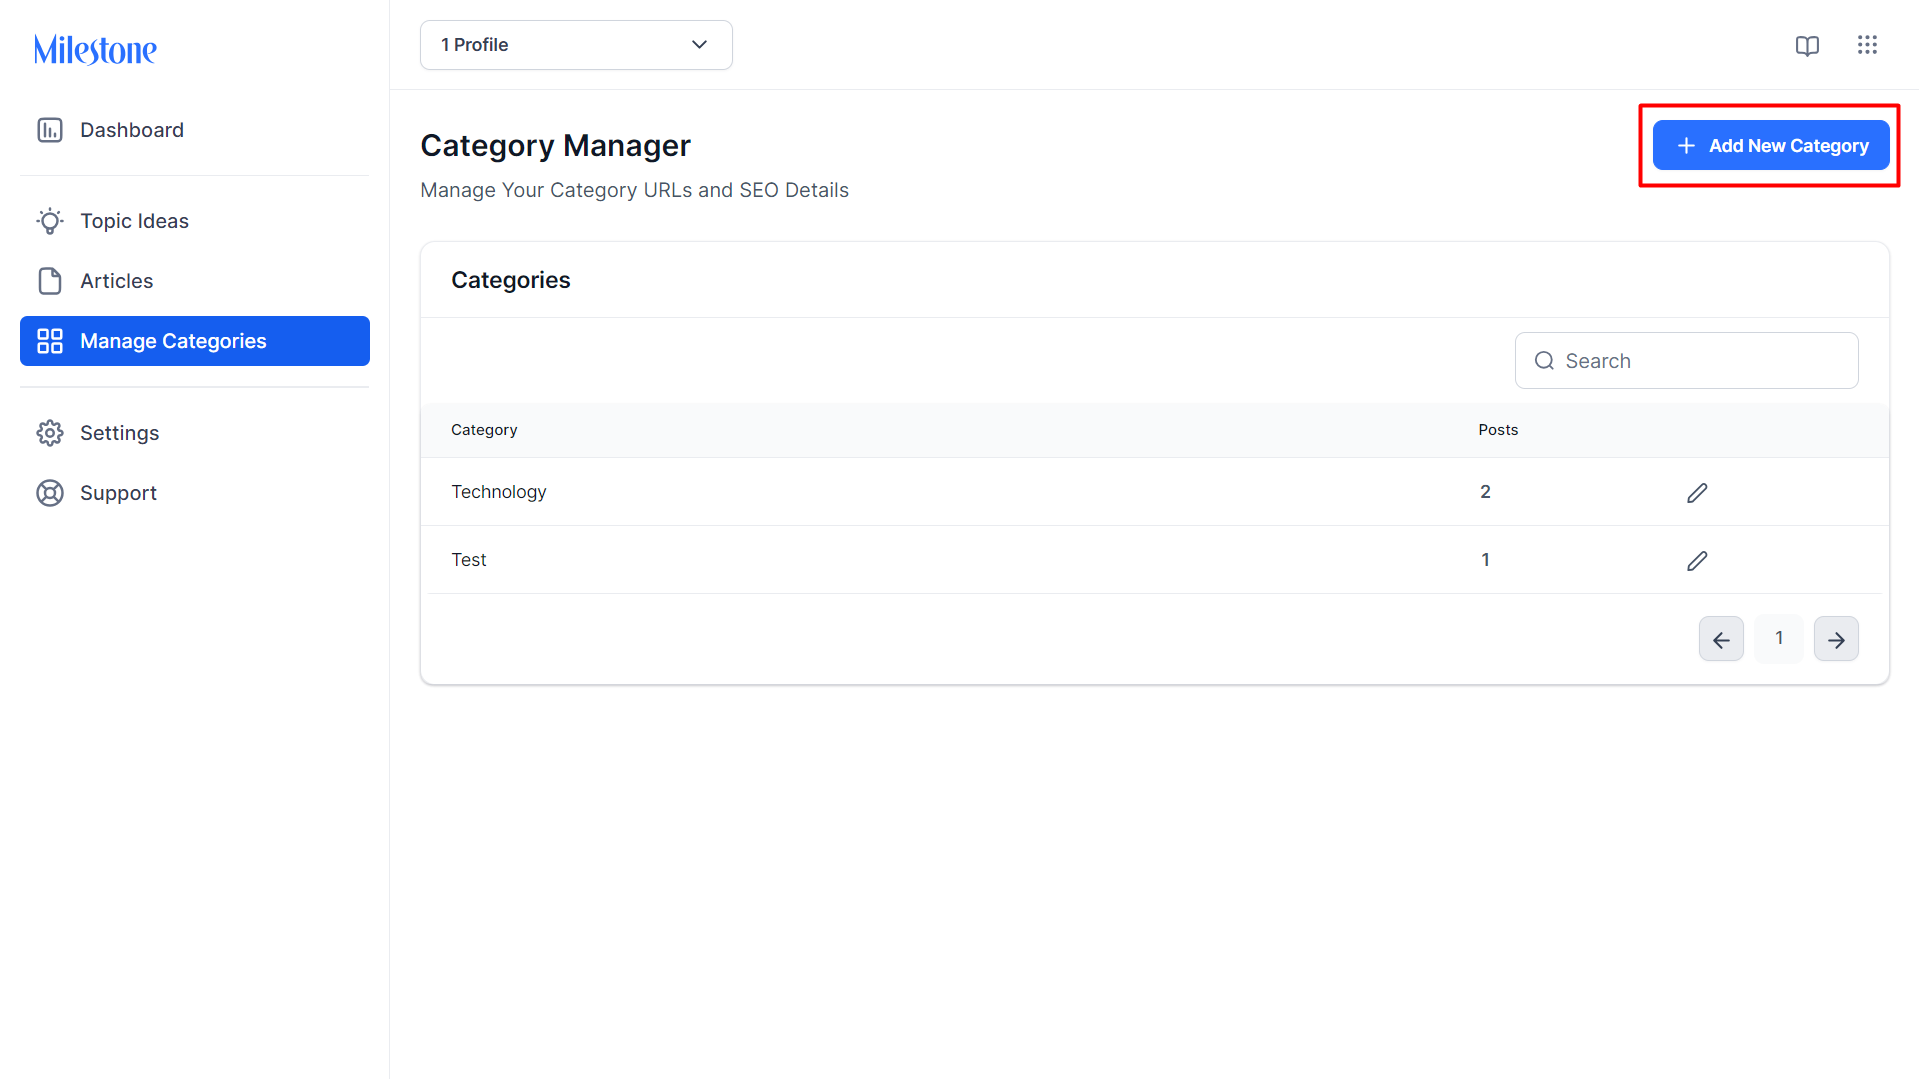
To create a new category, click on ‘Add New Category’ to the top right.
Add the details for the category page and click on ‘Create’.