Release: Apr 27, 2023
Latest updates from Milestone Analytics, CMS, Insights, Schema Manager and Local.
Milestone Analytics
GA4 Data Displayed on Dashboard
The ‘Website Performance’ tab in the Milestone Dashboard displays GA4 data for Revenue, Sessions, and Website Leads. If your business has migrated to GA4, and you have selected a date range prior to your migration the data will not be displayed.
If the date range spans over the time period you have migrated to GA4, only the data recorded in GA4 will be provided and UA data will not be added.
Path: Milestone Dashboard > Performance Highlights > Website Performance
Case 1: The message “GA4 data not available for the selected time period.”, as the date range you have selected is prior to migration to GA4.
In this case, a message will be displayed to indicate that GA4 data is not available for the selected date range.

Case 2: The date range you have selected spans UA and GA4 data.
In this case, only GA4 data will be considered. UA data will not be considered.

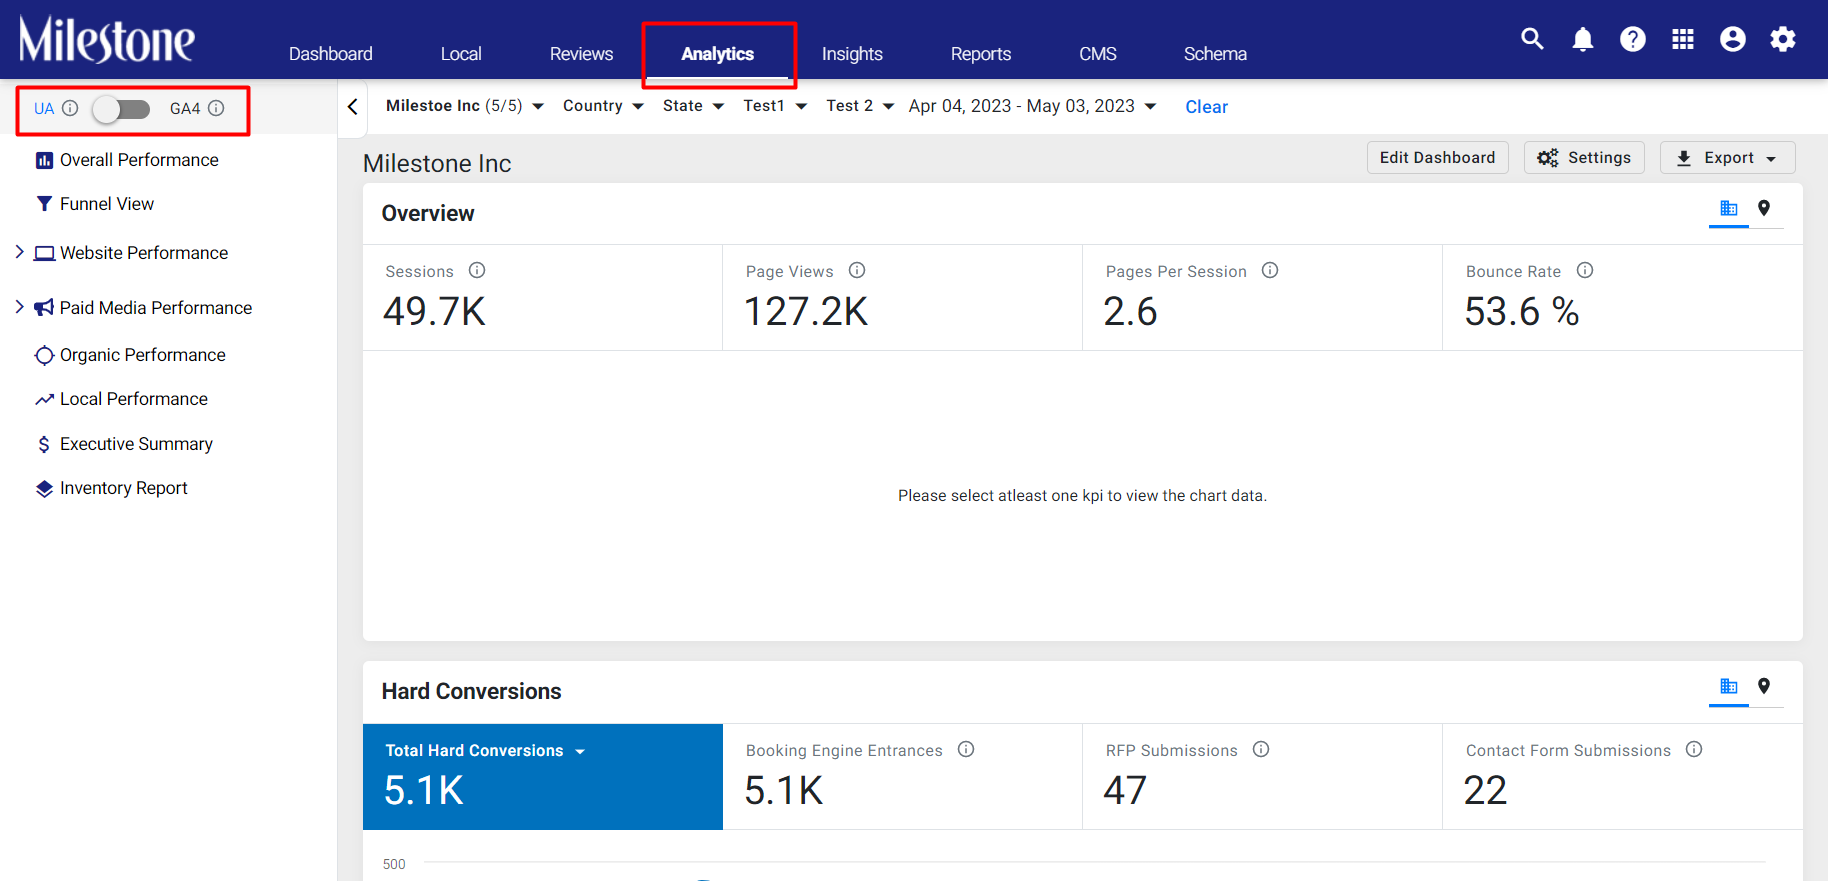
Case 3: There is no change in the case of UA-only clients. You can view UA data from the Milestone Analytics section using the toggle to the top left.
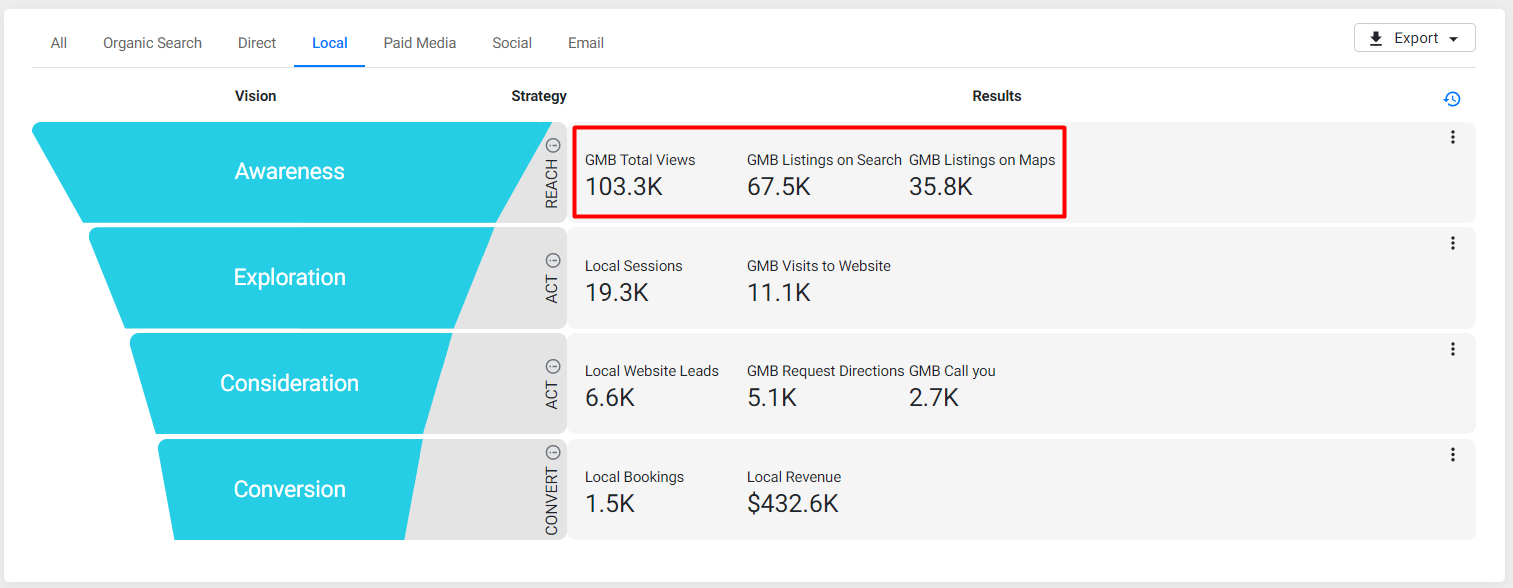
Funnel View GA4 Local Data
Since GA4 uses different KPIs to measure local traffic when compared to UA, certain KPIs have been deprecated in favor of KPIs supported by GA4.
There are 3 changes in GA4 funnel view, 1. All GA data will be from GA4 (and not UA), 2. Removed deprecated KPIs for Local and added replacement KPIs, 3. In GA4, there is no breakdown by Local channel so removed some KPIs – Local Sessions, Local Bookings, Local Revenue, Local Website Leads
Path: Milestone Analytics > Funnel View > Local
Step 1: Click on Funnel view in the left navigation panel of Milestone Analytics.
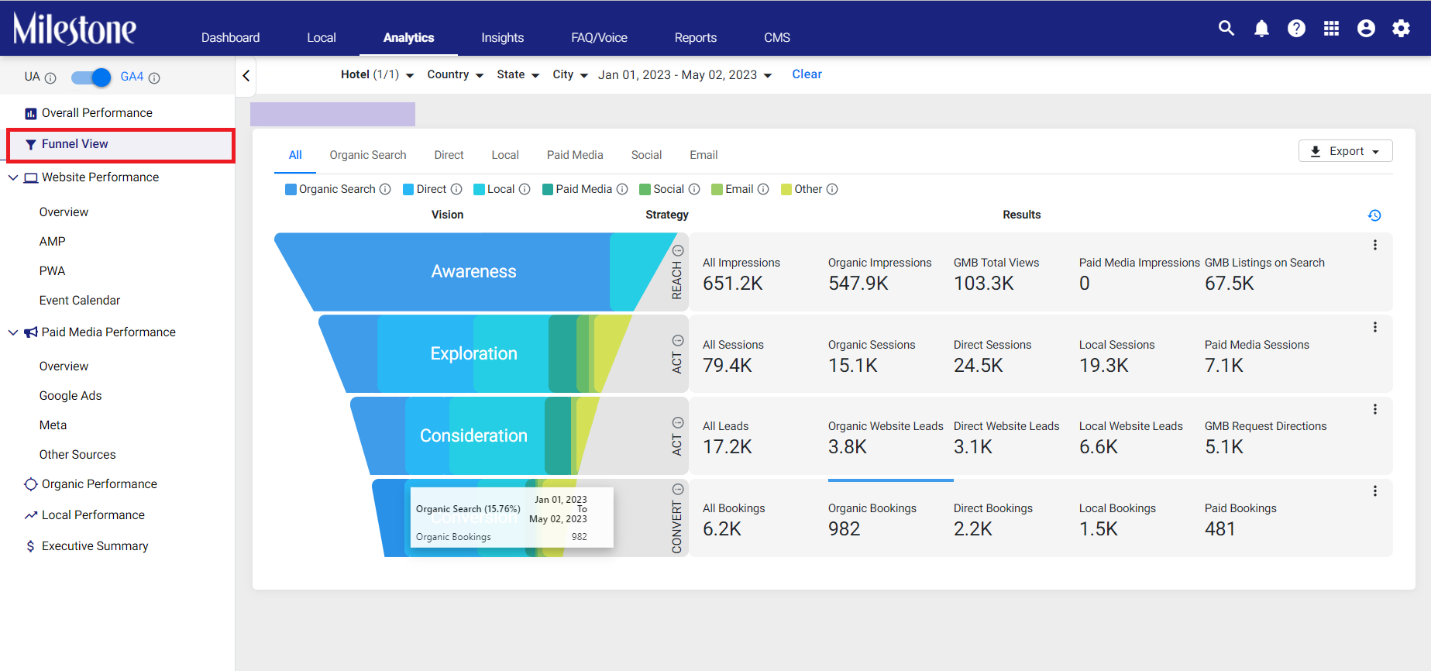
Step 2: Select ‘Local’ data from the tabs above the funnel view of the customer journey.

Step 3: Here you can view new KPIs for local traffic data like GBP Listings on Search, GBP Listings on Maps, Total Listings.
Milestone CMS
Asset Library Integration with Milestone Page Studio
Opportunity: Centralizing, optimizing, and distributing images across your website saves time and drastically improves the performance and visibility of your pages.
Solution: Milestone CMS supports Milestone’s Asset Library, the Asset Library allows you to upload and optimize images to be distributed across your website so that your pages are optimized and highly visible right from the get-go.
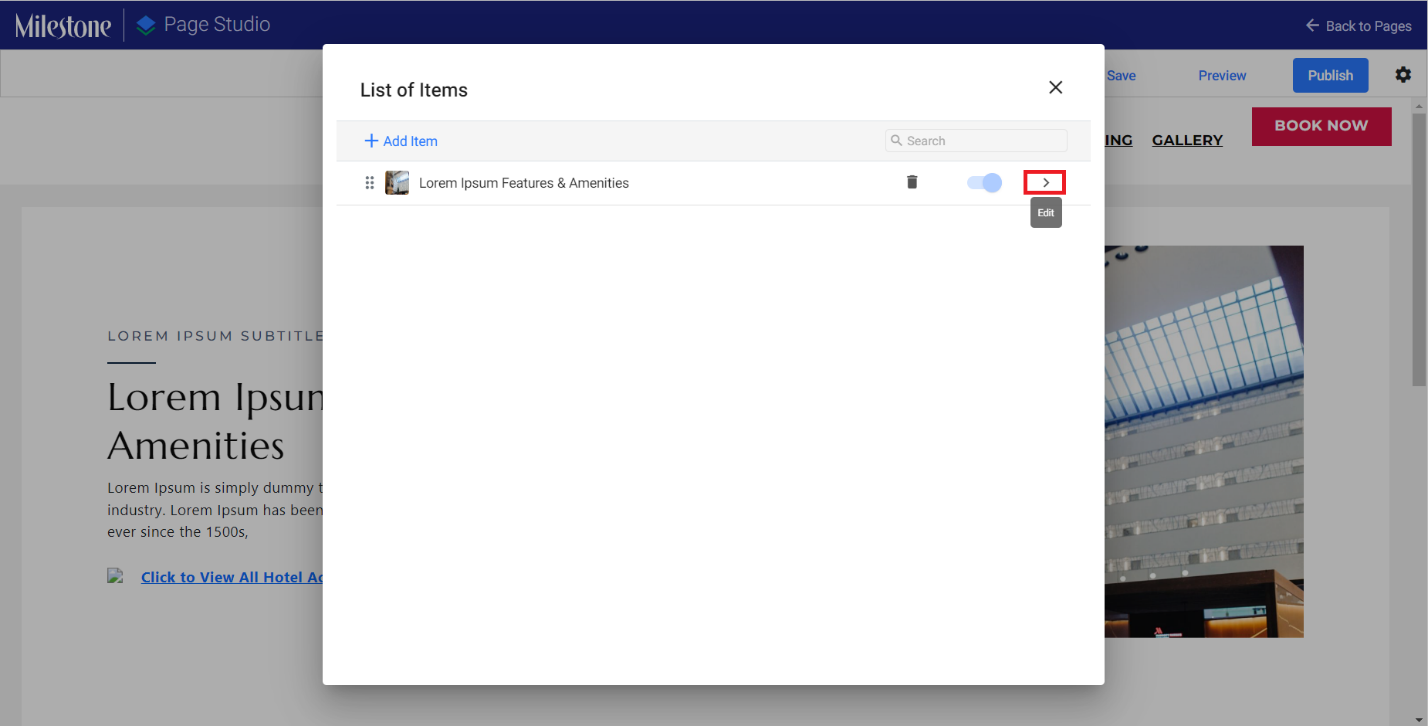
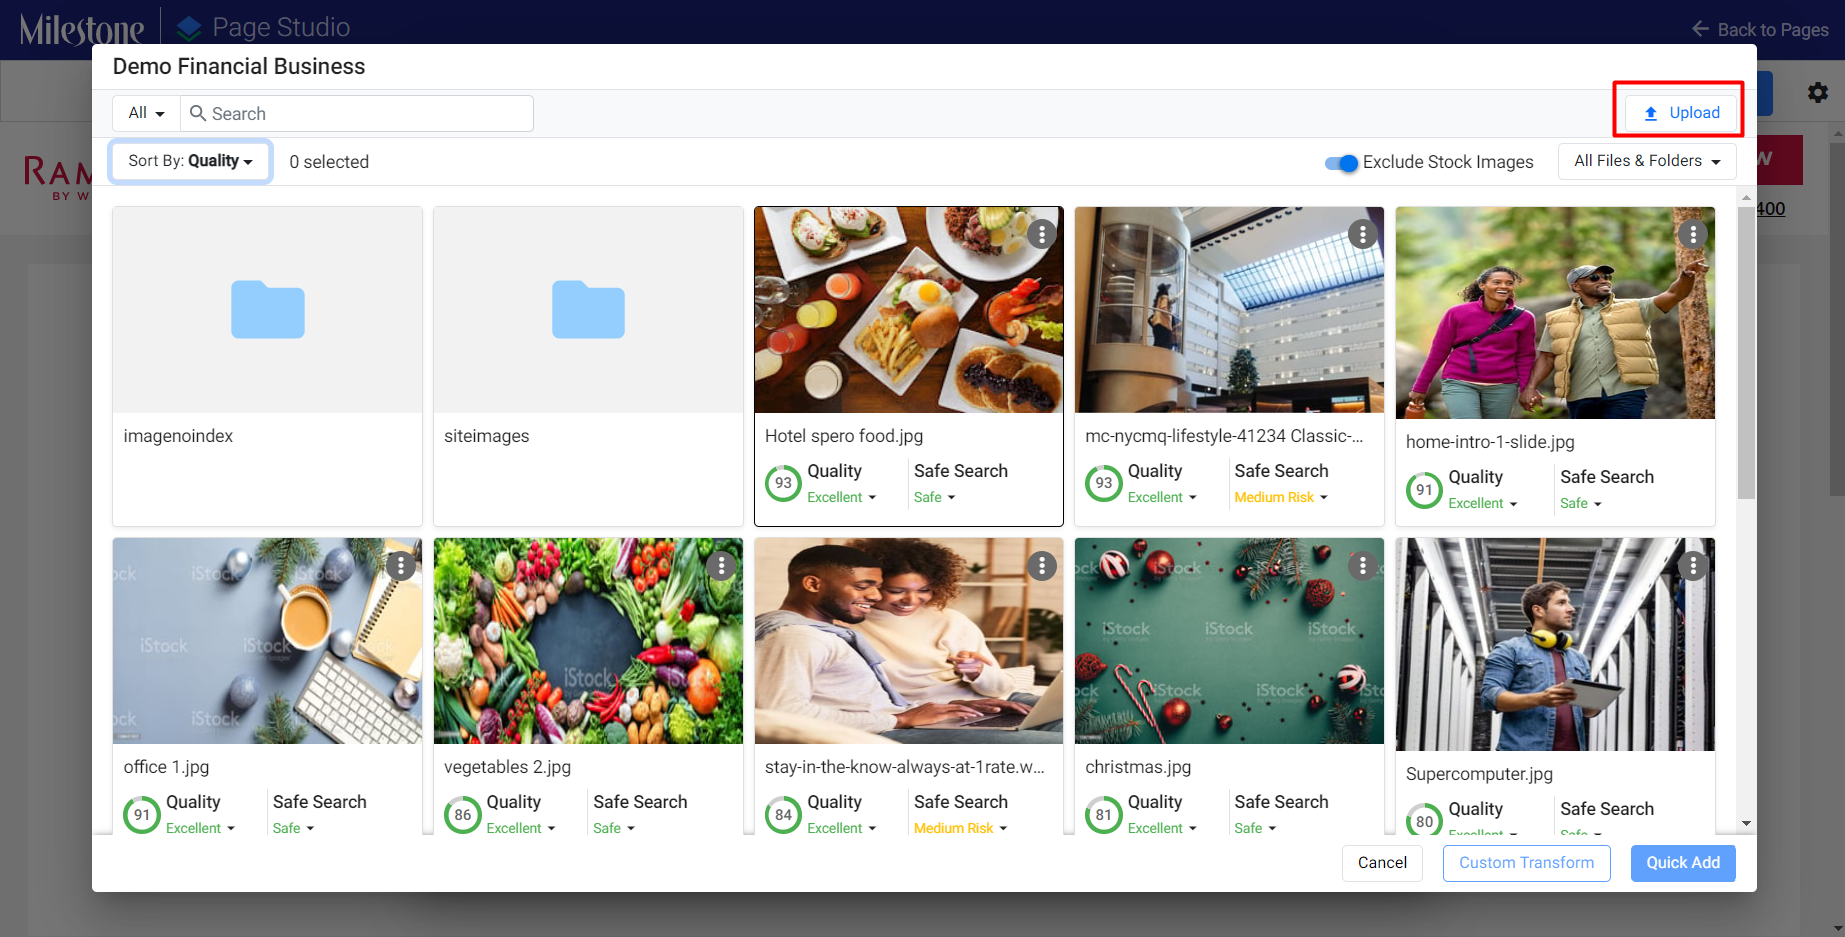
Step 1: Access Milestone’s Digital Asset Manager from Milestone CMS by clicking on the ‘Edit’ icon corresponding to the section in which you wish to add the asset.

Step 2: Click on the ‘Edit’ icon corresponding to the item with the section.
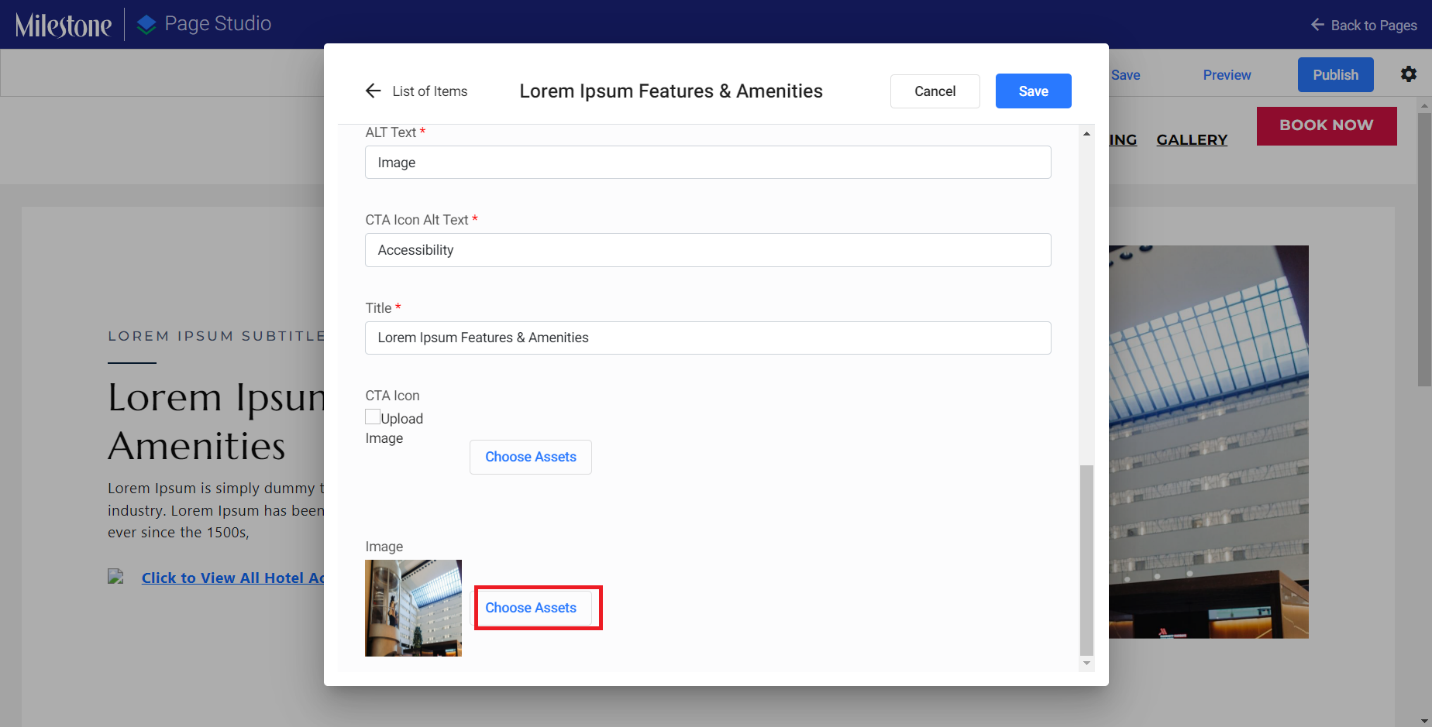
Step 3: Scroll to the bottom of the edit section and click on ‘Choose Assets’ under the Image option.
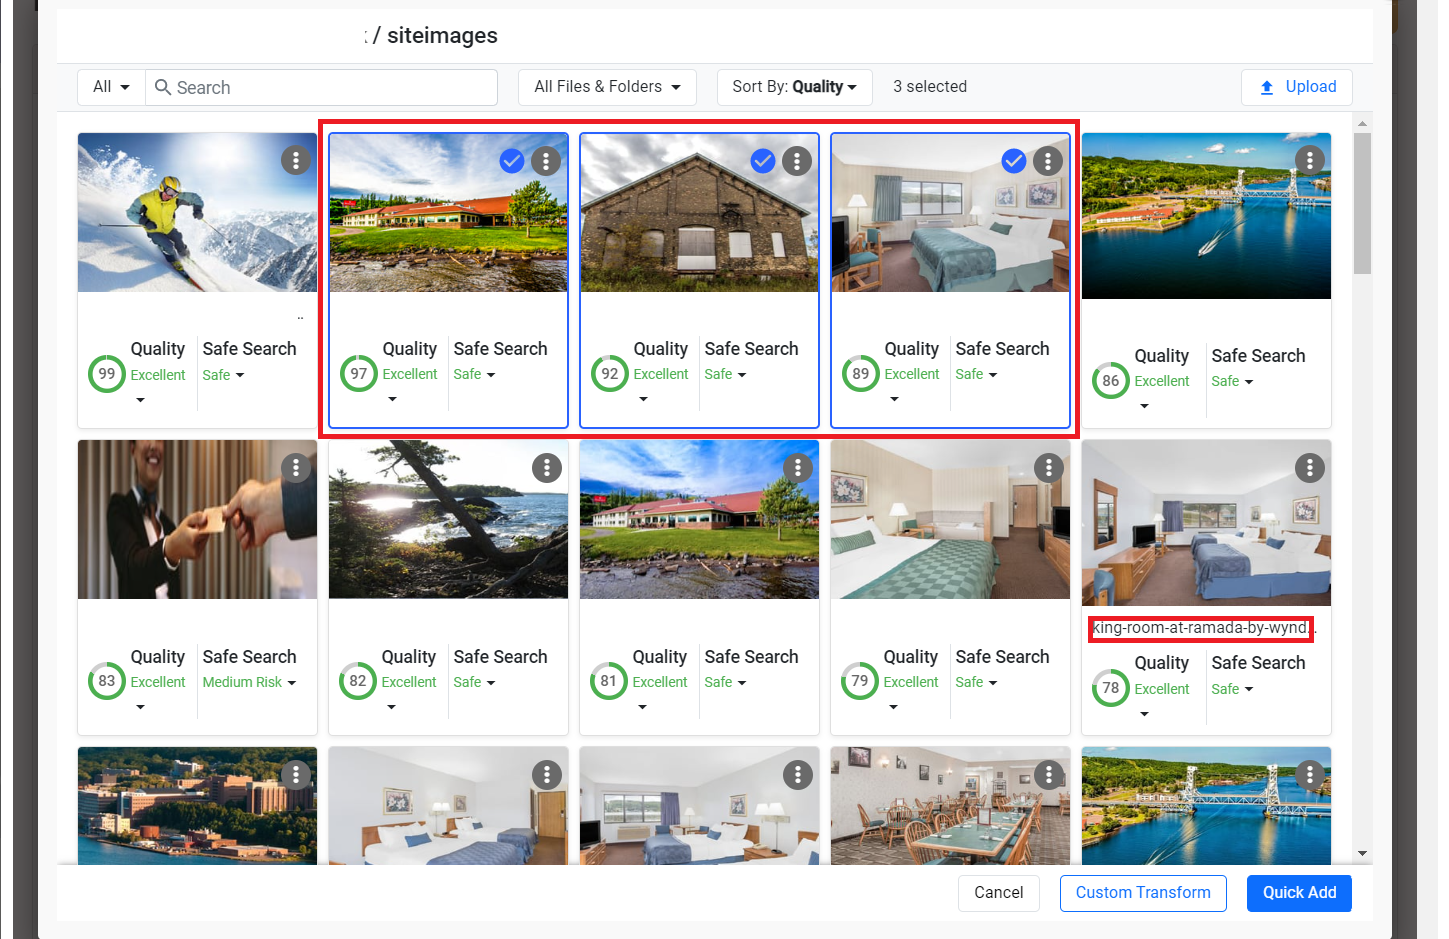
Step 4: You can view the folders and other assets here. Use the search bar to the top and the dropdown menu to the right to filter searches.
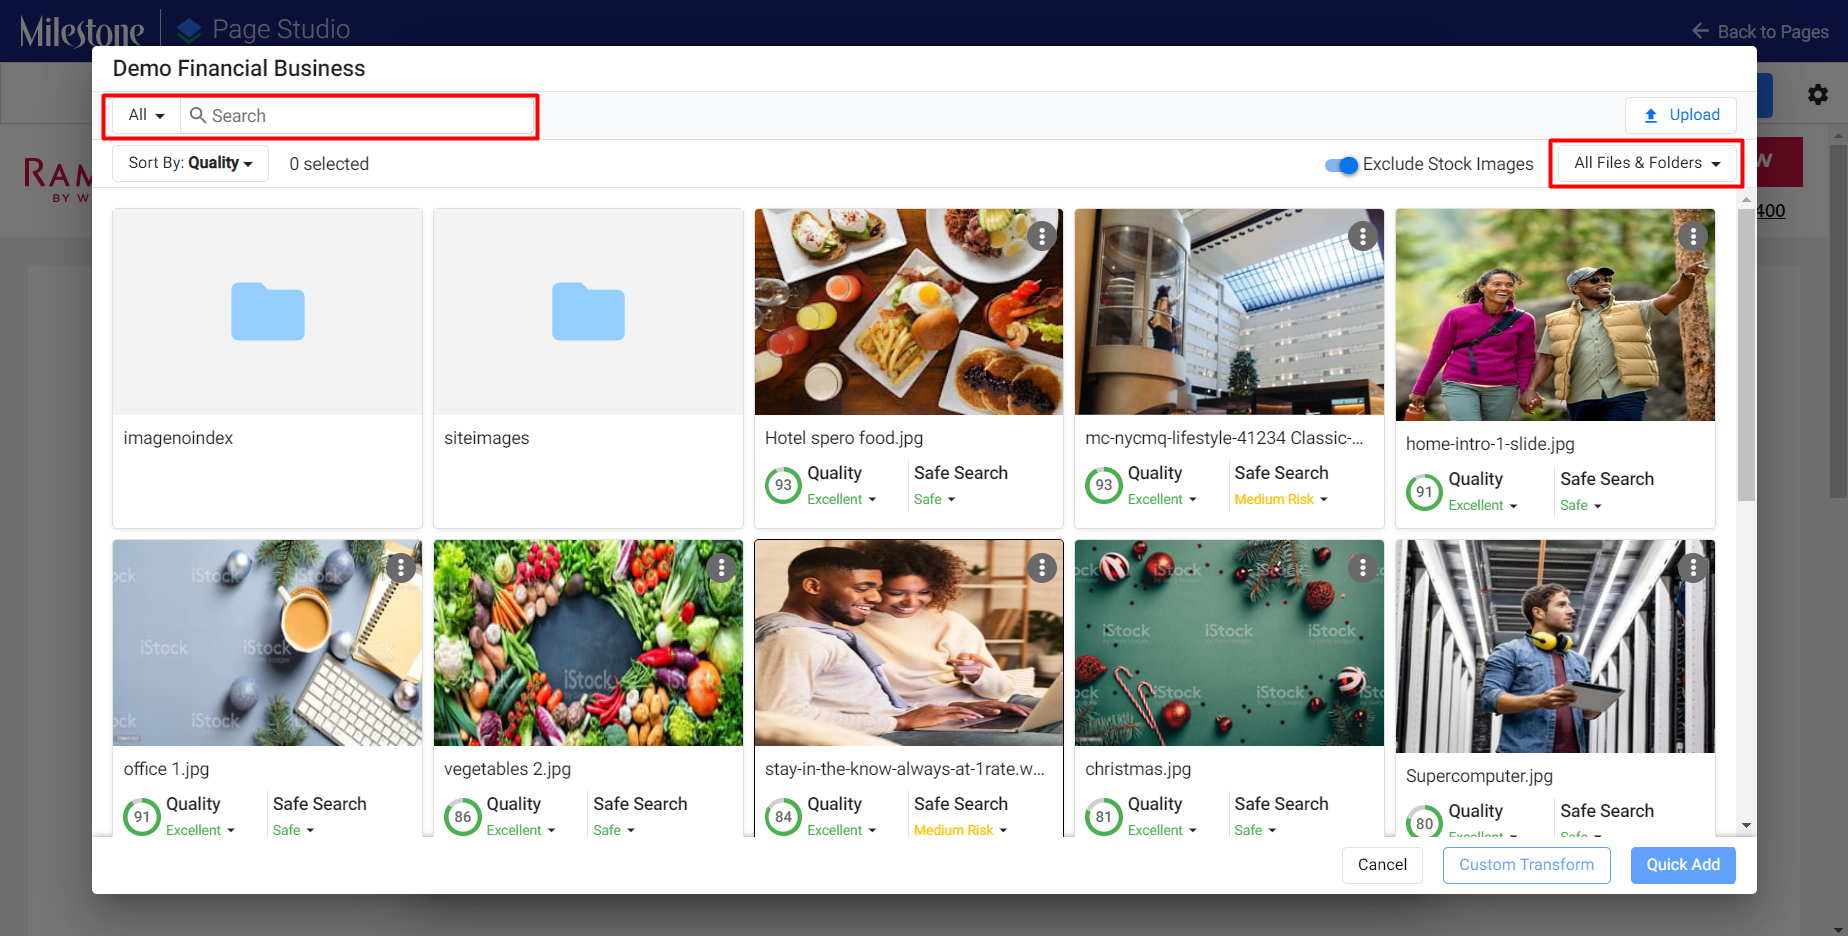
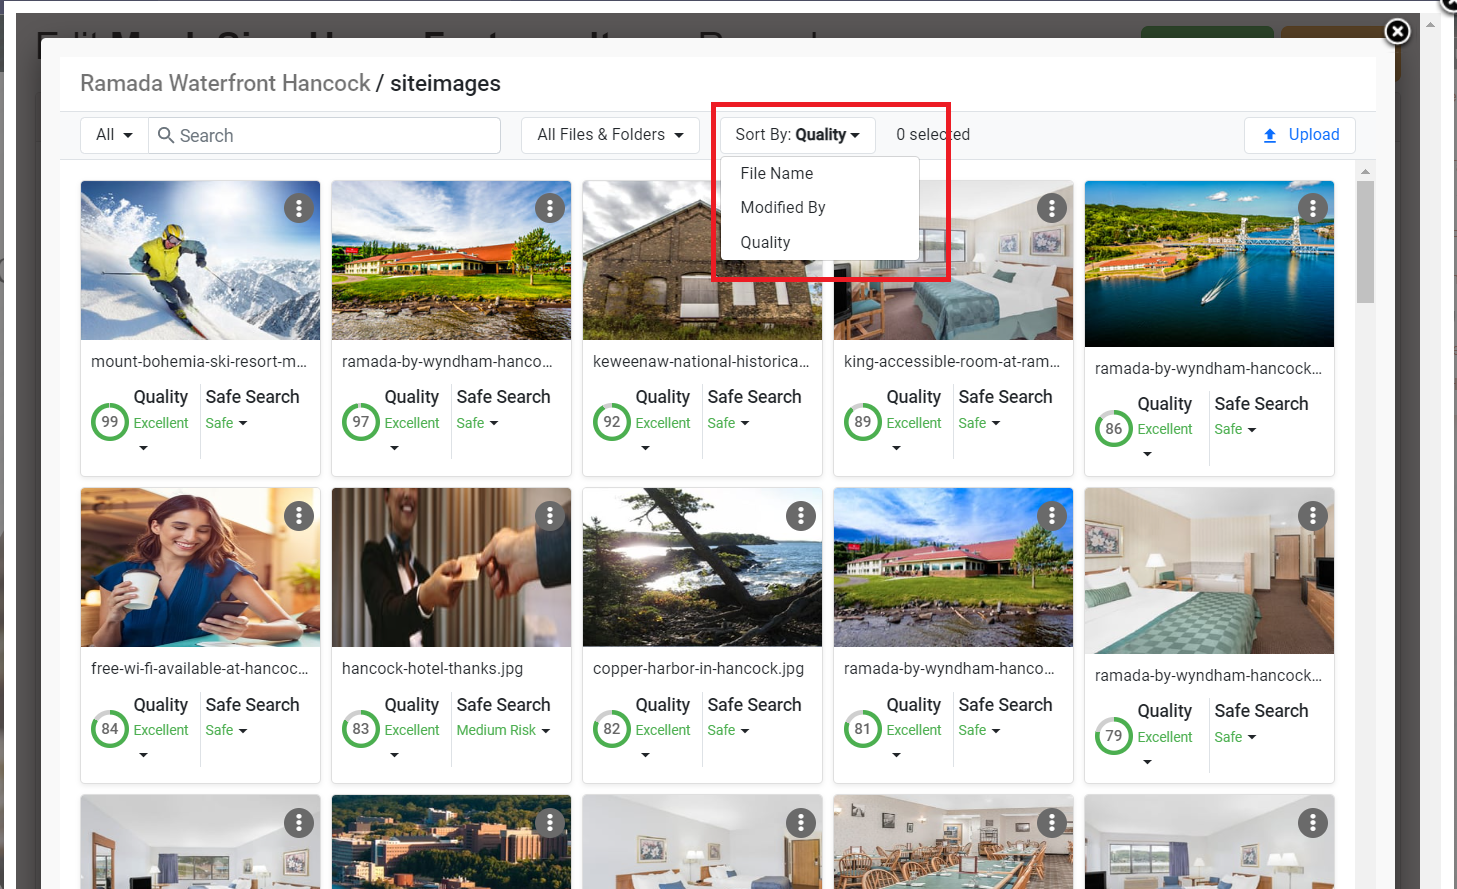
Step 5: Sort the files by file name, modified by, and image quality (quality score).
Step 6: Upload files to the Digital Asset Manager using the ‘Upload’ button to the right.
The ‘File Properties’ section displays the title, alt text, size, type, and image path.
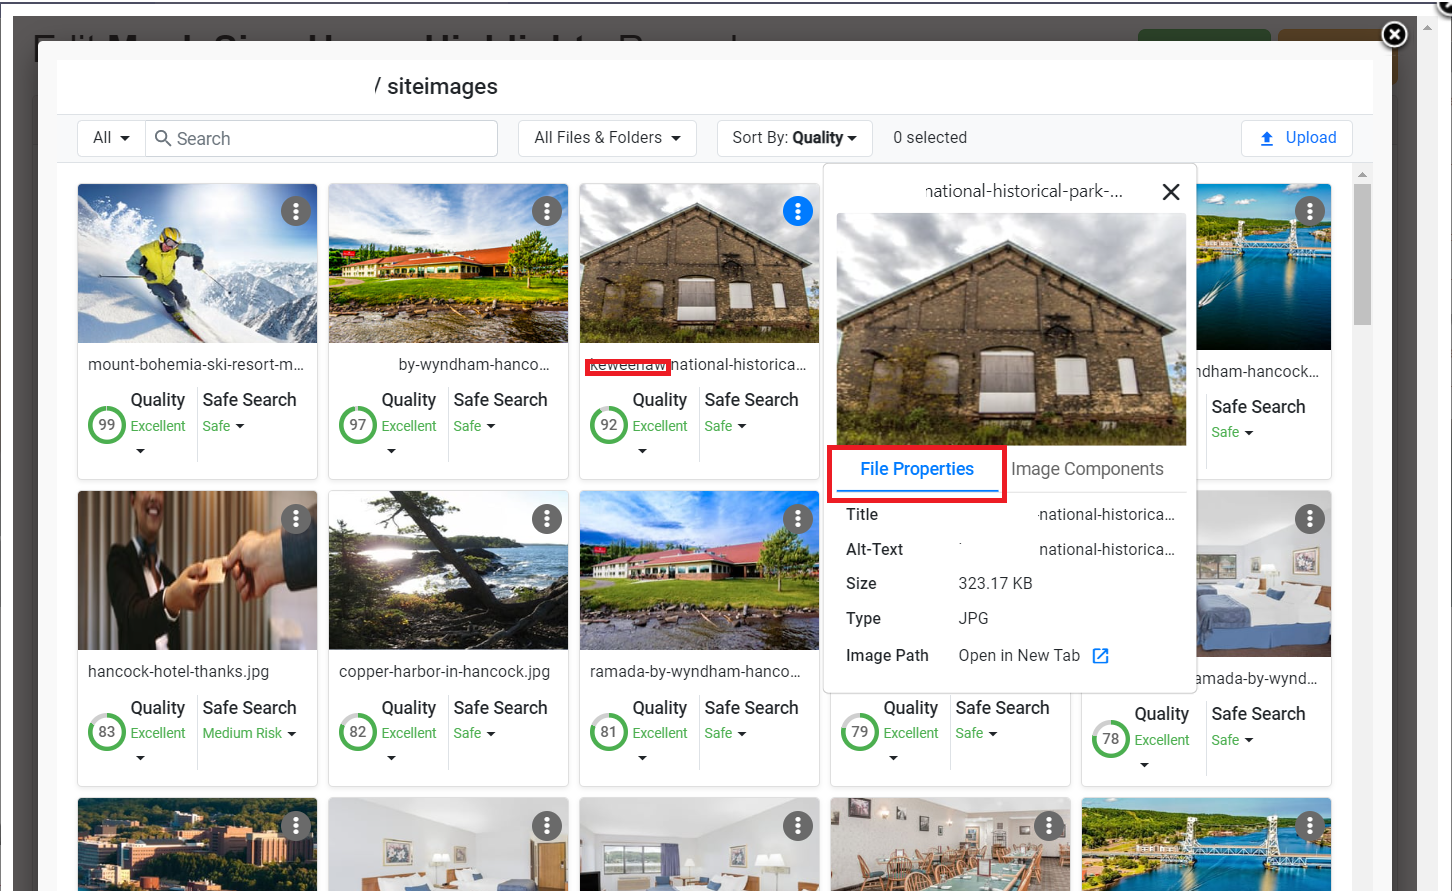
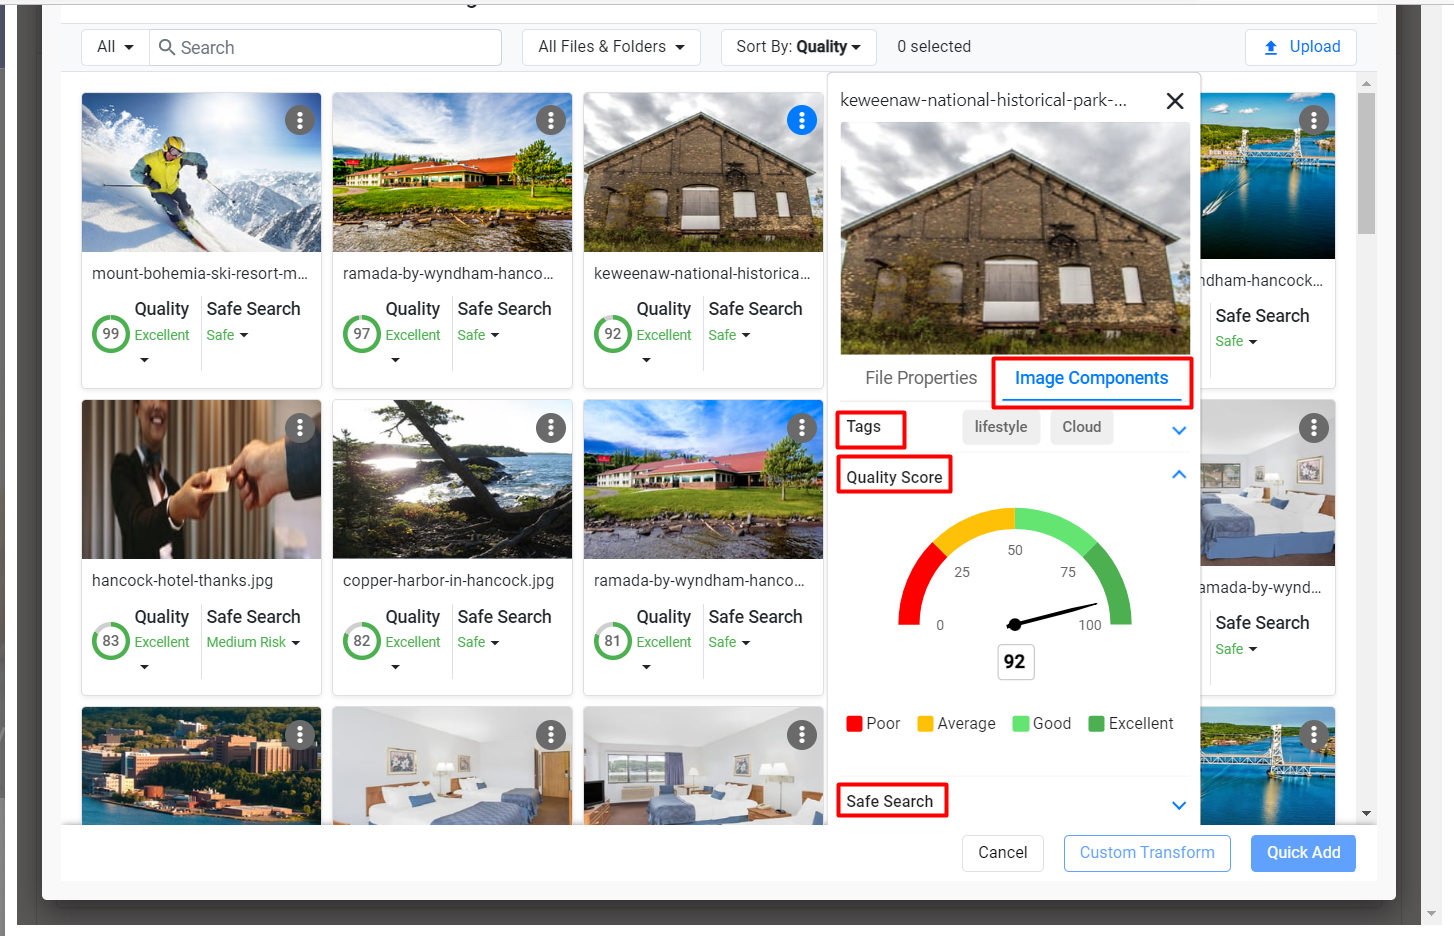
Step 7: The ‘Image Components’ displays tags derived from the AI analysis of the image, the quality score of the image and safe search data.
Step 8: Select an image by clicking on it.
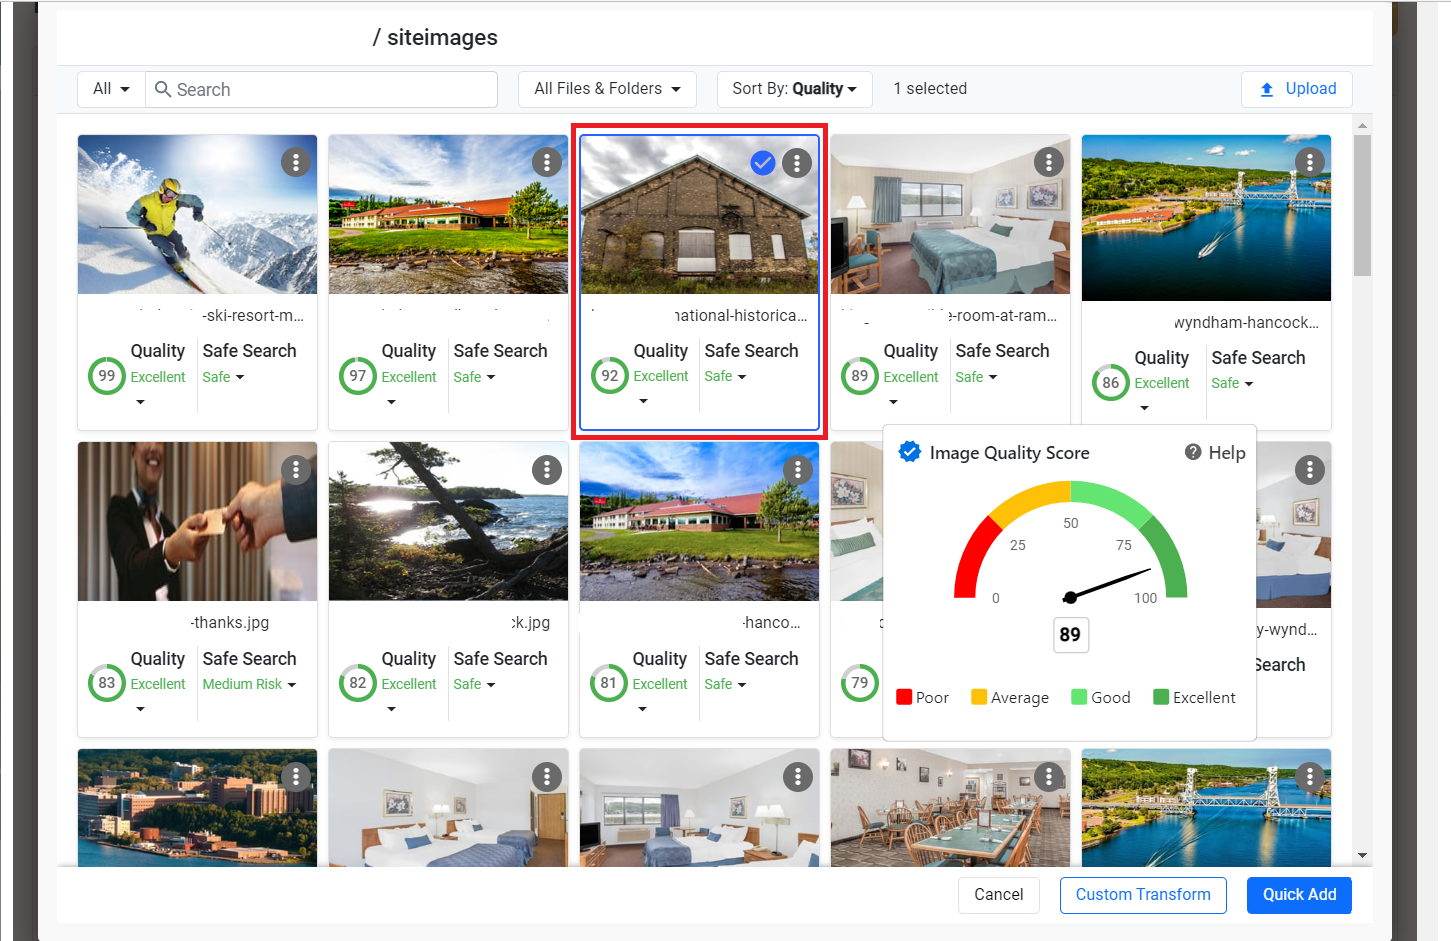
Step 9: You can select multiple images by simply clicking on them.
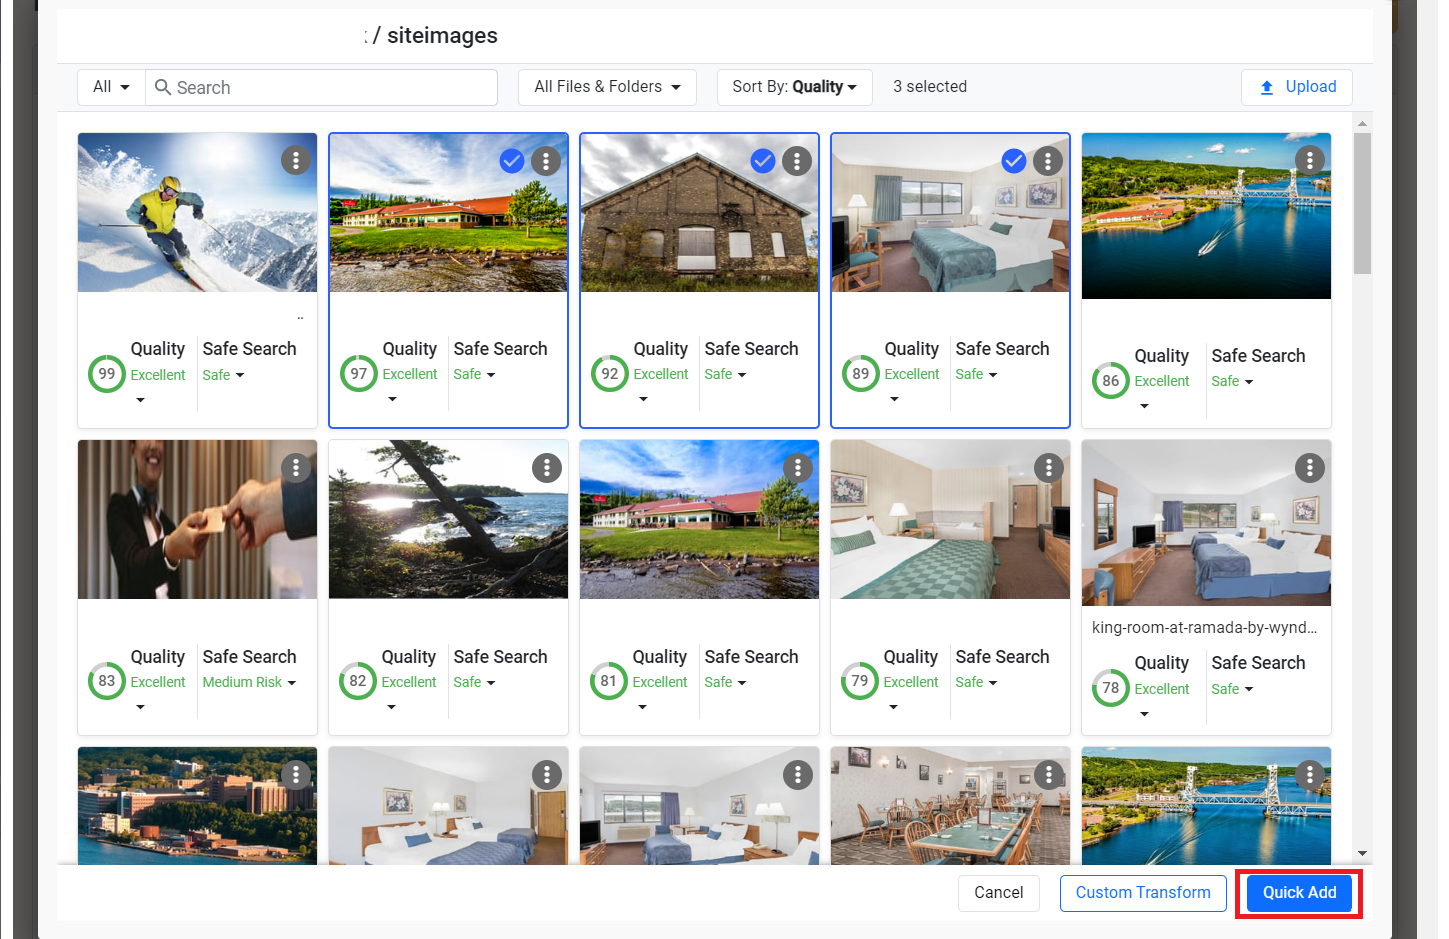
Step 10: Once you have selected the image you can choose to either ‘Custom Transform’ or ‘Quick Add’ the image. The Custom Transform option allows you to resize and crop the image. You can select between three sizes for the image; large, medium and small. After making the changes click on ‘Save’.

Step 11: If you choose to ‘Quick Add’ the image, it will be added to the webpage section in the most optimal way determined by the Digital Asset Manager.
Open Graph (OG) Tags on Milestone Page Studio
Opportunity: Social media users are bombarded with thousands of links daily, to stand out in the crowd you need to make sure your links look different and provide the user with some basic information about the link. Open Graph tags allow you to control the way your links appear when shared on social media, this can drastically improve your click-through rates.
Solution: Milestone CMS’ Page Studio creates OG tags for your pages, so that when they are shared they contain images and descriptions. Allowing users to view the basic information about a page before clicking on it.
After creating a page on Milestone Page Studio, when you try to share the link on social media it will automatically carry all the required OG tags.
Milestone Insights
Automated Insights in Digital Presence Report (DPR)
Opportunity: Having a comprehensive presence across the digital landscape is paramount when it comes to an effective digital presence strategy. Ensuring that your digital assets are appearing for relevant queries requires monitoring and reporting. A report that displays comparative data with actionable insights saves time and effort across the board and ensures you are optimized for search at every front.
Solution: Milestone’s Digital Performance Report provides actionable insights so that you know the steps you need to take to rank well on search and reach your customers no matter where they are looking for you.
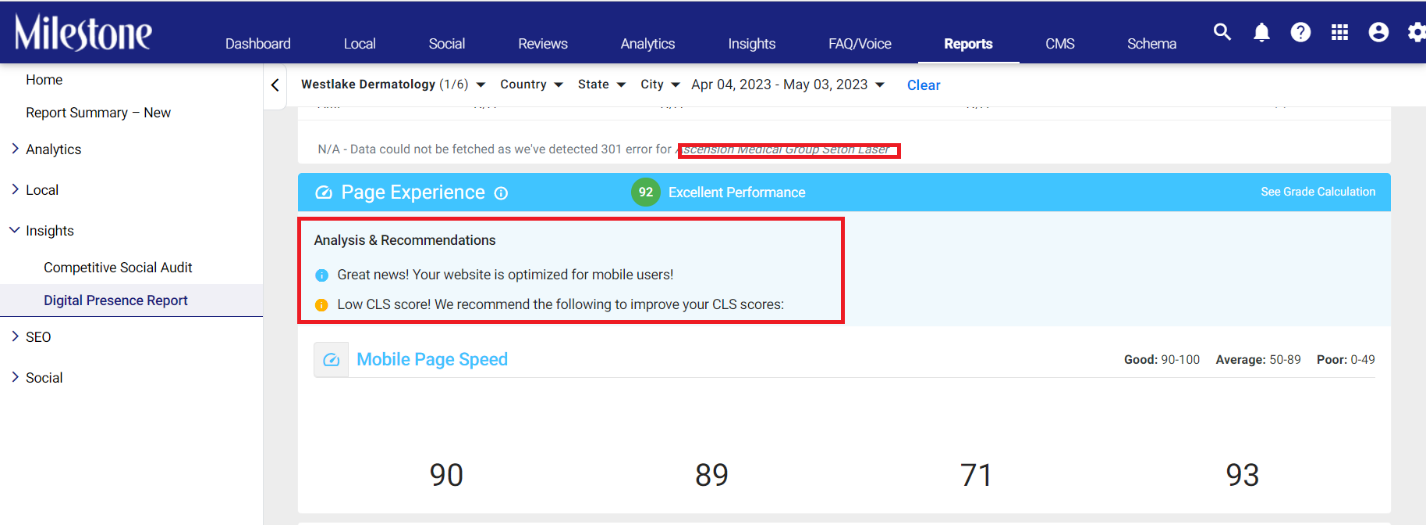
Path: Milestone Reports > Insights > Digital Presence Report
Step 1: Click on ‘Insights’ in the left navigation panel of Milestone Reports.
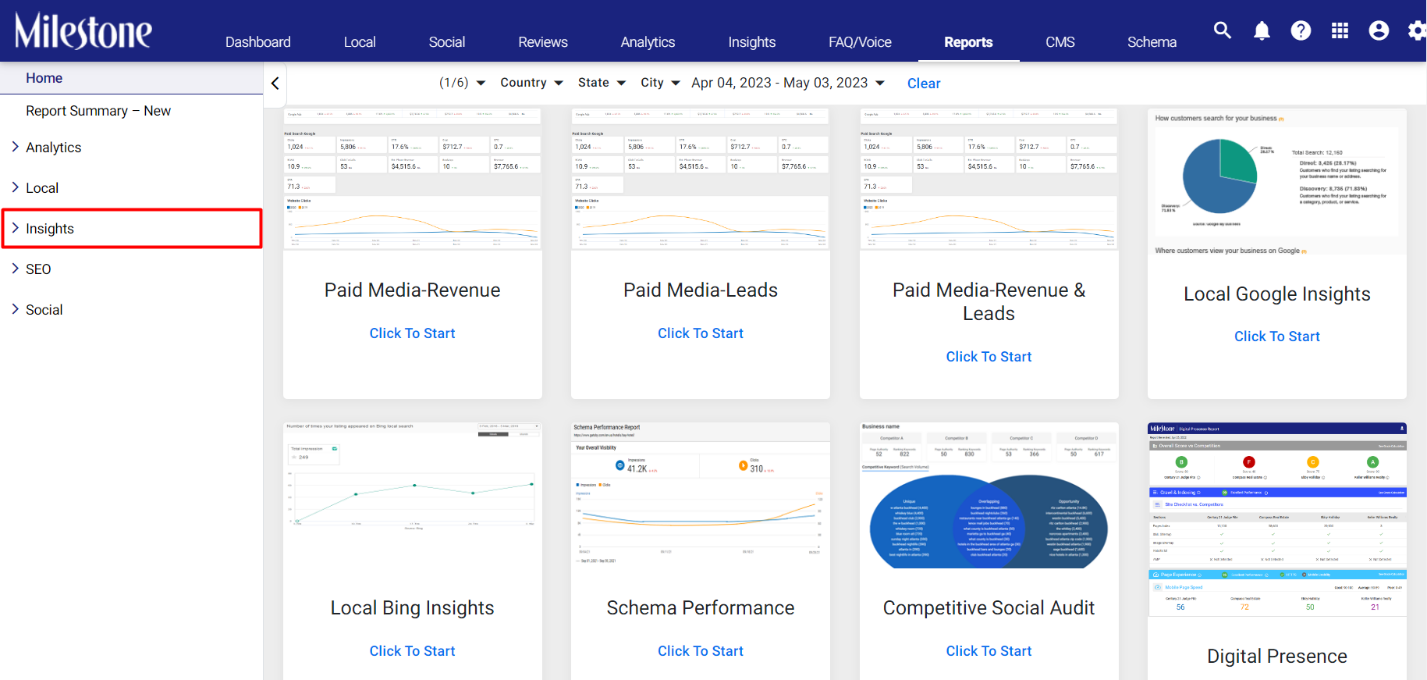
Step 2: Select ‘Digital Presence Report’ from the expanded menu.
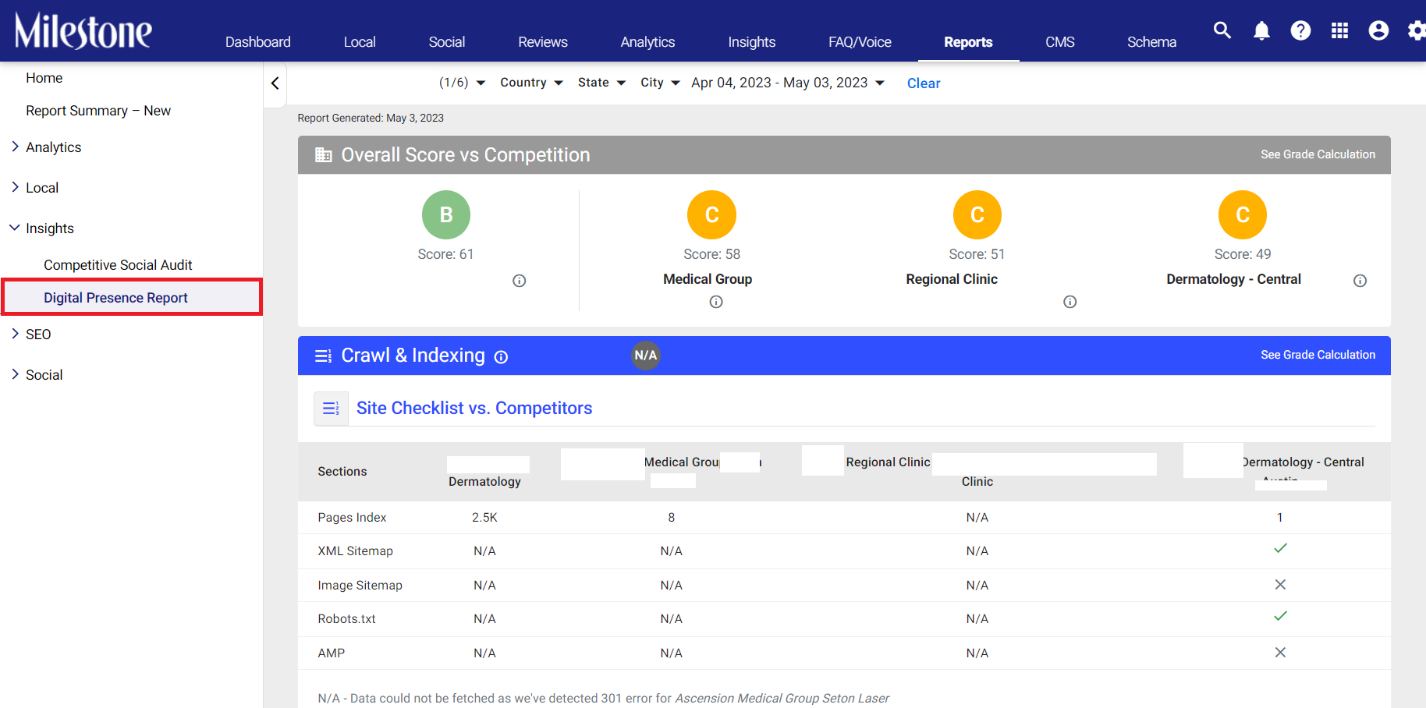
Step 3: The ‘Analysis and Recommendations’ sections provide actionable insights so that you can optimize your presence across channels.
Milestone Schema Manager
Global Schema Maintenance
Opportunity: Updating schema across multiple web pages is a time-consuming task, and redundant when it comes to schema that appears across web pages. Declaring global schema applies schema across all referencing or associated webpages for webpage elements that remain consistent across your website. For example, website navigation elements remain consistent across your website, and you can use a single web page to declare schema for website navigation elements across all the web pages of a website. But if there is a change to these website navigation elements it can be time-consuming and redundant to individually update the schema for each webpage.
Solution: Milestone Schema Manager lets you update globally declared schemas across all the referencing web pages in one go. This drastically reduces schema deployment and maintenance times, ensuring your schema is always up to date with your website content.
Path: Milestone Schema Manager > Tag/View > Tag Schema
Updating Global Schema across URLs
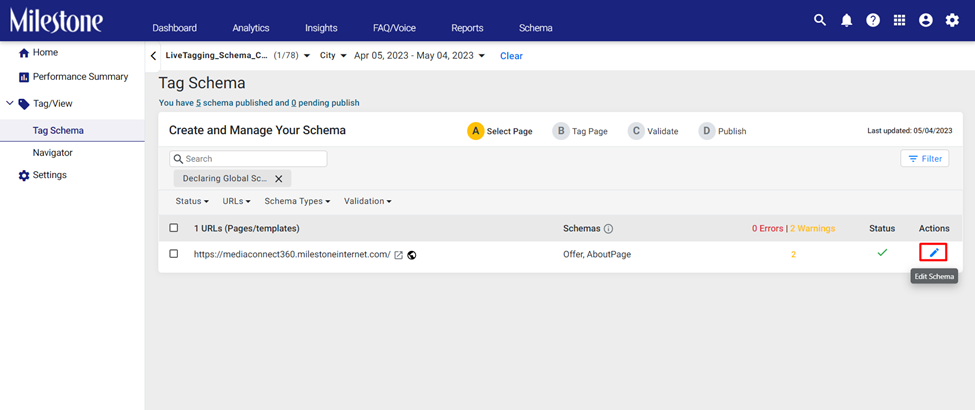
Step 1: Click on ‘Tag/View’ in the left navigation panel of Milestone Schema Manager.
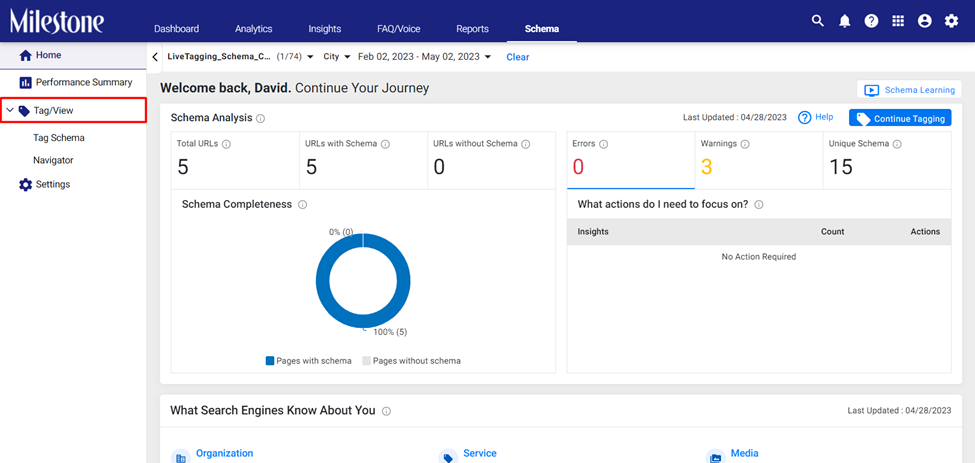
Step 2: Click on ‘Tag Schema’ for the expanded menu.
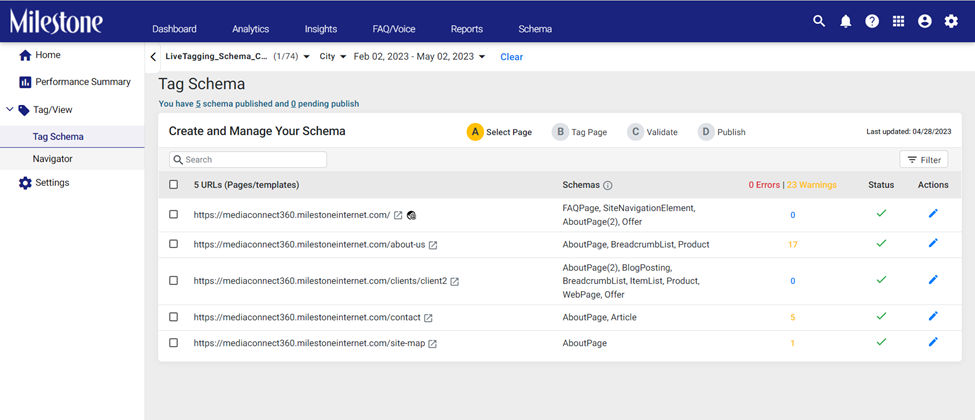
Step 3: URLs that are declaring global schema have a ‘globe’ icon corresponding to them. Click on the ‘Edit’ icon corresponding to the URL declaring global schema in the ‘Actions’ column.
In this case, the AboutPage schema is declared across all the URLs

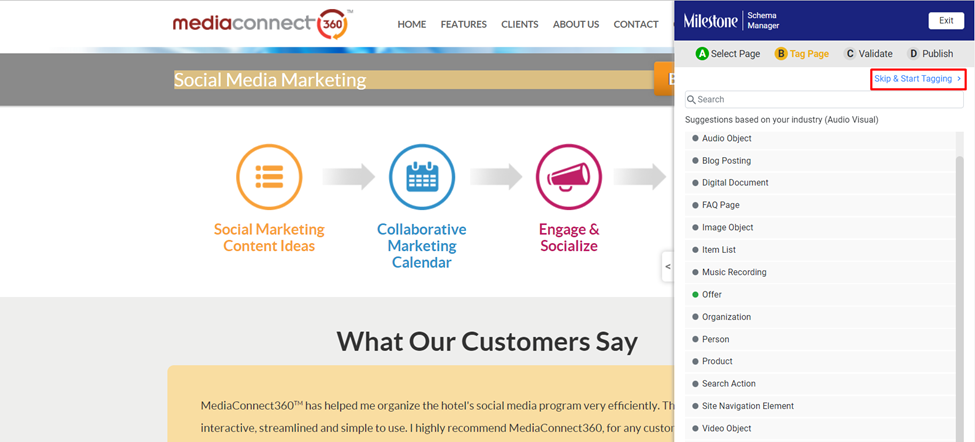
Step 4: You can skip the suggested section by clicking on ‘Skip and Start Tagging’.
Step 5: The icon to corresponding to the schema denotes that it is a Globally Declared schema.
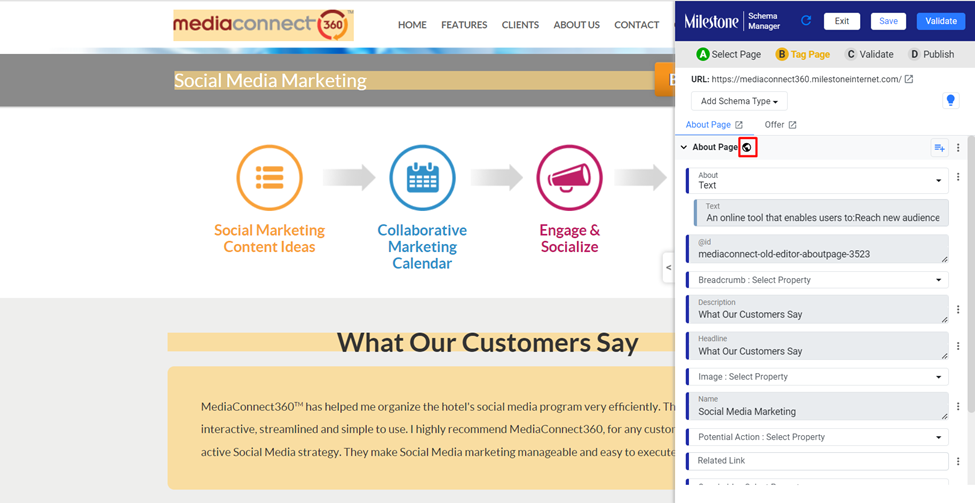
Step 6: You can go ahead and make changes to this schema, in this case we will add an alternate name property to the schema.
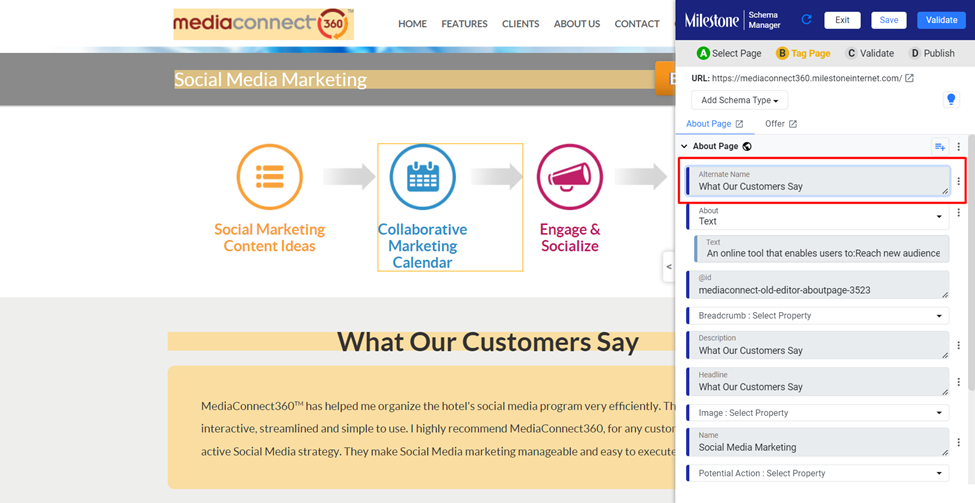
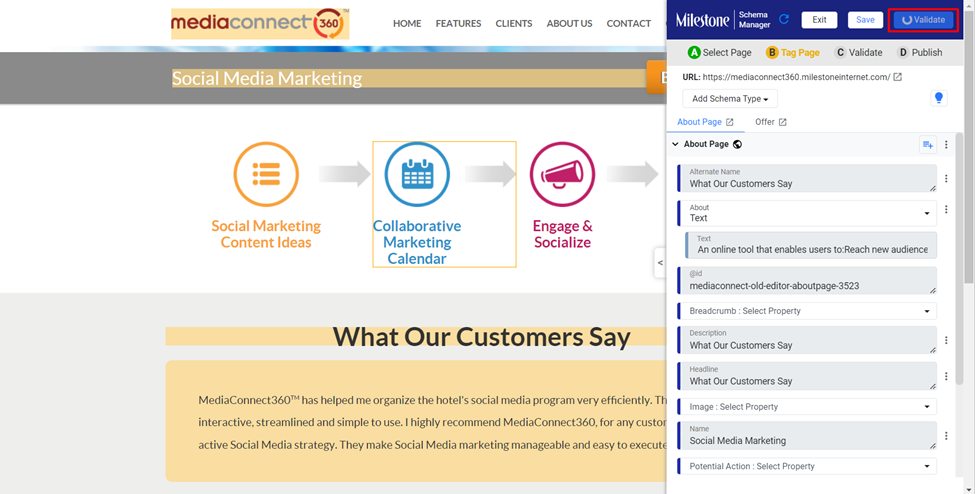
Step 7: Once you have added the new property or made changes to the schema properties click on ‘Validate’.
Step 8: You can see that the ‘Alternate Name’ property has been updated to the schema.

Go ahead and publish the updated schema.
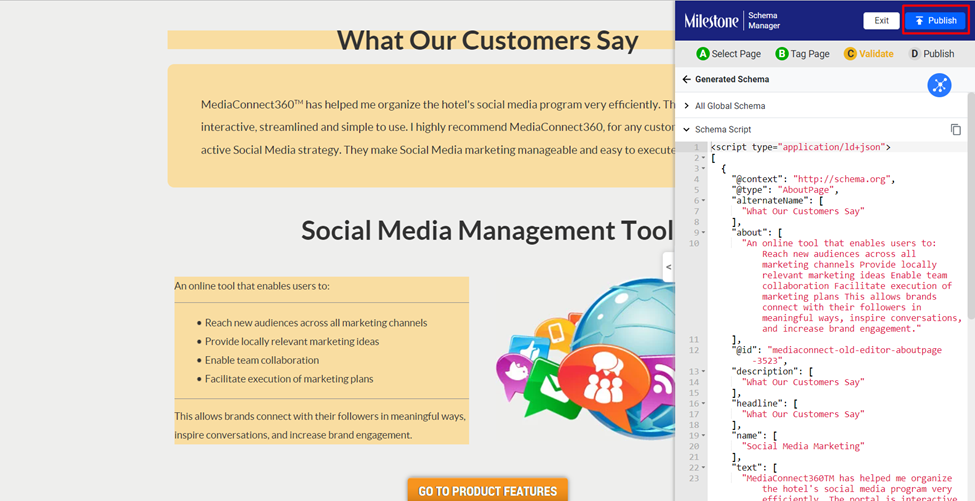
You will be prompted that this will affect the schema within referencing URLs as this is a globally declared schema. Click on ‘Publish’ if you wish to continue.

Successful publish.
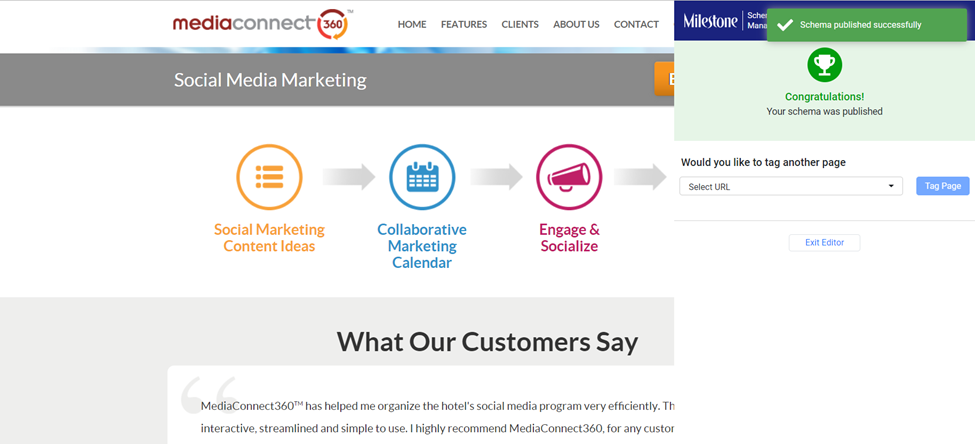
You will also receive an email notification of the actions carried out by you.

Step 10: Once the schema has been successfully updated, you can view the updated URLs’ schema in the ‘Navigator’.
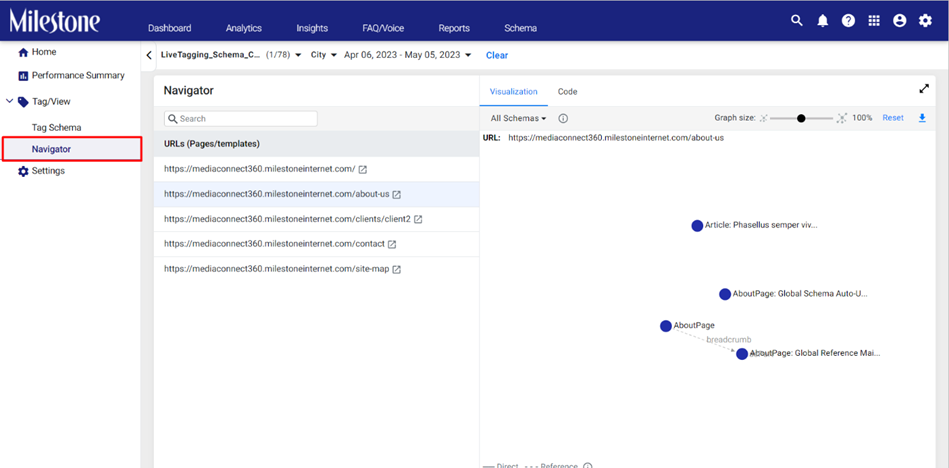
Step 11: Select one of the referencing URLs.

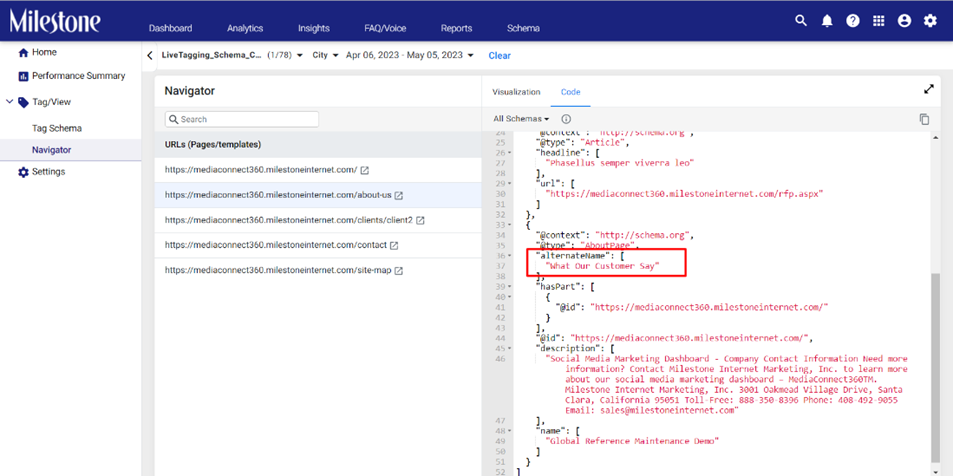
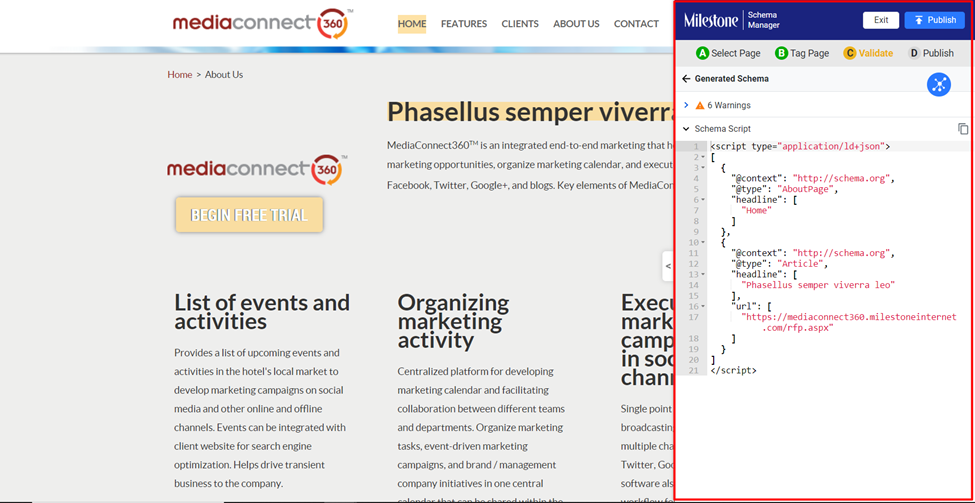
Step 12: Click on ‘Code’ to the top to view the schema. Here you can see that the property has been updated from the Global Reference Schema.
Once the action is complete you can download a status report by clicking on the link within the email.
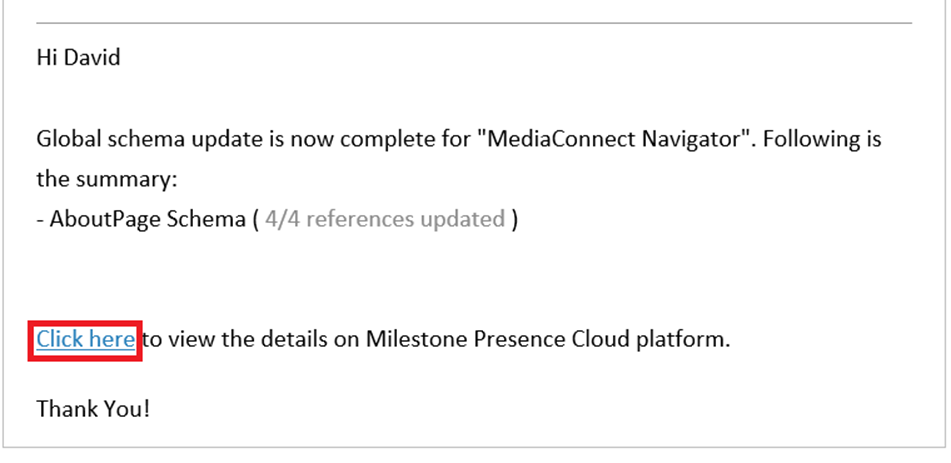
You will be redirected to Milestone Reports. You can use the three-dot menu corresponding to the report to download the spreadsheet.
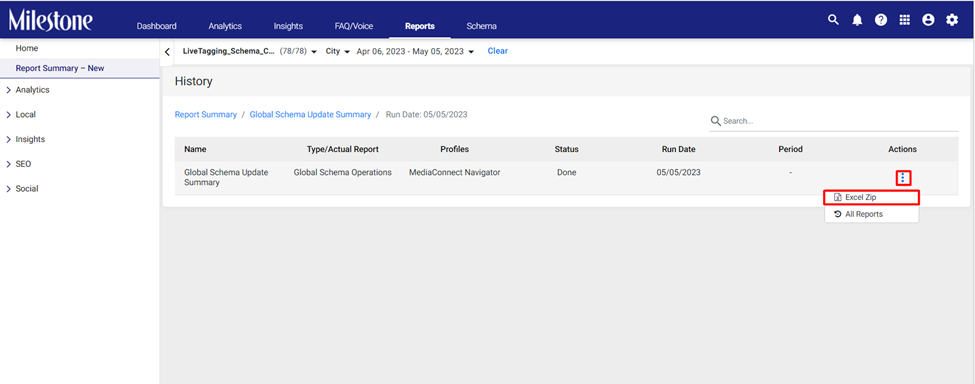
The report displays the affected URLs and the schema publishing status.

Deleting a Global Schema
If you decide to remove the Global Reference schema it will automatically be removed from all referring URLs as well
Step 1: Open the URL that is Declaring Global Schema. You can find these URLs by using the filters.

Step 2: Click on the ‘Edit’ icon corresponding to the URL.
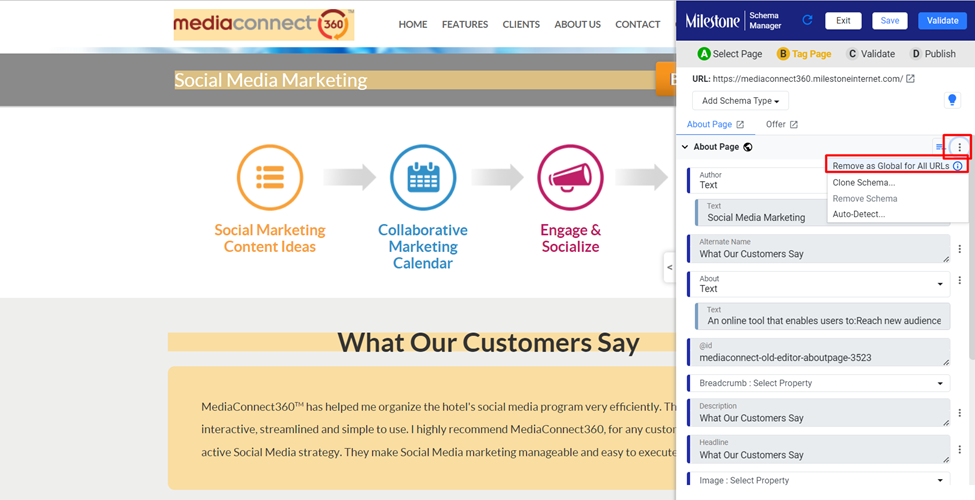
Step 3: Click on the three-dot menu corresponding to the schema and select ‘Remove as Global for All URLs’.
Step 4: Validate the update to the schema.

Step 5: Click on ‘Publish’ to carry out the action.

Step 6: You will be prompted to the number of referencing URLs that will be affected by this action. Click on ‘Publish’ to complete the action.

Successful deletion

Please note: This method can be used to update both Global Schema and Global Reference Schema
Milestone Local
New KPIs for Google Insights
Opportunity: Google’s API has undergone changes and provides more in-depth data about your Google Business Profile’s local performance.
Solution: Milestone Local provides new KPIs to monitor the performance of Business Conversations, Business Bookings, and Menu and Food Orders. These KPIs let you know how these features in the Google Business Profile are being utilized.
Path: Milestone Local > Local Insights > Google Insights
Step 1: Click on ‘Local Insights’ in the left navigation panel of Milestone Local.

Step 2: From the expanded menu click on ‘Google Insights’.
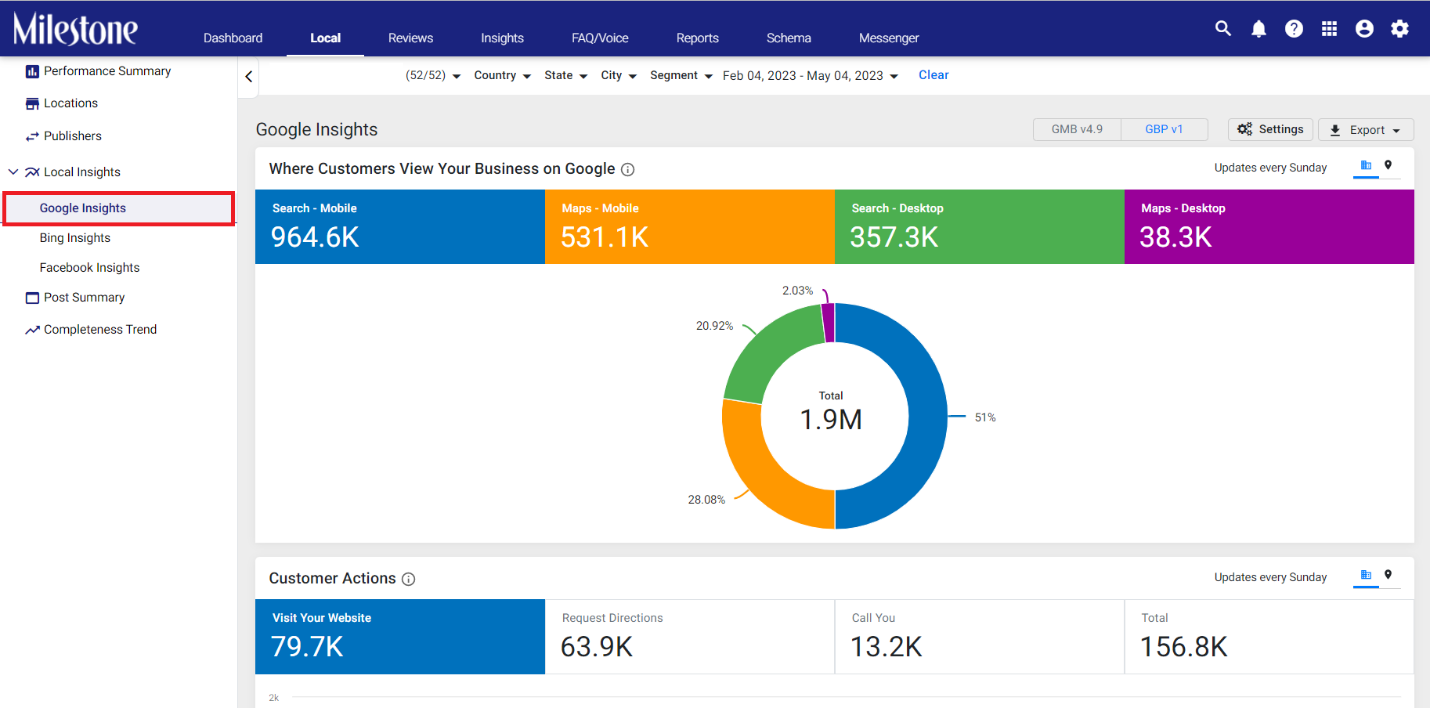
Here you can view new widgets for the following KPIs:
Business Conversations:
The Business Conversations widget displays the number of messages sent to your Google Business Profile over a period.
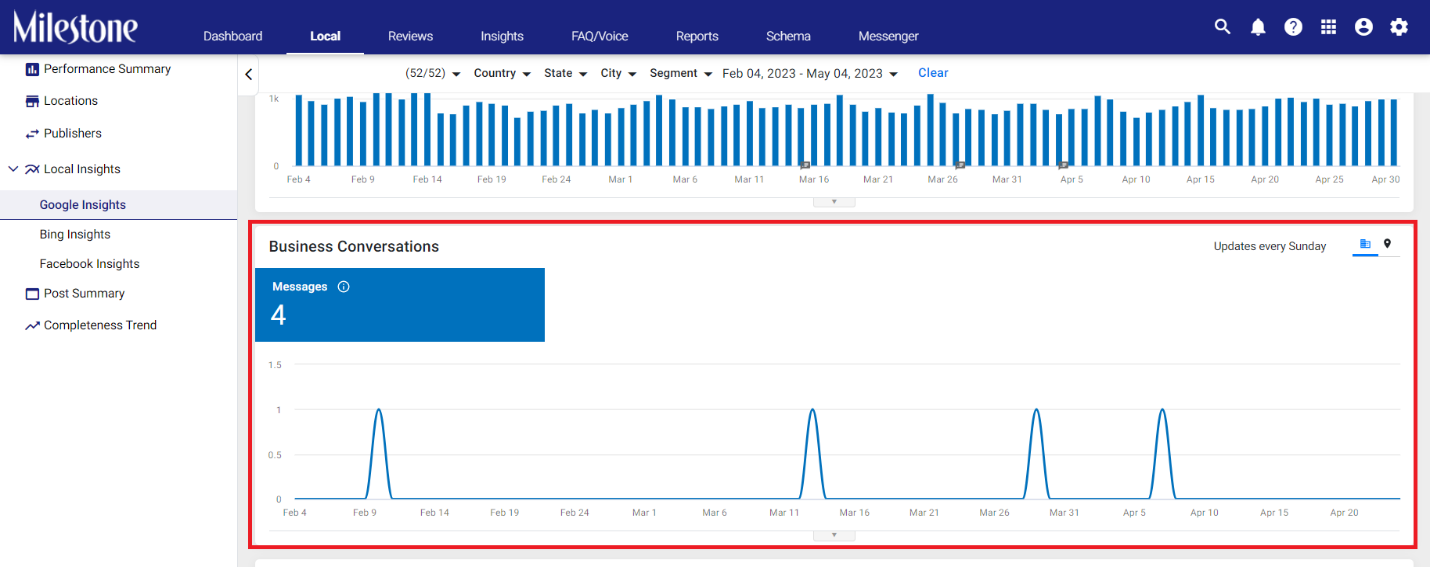
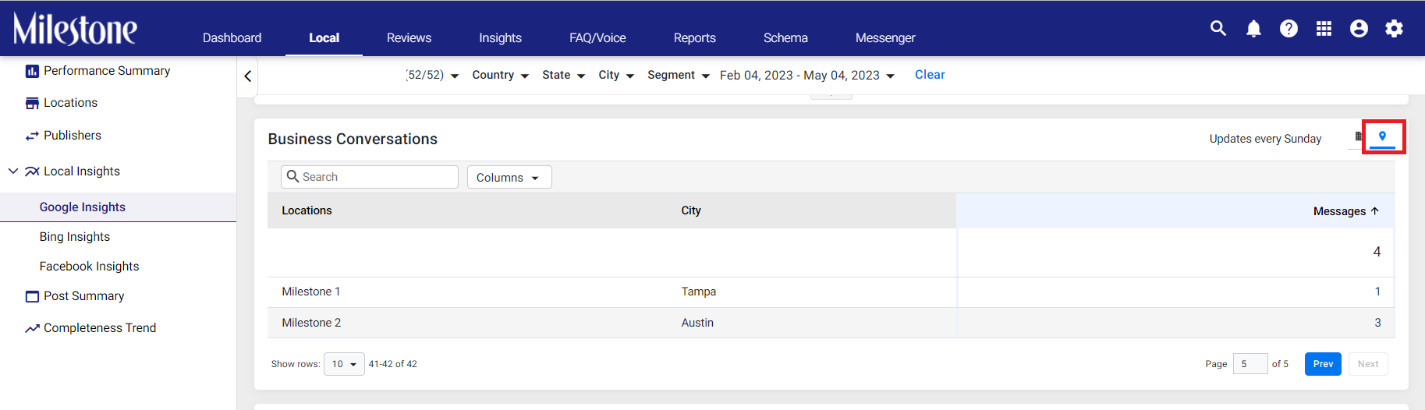
You can view local-wise data for Business Conversations by clicking on the locations icon to the top right of the widget.
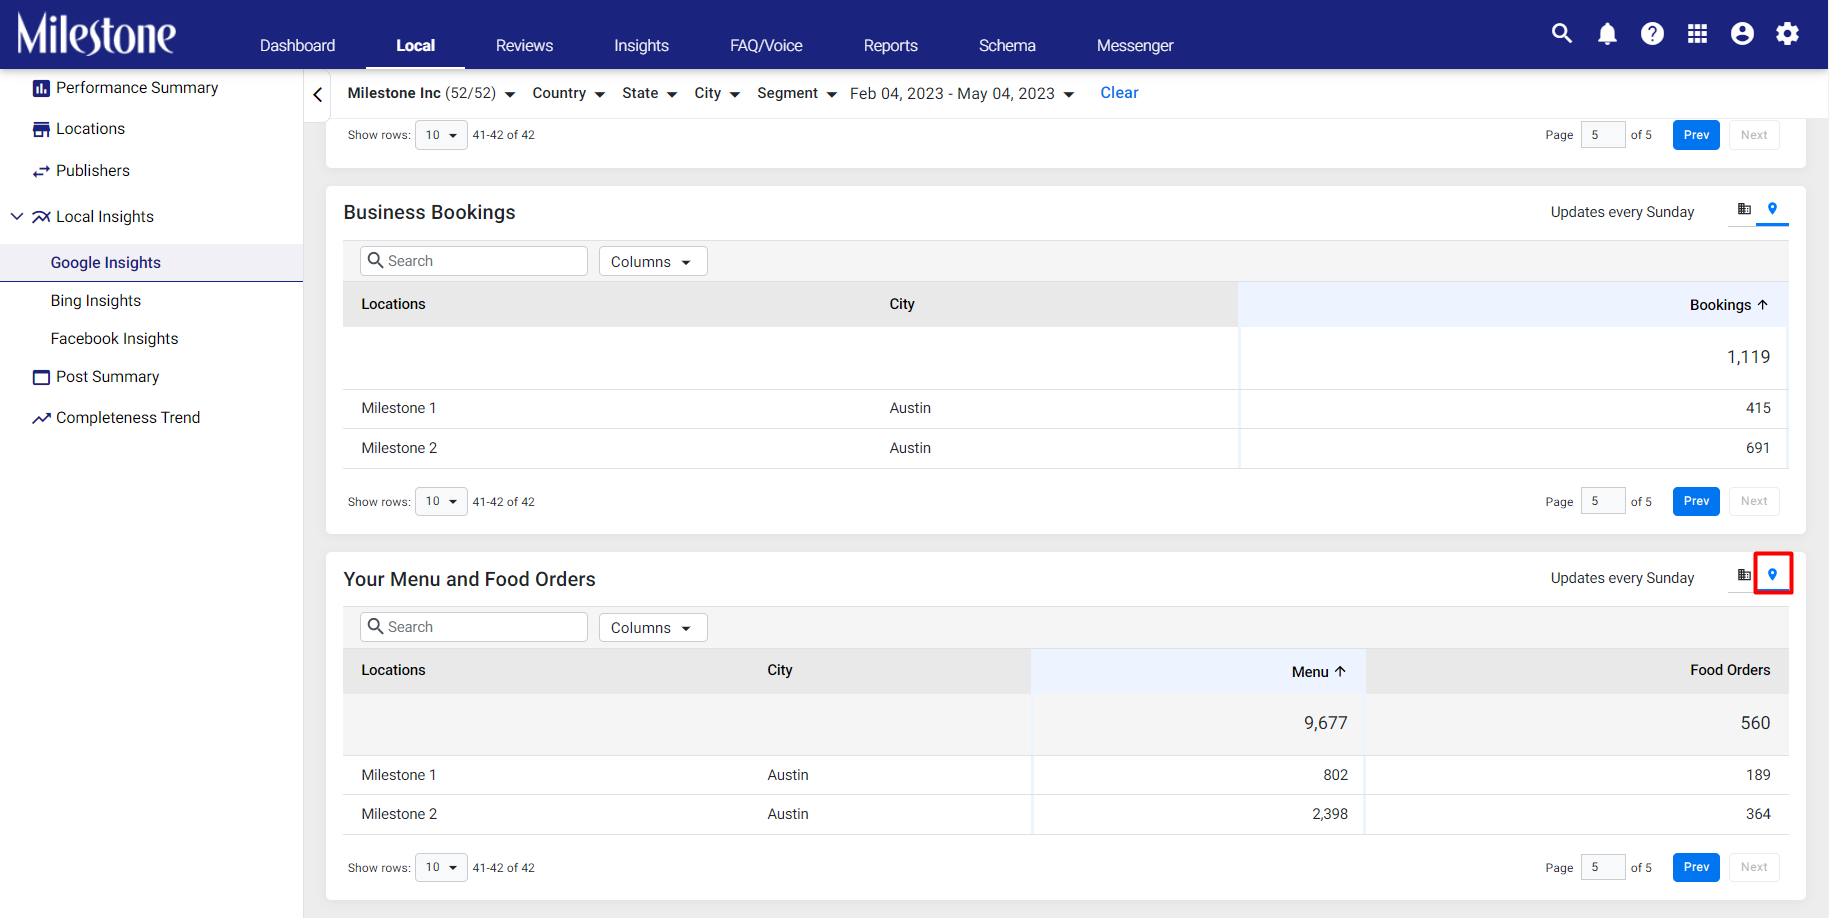
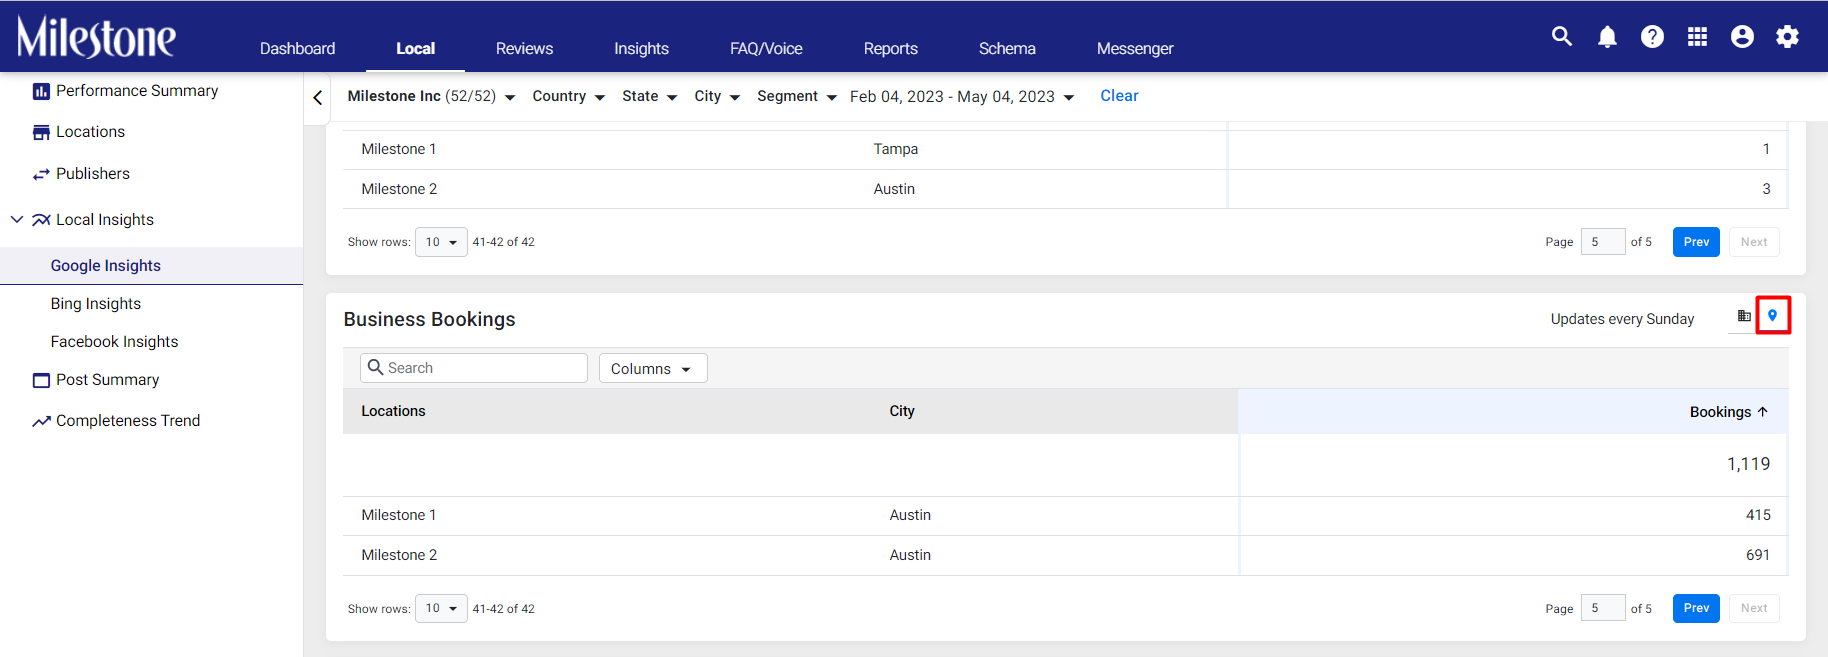
Business Bookings:
The Business Bookings widget displays the number of bookings your business has received view your Google Business Profile over a period.
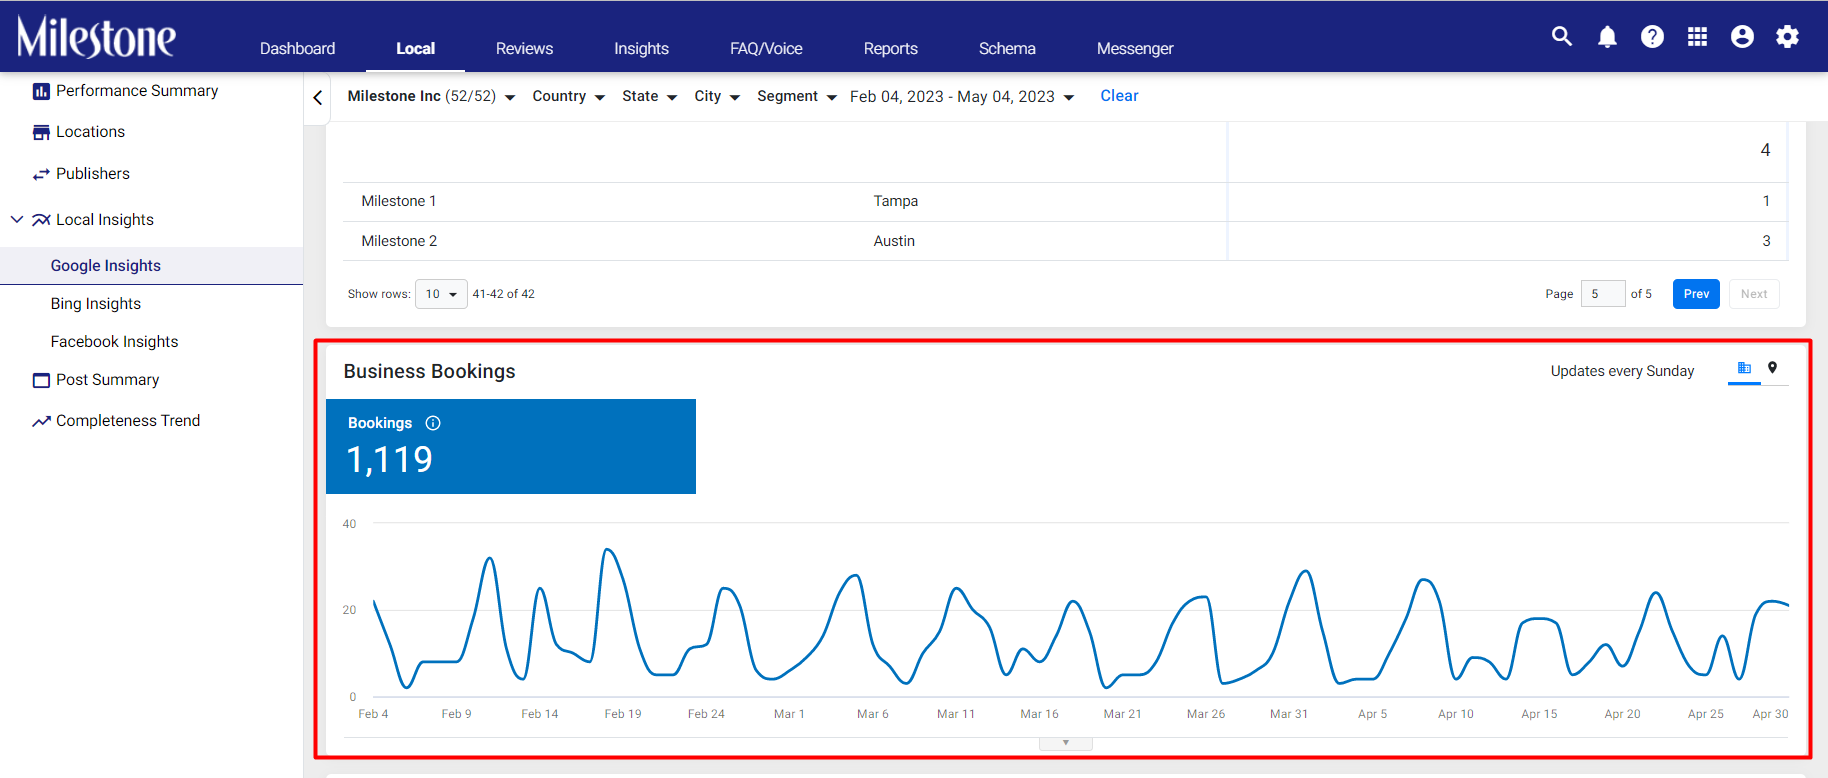
You can view location-wise booking data by clicking on the location icon to the top right of this widget.
Your Menu and Food Orders:
The ‘Menu and Food Orders’ widget displays the number of times your menu was viewed on your Google Business Profile and the number of times orders were placed through this menu.

You can view location-wise data by clicking on the location icon to the top right of this widget. The Menu column displays the number of clicks on your menu and the Food Orders column displays the number of food orders placed view this menu.