Schema Editor Basics
As soon as click on or
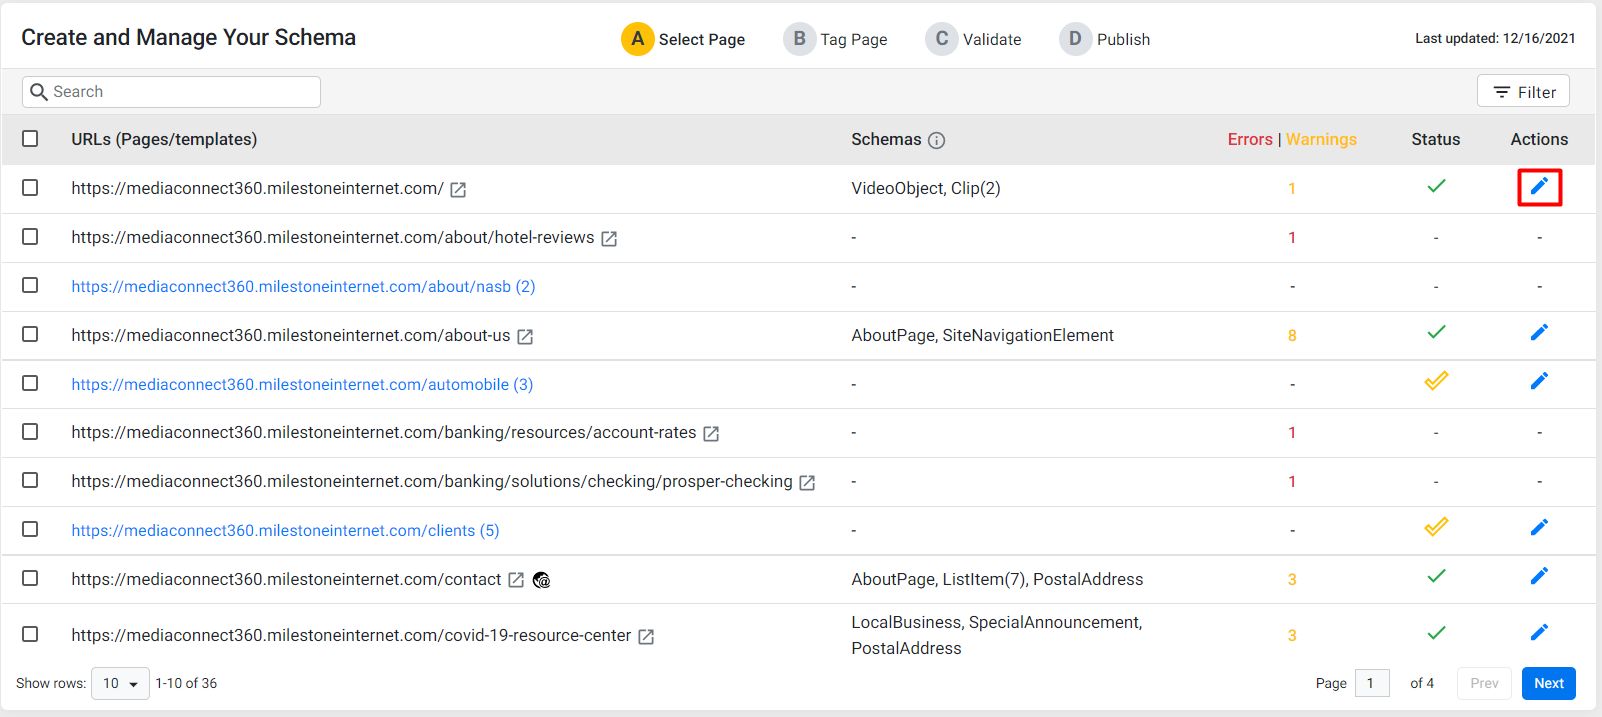
under the ‘Actions‘ column under the ’Tag Schema’ tab, you will be redirected to your website where you will see the Schema Editor.
Schema Manager Editor Welcome Screen
The first-time user will see a set of the most prominent schemas under the ‘Choose a Schema type to start with’. The user can choose from the list of schemas displayed or use the search bar to find the most relevant schema to start with.

Moving the Schema editor on the page:
You can use the drag and drop feature to move the schema editor across the page to have better visibility of the website items that you are tagging. Click on the 4 dots to drag and drop the editor. You can also move the editor from left to right or vice versa by clicking on the arrow.

Viewing all the schema types that you have added to the page:
If you have added multiple schema types on the editor, use the arrow to navigate (left or right) to view all the schema types. In addition, if you have added 2 of the same schema types, a number will be against the schema type. In the example below, the schema type Postal Address was added twice.

Recommended properties and adding properties
Just like how the editor displays a list of prominent schema types for first-time users when you choose a schema type, the editor automatically displays the recommended properties. You can even choose to add a property.

Click on the 3 dots against the property and you have the option of removing the property, add a property clone, and using advanced configuration such as X-path.

Highlighting tagged elements on the website
The property that you are currently tagging will be highlighted in the brightest color (bright orange here) while elements that are already tagged will be in a duller shade for the user to distinguish what elements of the page have been already tagged.

To remove a tagged data, click on the 3 dots by the property and click on ‘Remove tagged data’.

Advanced tagging of properties
Against some properties, you will see a drop-down to further go into detail as to what you wish to tell the search engine. By clicking on it, you will have options such as this.

By choosing ‘Thing’, you have to then describe what the ‘Thing’ is. To do so, choose a ‘Thing type’.

Now for example, if you chose ‘Accommodation’, then you will have to fill in the required details as in the image.
