Managing redirects
In this article, we’ll show you how to manage your 301 redirects so you never lose traffic to your website even if you have taken down web pages.
Accessing 301 redirects
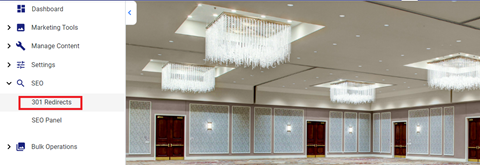
On the website editor screen, click on the left-hand navigation, click on ‘SEO’ and then choose ‘301 redirects’.
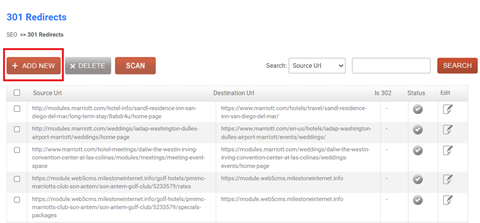
As soon as you land on the page, you’ll see a list of existing 301 redirects. Use the filter options (source or destination URL) and enter the URL to locate a URL quickly. Click on ‘search’ to carry out the function.

For existing 301 redirects, you can view the current status and even choose to edit using the edit icon. You can also choose to delete or scan for redirects. To delete, first, select the URL and click on delete.

Adding a redirect
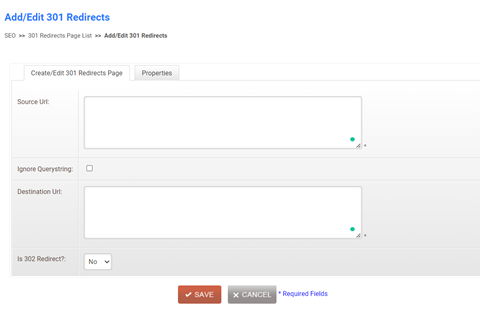
Now to add a 301 redirect, click on ‘Add New’.
Enter the source URL, choose ‘Ignore query string’ to ensure you’re maintaining only the source URL when redirecting, enter the destination URL (New redirect URL), and click on ‘Save’ to confirm the 301 redirects.
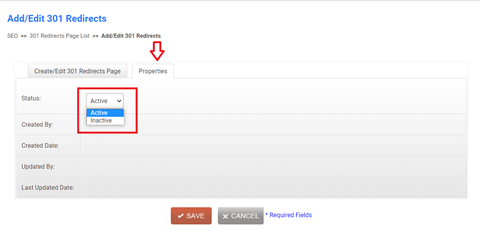
Setting 301 redirect status
On the ‘Properties’ tab, you can choose the status of the redirect – Active or Inactive.