Local Onboarding Requirements
Overview
To ensure a smooth and efficient onboarding process for your client’s local presence management, agencies should gather and share essential business information and access credentials ahead of time. This guide outlines the key resources and steps needed to begin managing listings, profiles, and performance effectively across channels like Google, Facebook, and more.
Background
Effective onboarding begins with a complete and accurate dataset. From business listings to account permissions, proper setup ensures fast deployment, improved accuracy, and seamless publishing across digital platforms. Agencies should work with their clients to secure this information early in the engagement.
Who is this for?
This checklist is designed for agencies onboarding new clients for local presence or reputation management. It ensures that the agency can connect, manage, and publish across platforms like Google Business Profile, Facebook, and others without delay.
Step-by-Step Instructions
Business Information Required
Confirm and collect the following information from your client:
- Business Name
- Address Line 1 & 2, City, State, Country, Zip Code
- Primary Phone Number
- Website URL
- Business Category
- Operating Hours
- Short Description and Long Description
-
Images:
- Business Logo
- Cover Image
- 5 Additional Photos (interior, exterior, team, or products)
Google Business Profile Access
Access to the client’s Google Business Profile (GBP) is required for listing management, publishing posts, and monitoring performance.
For Single or Individual Business Locations:
Log in to the Google Business Profile: https://www.google.com/business

Select the business to share.
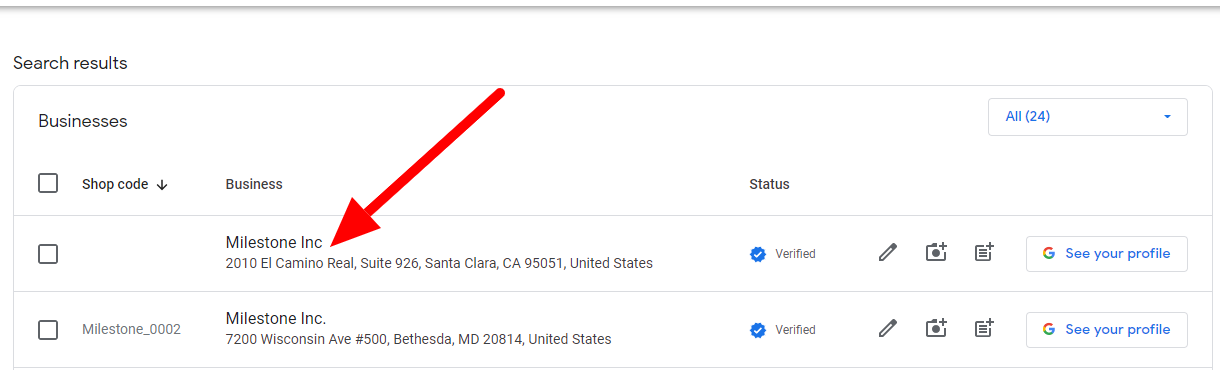
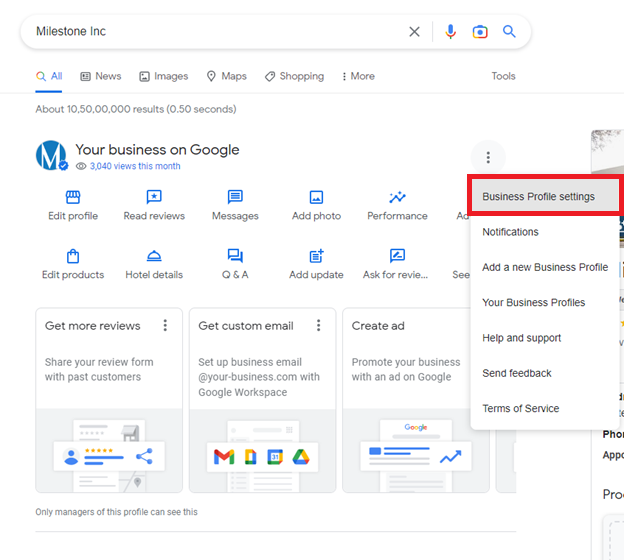
In Google Search, click the three-dot menu next to the business name and choose Business Profile Settings.
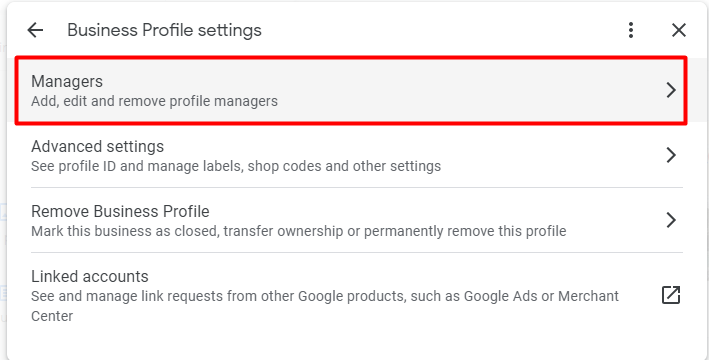
Click Managers.
Click Add and enter the agency’s Business Group ID (provided internally).
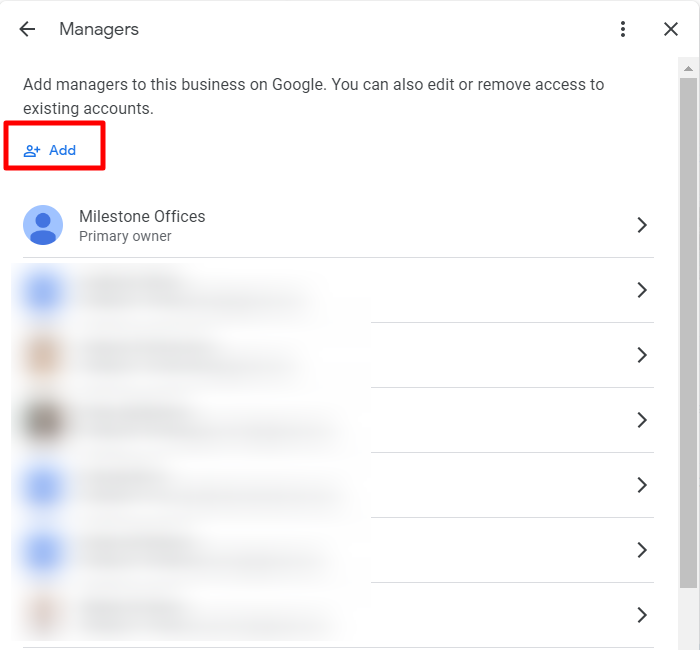
Enter the email address and assign the role as Owner.

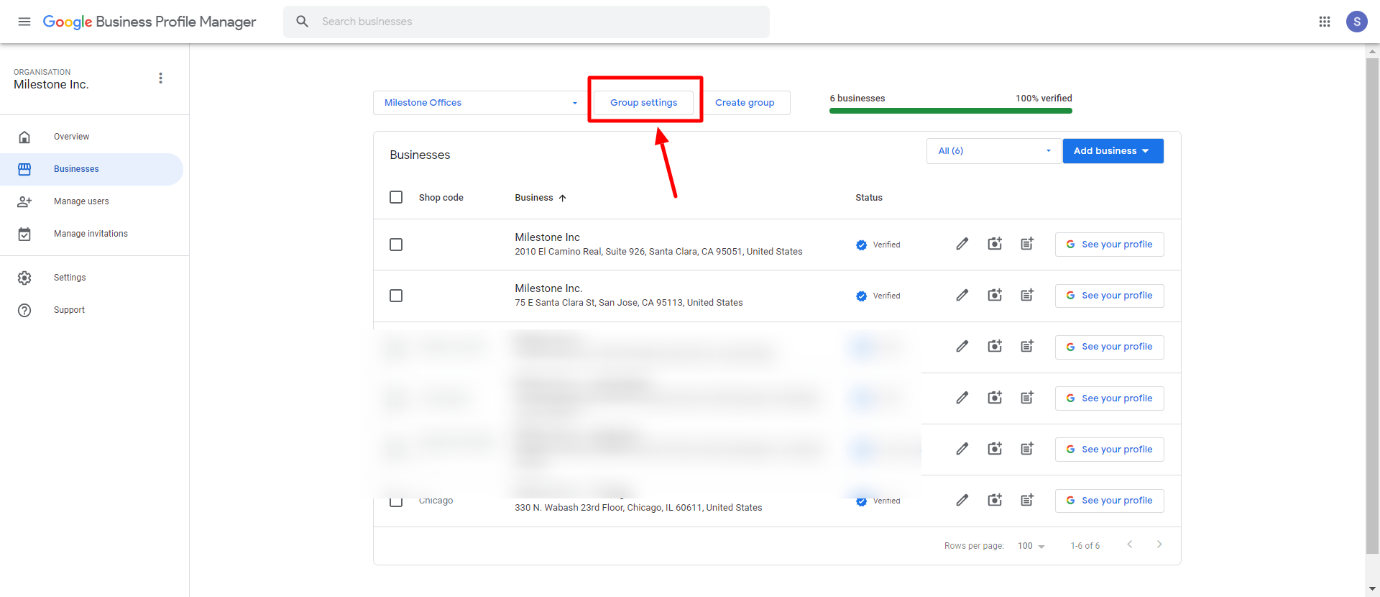
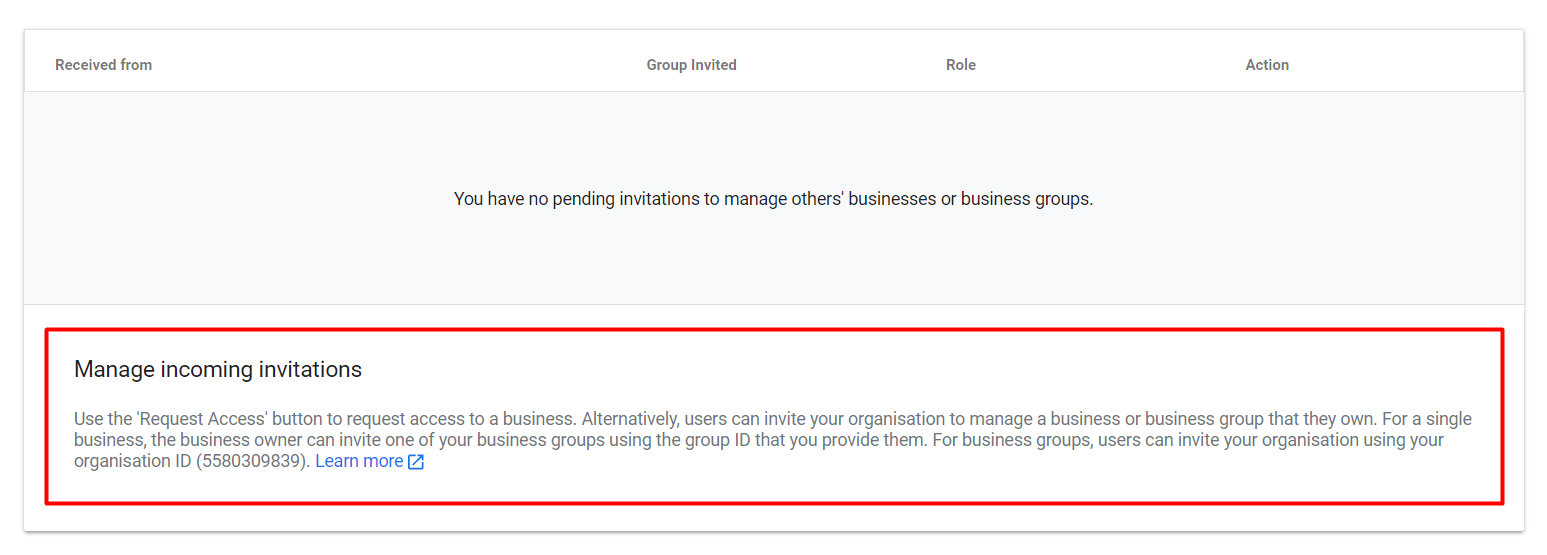
For Business Groups:
On the GBP dashboard, select the appropriate Business Group. Click Group Settings.
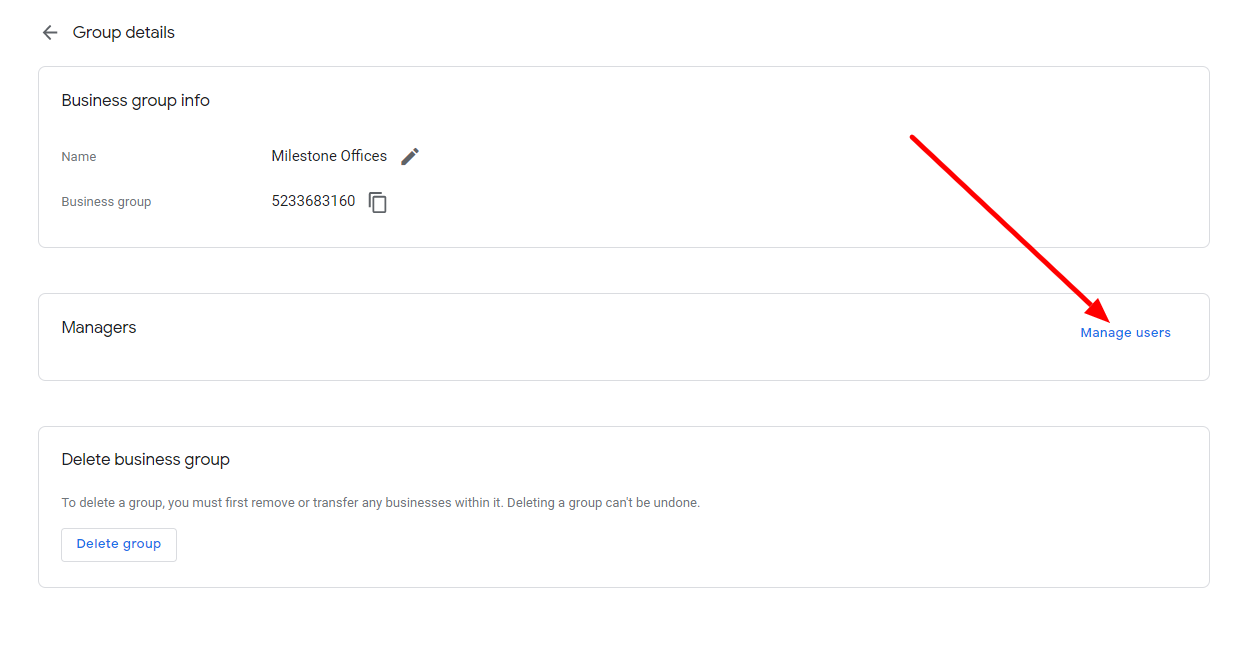
Under Group Details, click Manage Users.
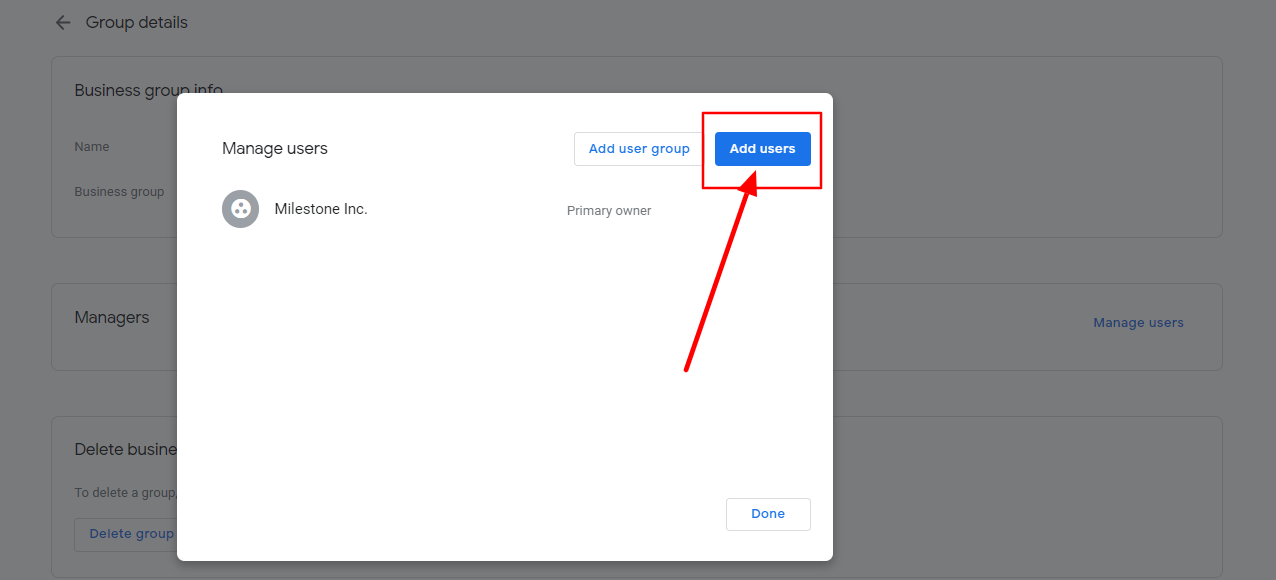
Click Add Users.
Enter the agency’s Group ID (provided internally) and assign the Owner role.
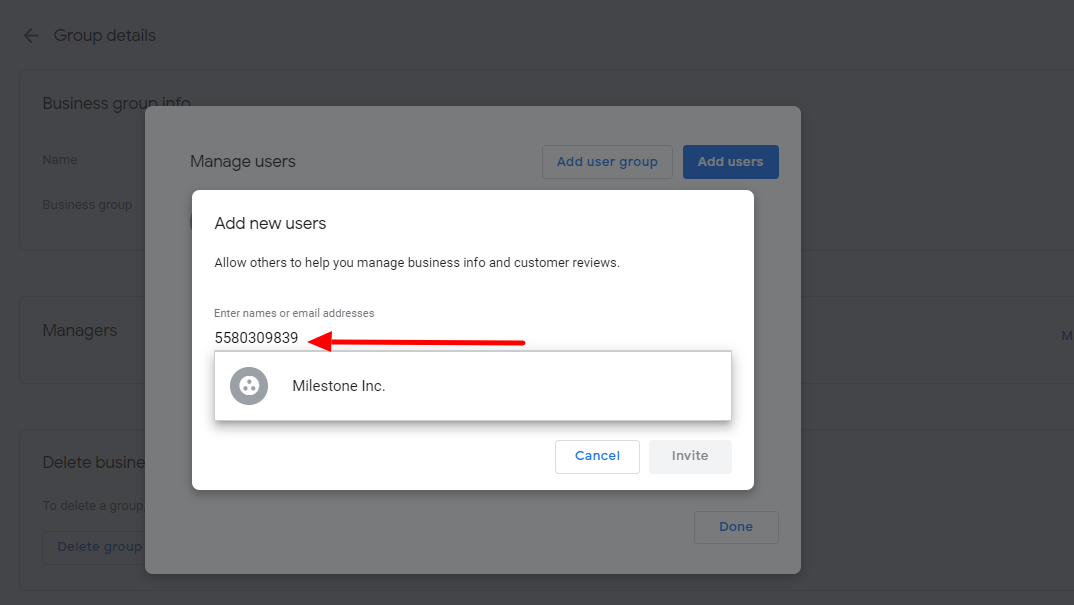

🔎 Note: Use a different ID for single-location profiles and business groups, as each serves a specific access tier.
Google Help Center – Add/Remove Managers
Facebook Business Manager Access
Access is required to manage Facebook pages for posting, insights, and visibility monitoring.
Pre-Conditions:
- The business owner must already have a Facebook Page created.
- Facebook Pages must be added manually by the business owner.
- Agencies cannot create Facebook pages on behalf of clients.
Step-by-Step: Add Agency as Facebook Partner
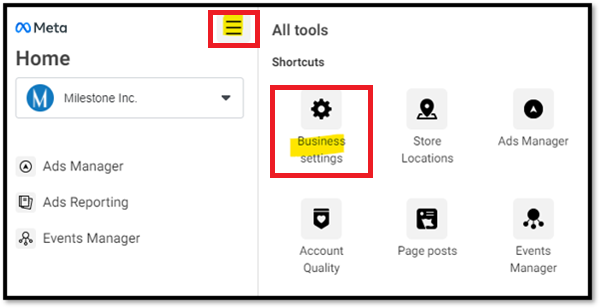
Go to https://business.facebook.com/
From the top-left menu, click Business Settings.
In the left sidebar, under Users, click Partners > Add.

Give a partner access to your assets. Enter the agency’s Facebook Business Manager ID (provided internally).
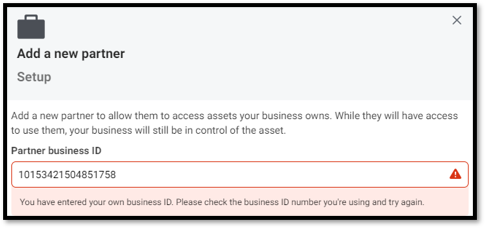
Click Assign Partner.
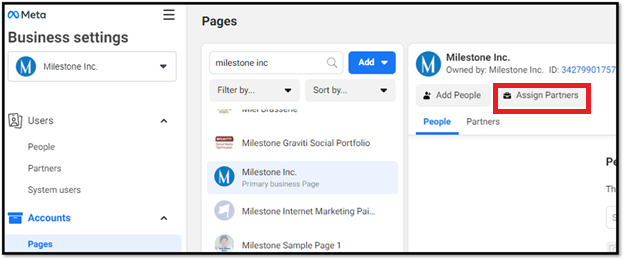
Select the Manage Page permission.

📌 Once added, the agency will accept the partnership invitation to begin managing the page.
Important Notes:
- If the client cannot provide access but has a live Facebook page, agencies may monitor but cannot manage it.
- If no Facebook page exists, Facebook cannot be enabled as a supported channel until one is created.
Glossary
- Business Group ID: Google identifier for managing access to a set of listings under one umbrella.
- Business Manager: Facebook’s centralized platform for managing assets like pages, ad accounts, and permissions.
- Owner Access: Full administrative control is necessary for managing listings or page content.
- Short/Long Description: Text fields that describe the business for profile and post visibility.
- Images: Critical visual assets to enhance search visibility and engagement.
Tips for Agencies
- Collect all required access and business data before launching location or reputation services.
- Clearly explain to clients the importance of assigning proper access levels for each platform.
- Schedule a quick onboarding meeting to walk through access steps with your client if needed.
- Store platform access credentials securely for team use and compliance.