Inventory Management
In this article, we’ll show you how to manage your inventory page.
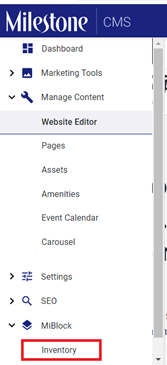
Accessing the Inventory
Once logged in, on the website editor screen, click on the left-hand navigation, and under ‘Miblock’ click on ‘Inventory’.
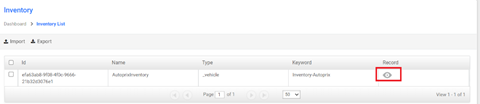
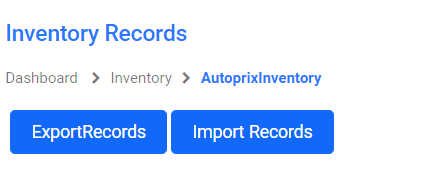
On the inventory screen, you can choose to import or export record on the top. To view records and add records, click on the view icon.
Adding Items
To add a record or item, click on the ‘Add New’ button.
On the ‘Add Inventory’ tab, you will have to enter all the required details you wish to display on the inventory page. Items with the *mark are compulsory details that have to be added.
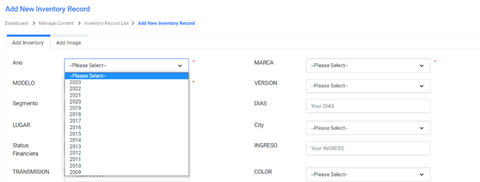
Click on ‘Save & Continue’ once you have entered all the details.
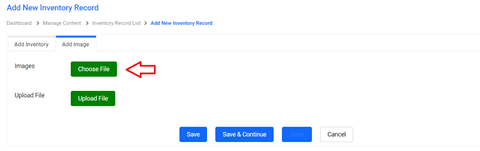
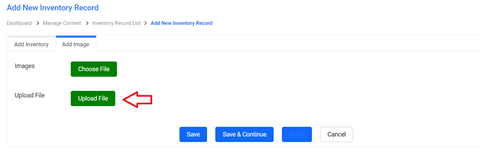
On the ‘Add Image’ type you can choose to add an image from the asset library or choose an image from your local device. To add an image from the asset library, click on ‘Choose File’.
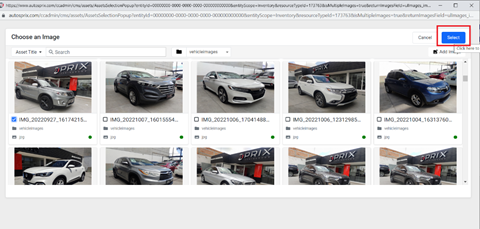
On the Asset Library, click on the image and click on 'select to add the image. To know how to manage your assets, use the ‘Managing Assets’ article.
To select an image from your local device, click ‘UploadFile’.
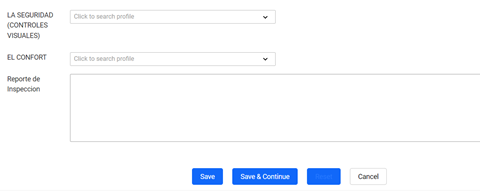
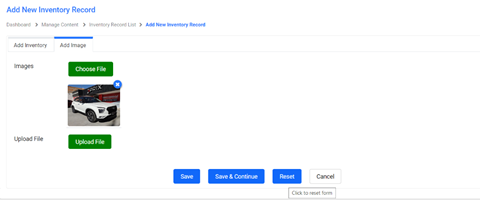
Once the image is selected, click on ‘Save’ to publish the inventory or ‘save and continue’ if you wish to add another inventory.
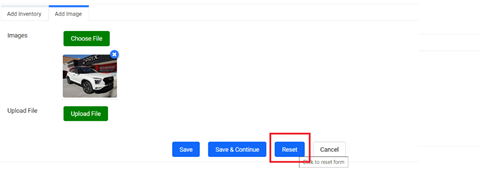
You can also reset the details you have entered by clicking on ‘Reset’.
Inventory Functionalities
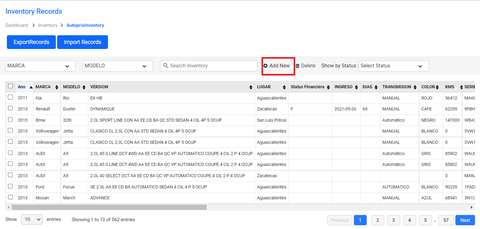
Back on the Inventory Record List screen, you can carry out the following functionalities.
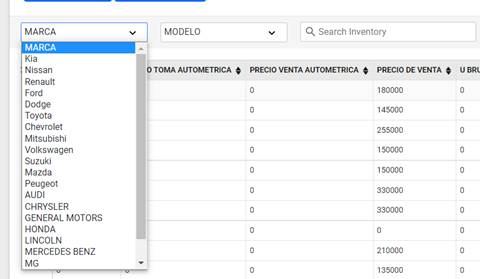
To find a record quickly, use the filter options. Click on the dropdown for the type of cars, enter the model and click on ‘Search’.
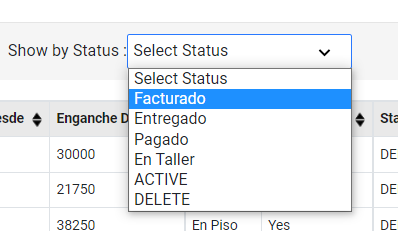
You can also filter by the status of the record.
To edit or delete a record, click on the edit or delete icons against a record under the ‘Actions Column’.
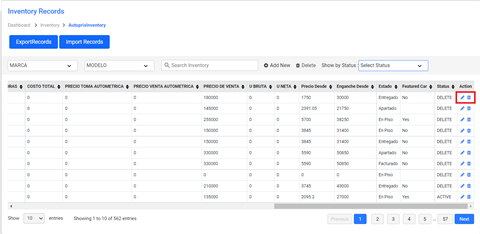
You can also bulk import and export records using these buttons.
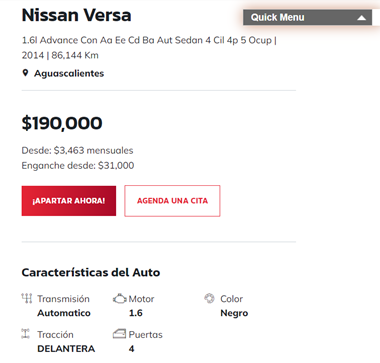
Based on the details you have entered, the main details willbe on the main inventory page
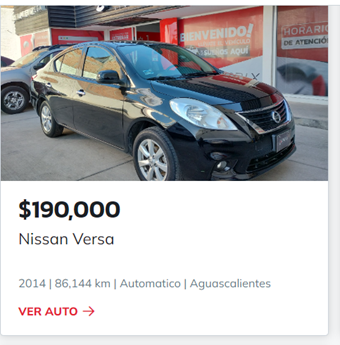
The rest of the details will be on the details page of the car.